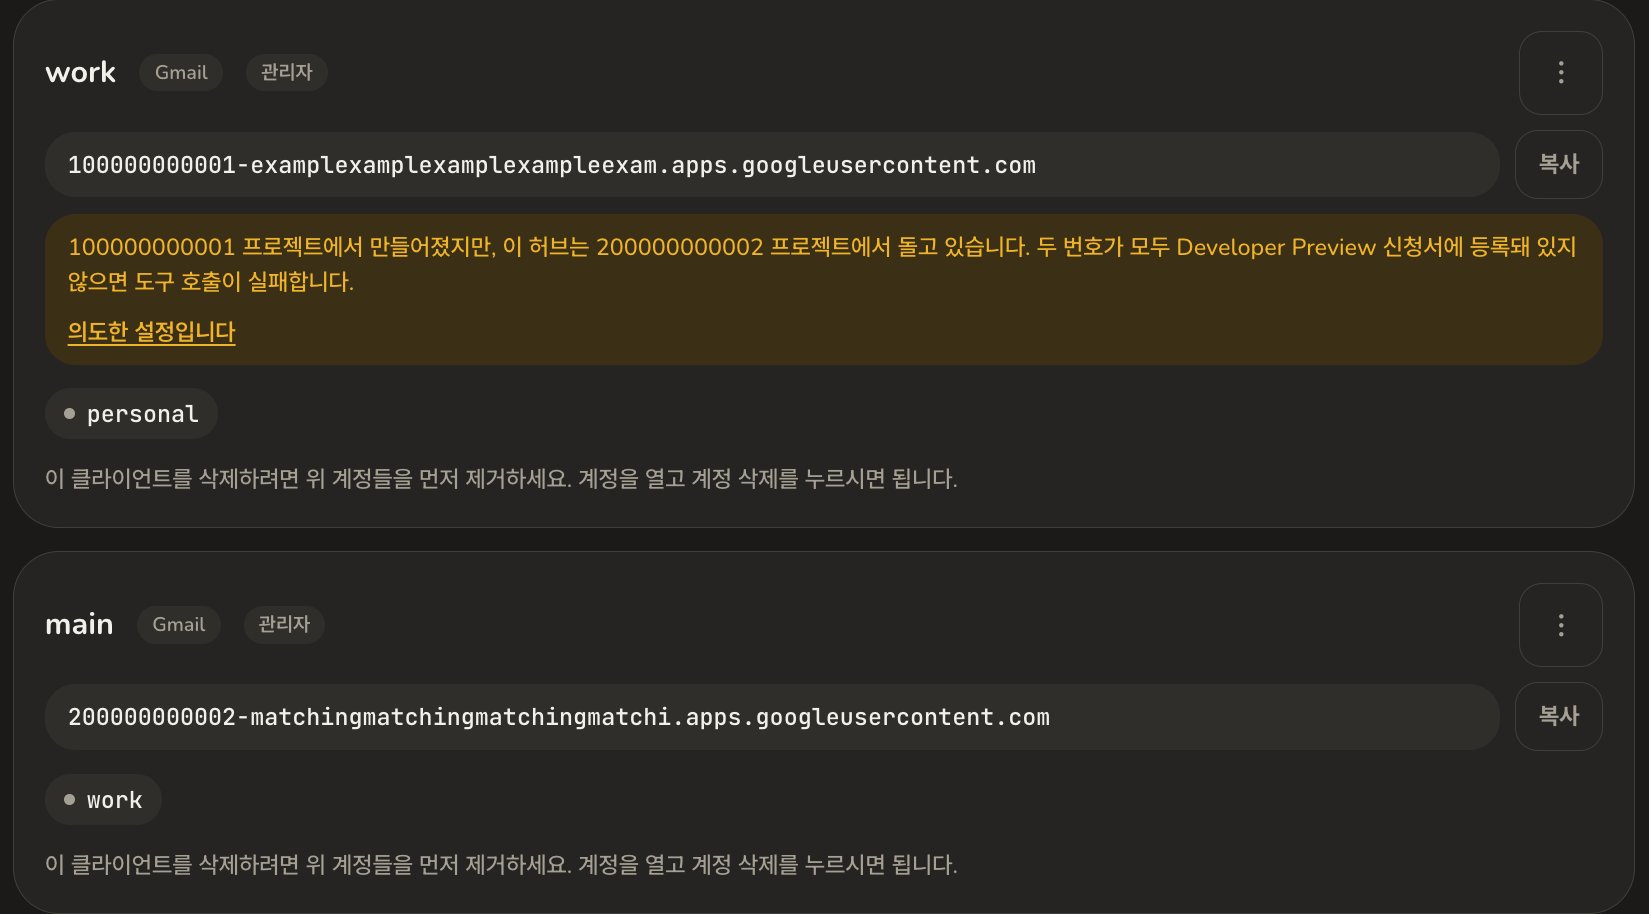
Apply from the installer
The installer has an Apply for the Developer Preview Program card. Use it rather than going to the form yourself: it fills in your project number and your address for you, so the two fields most likely to be wrong are already right. The card appears once your hub is deployed, because that is when your project number is known. So the order is: install first, apply second, and use the hub properly once approval lands. You are not waiting on us in between.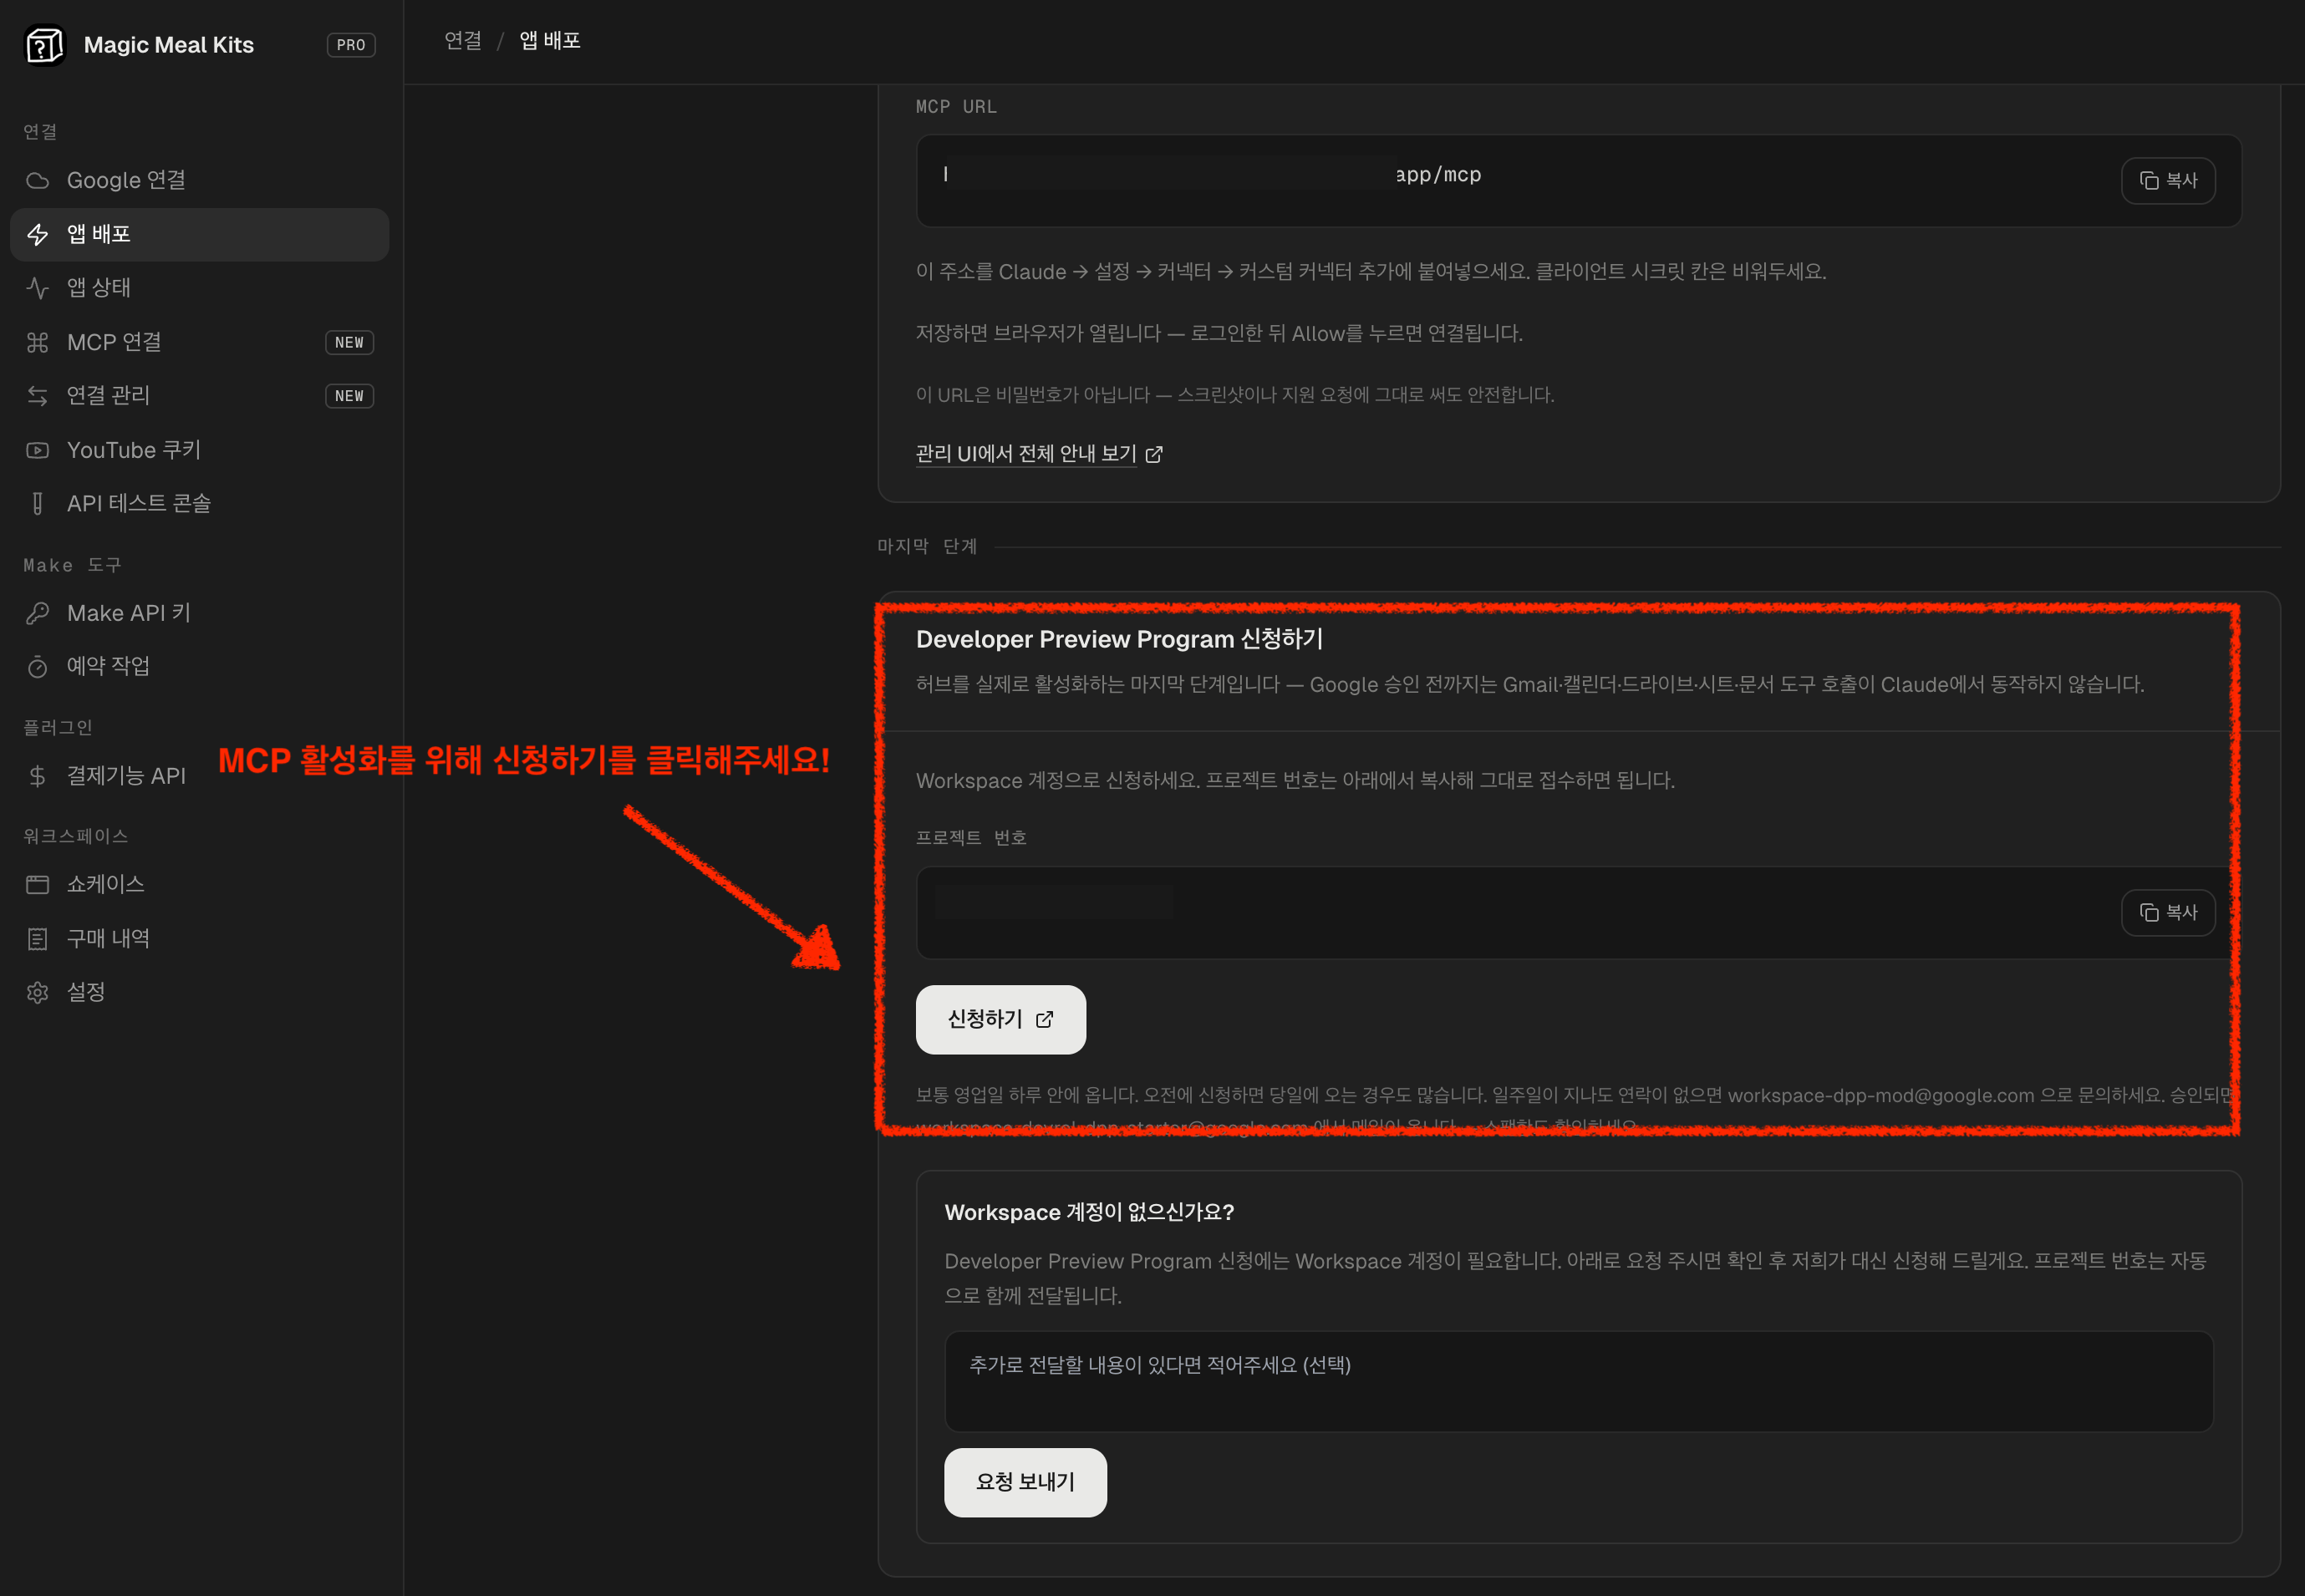
Filling in the form
1
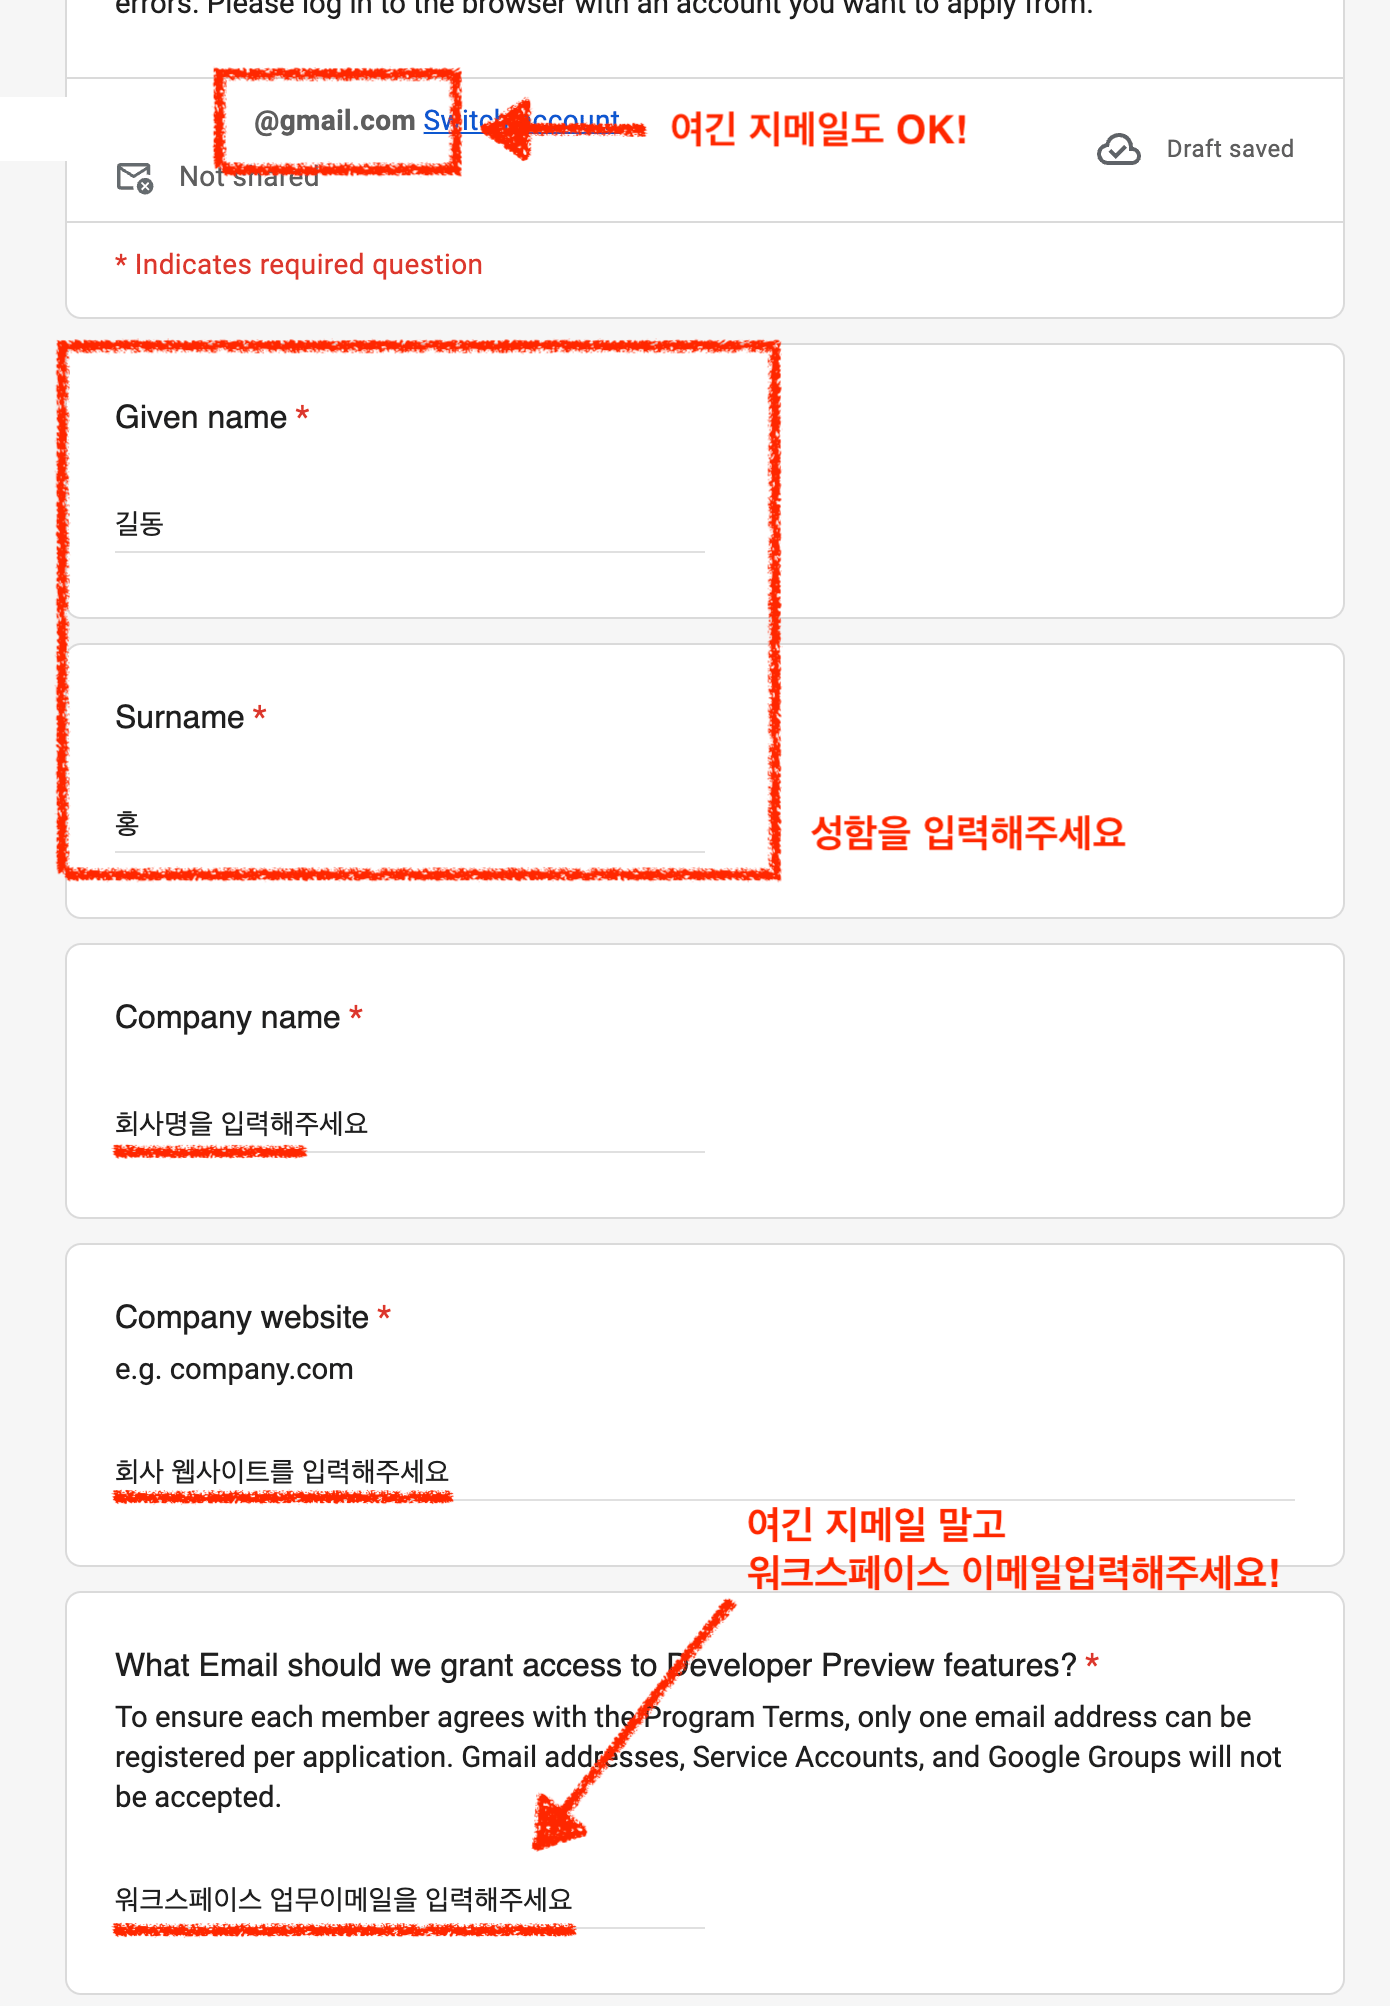
Name and support email
2
Company details and the Workspace email
3
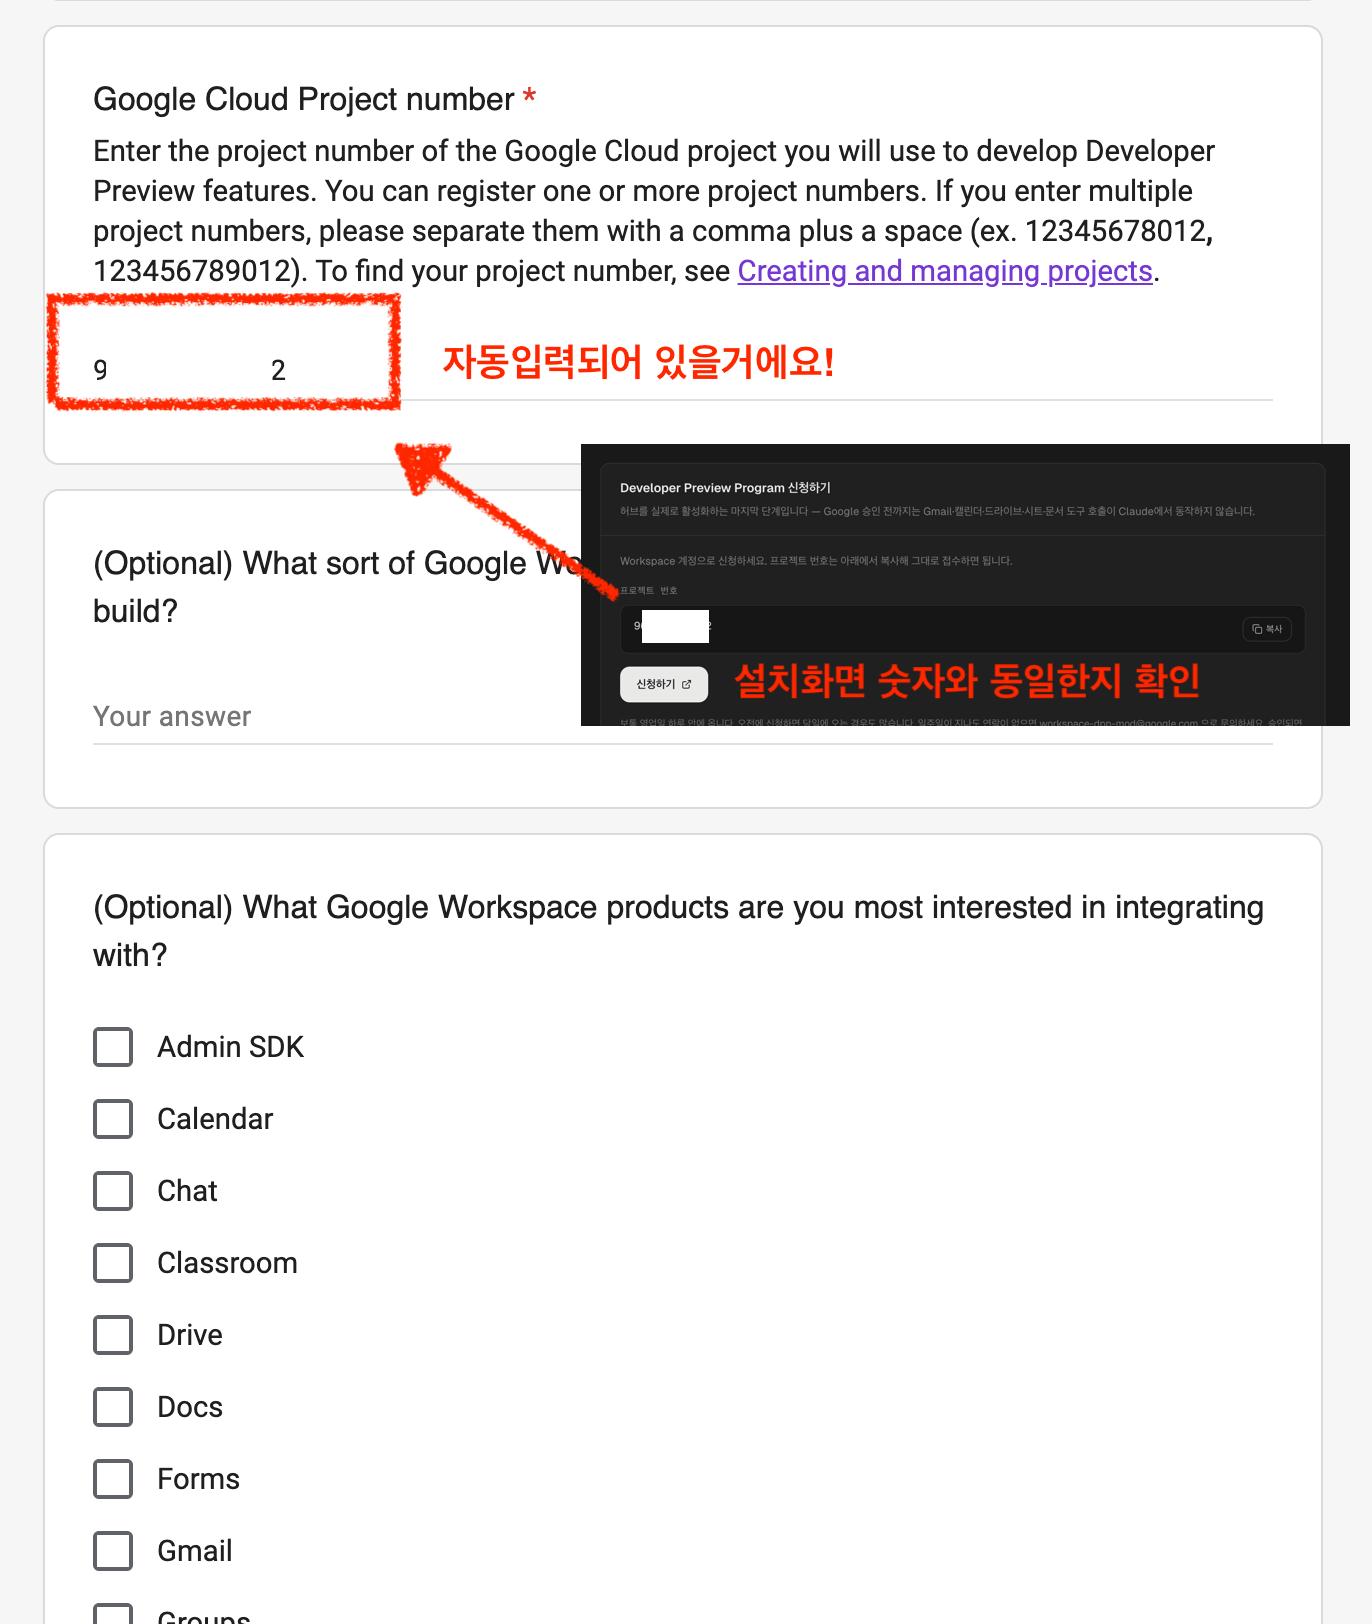
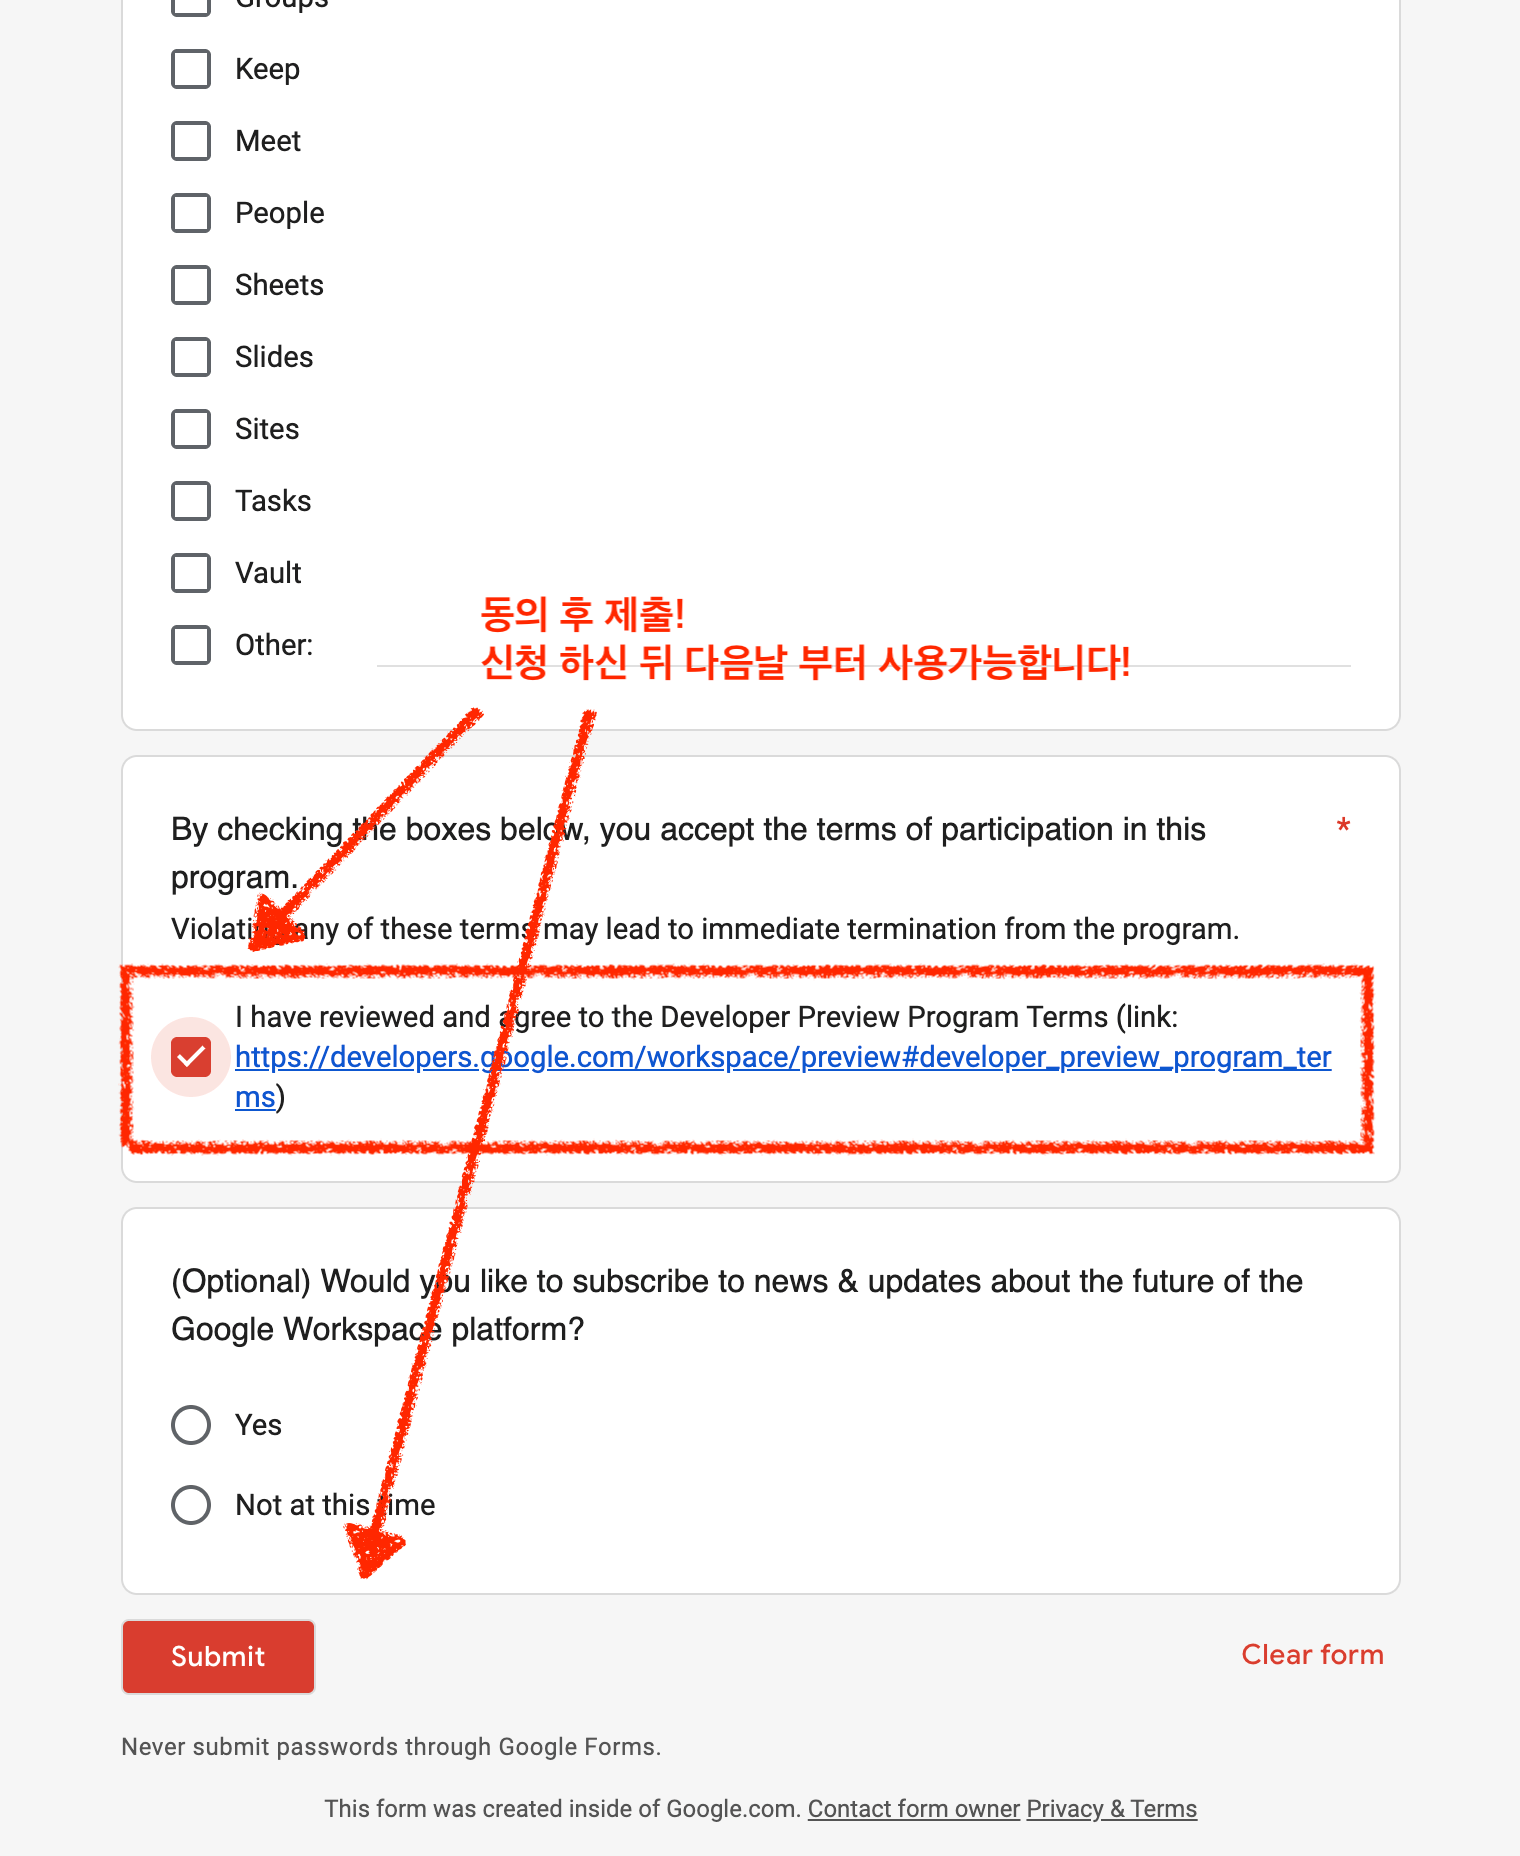
Optional fields, terms, and submit
If you do not have a Workspace account
You do not have to go and buy one.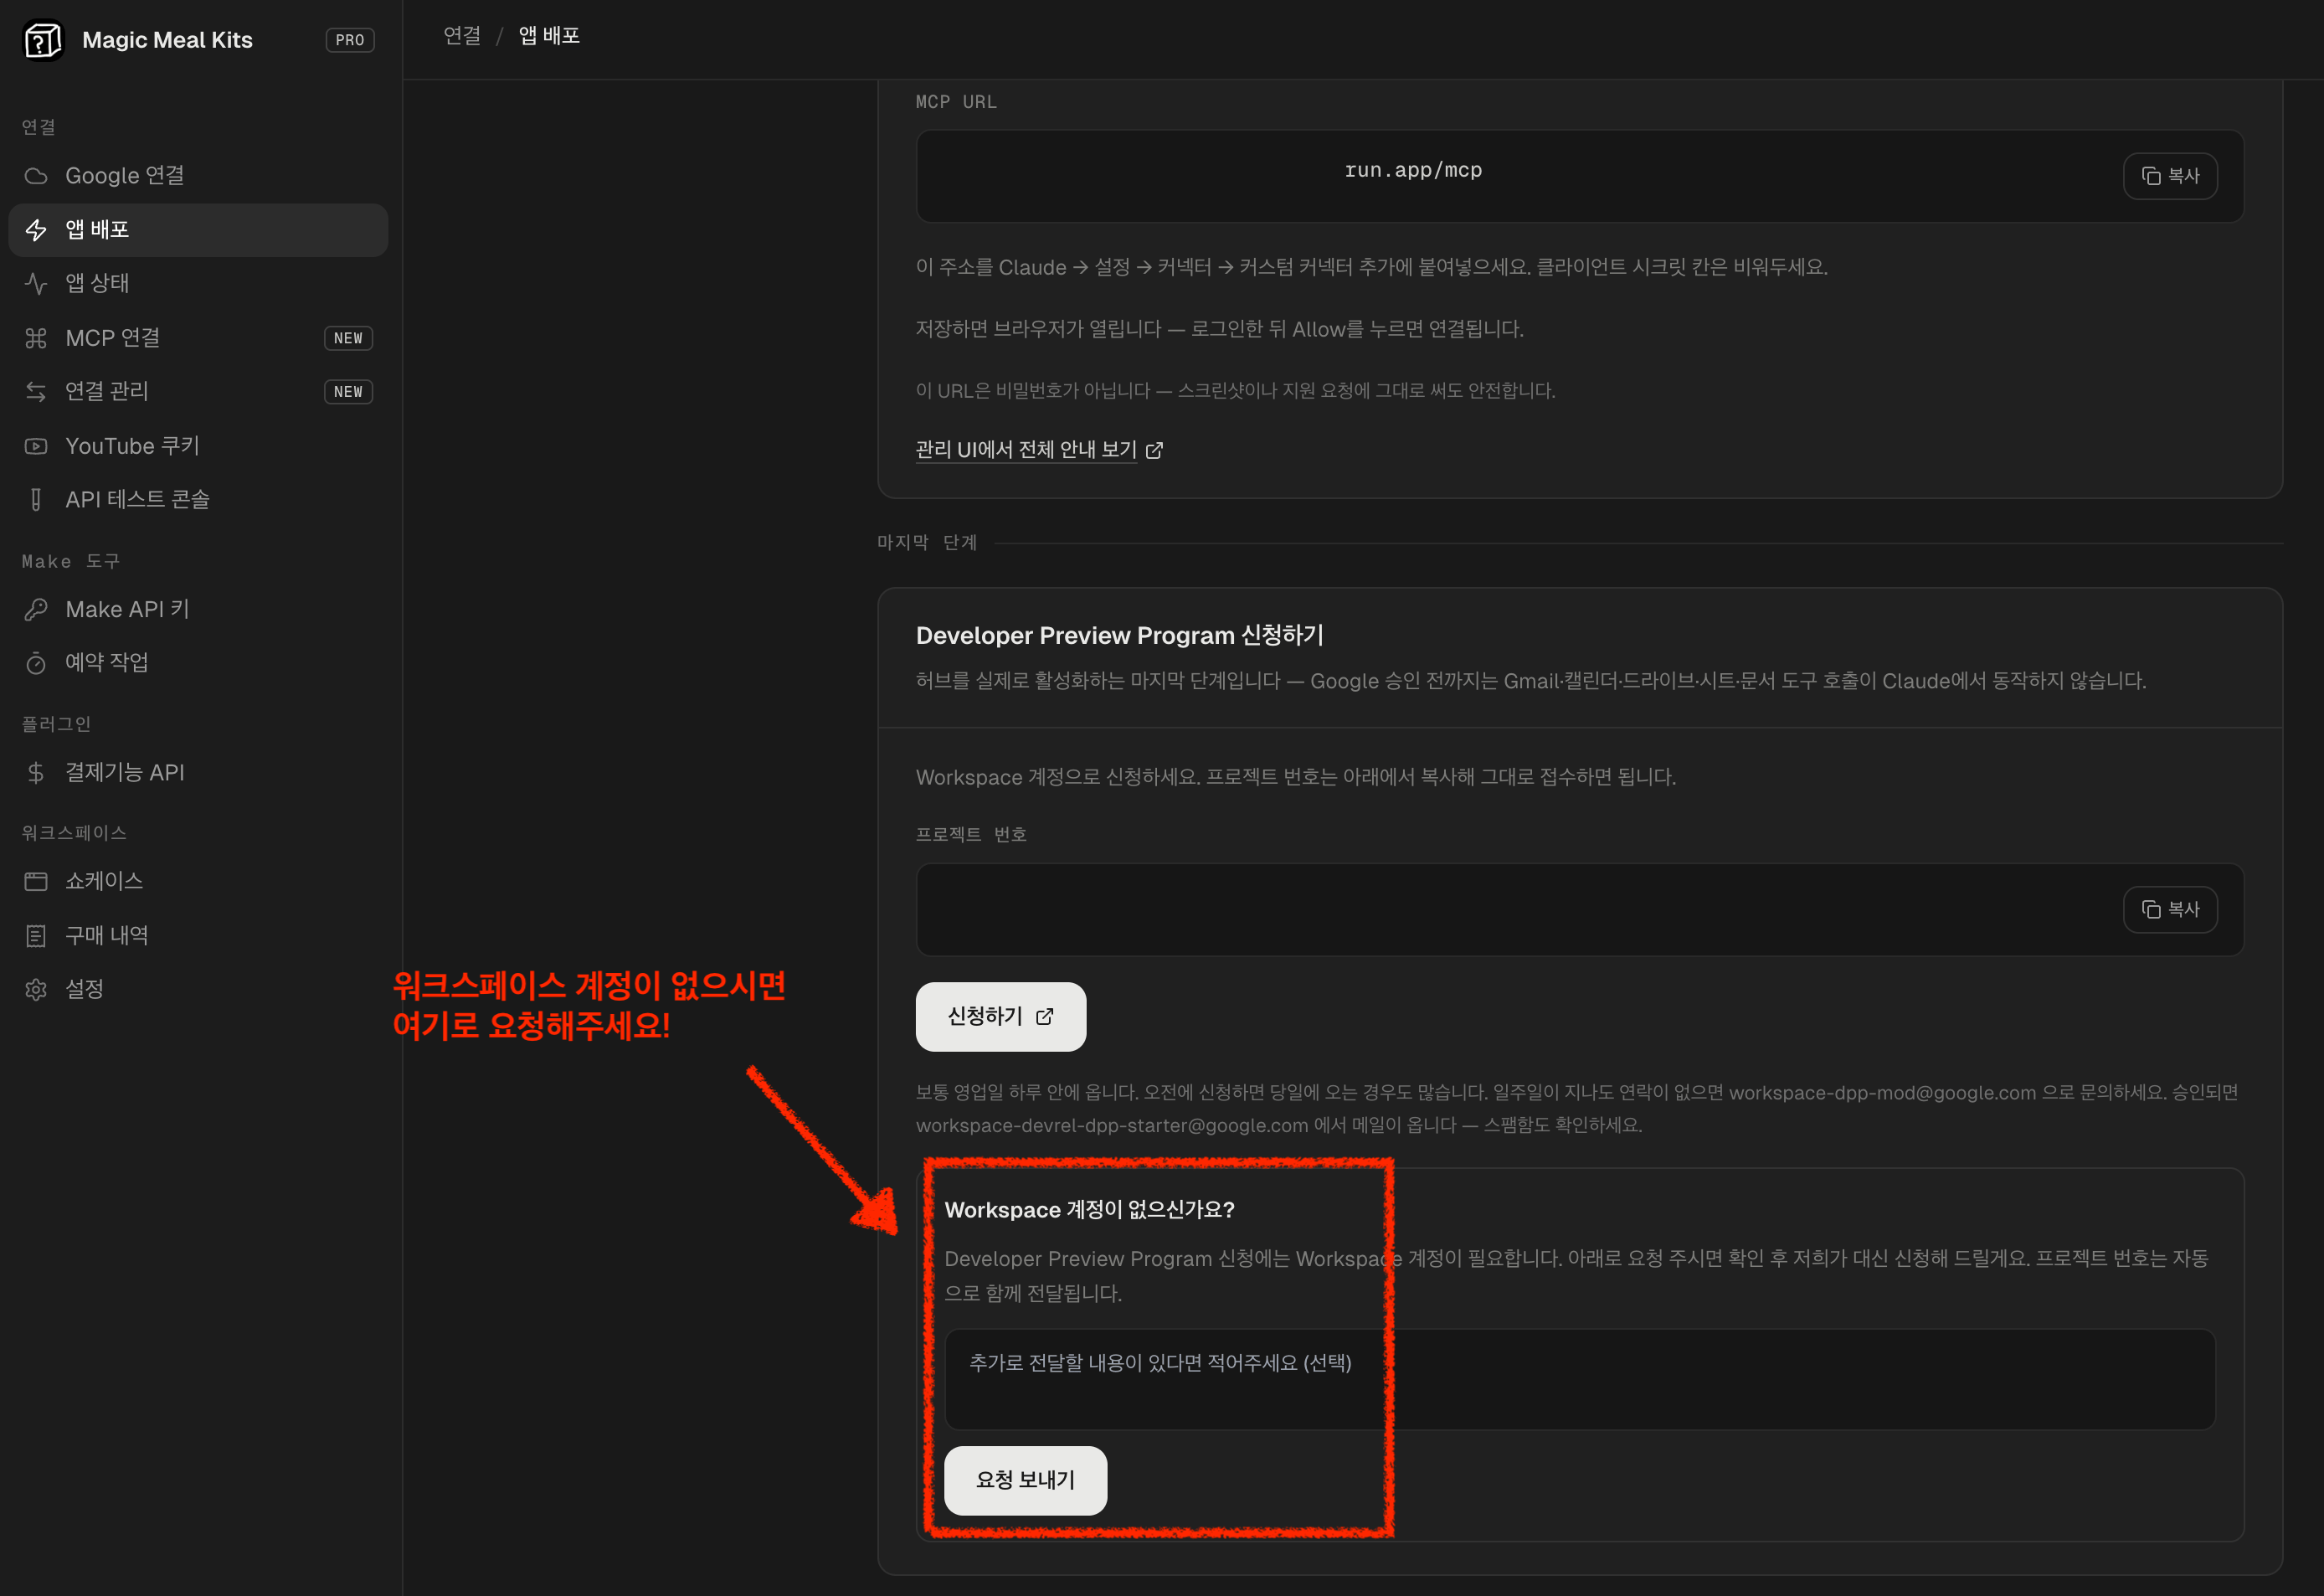
Read the terms once
The Program Terms are short, and for almost everybody they come down to one line: If you are setting this up for yourself or your own team, carry on. If you are planning to put it in front of your own customers, say so in the form’s use-case field and let Google answer. The reason is clause (iv), which prohibits sharing an integration built on preview features with customers before those features launch generally. It turns on the act of sharing rather than on where the thing is hosted or who owns the data, so running your own copy does not automatically put you outside it.After approval
Two emails arrive: one adding you to the program’s group, and one confirming your project is registered. Check spam, both come from Google. Then open your hub’s admin screen and press Refresh next to the schema status. While the gate was closed nothing could be registered, so there is nothing for Claude to call until you ask for that refresh once. This is not a redeploy and takes a moment. If the approval email arrived but things still fail, the usual cause is that the project you had approved is not the project you are using.When you need a second project
Most people need one project. Check this only if the account you are connecting is a Workspace account. Google’s consent screen has one setting for the whole project, so a single project cannot hold both an Internal client and an External one. That is what forces a split, and only when the Workspace side has to be Internal:- Your Workspace administrator blocks unverified apps. This is a common setting. If it is on, that account cannot consent to your own app at all, and only an administrator can allow it.
- You do not want people in your organization seeing the unverified warning. Internal has no warning.
Why publishing matters more than verification
These two get mixed up, and it costs people a reconnect every seven days. A consent screen set to External with a publishing status of Testing issues sign-ins that expire in seven days. Both conditions have to be true, and verification has nothing to do with it. An unverified app stops expiring sign-ins the moment its publishing status is raised to production. So publish the consent screen. What you keep is the unverified warning at consent time and a cap on how many people can use it, neither of which matters for a hub you run for yourself.If something goes wrong
Checking this yourself
The admin screen checks it for you now. Open Clients and any OAuth client whose project does not match the one your hub runs in gets a highlighted box naming both project numbers.