Access follows a licence, granted per account. If the installer page does
not show an MCP Hub section, buy one at
hub.magicmealkits.com/buy with the
same address you sign in to the installer with.
What you will need
- A Google Cloud project with billing linked. The hub costs almost nothing to run and scales to zero when nobody is using it, but Cloud Run will not deploy into a project with no billing account attached. If you have never used Google Cloud, see below.
- About twenty minutes of clicking, in two sittings, with a wait in between while Google approves your project. That is usually about a working day, which is why applying is the second thing you do rather than the last.
- A Google Workspace account, if you have one. You can set the hub up without one, but Google’s Developer Preview application will only accept a Workspace address. There is a way around that, covered below and in Developer Preview.
If you have never used Google Cloud
If you do not have a Google Cloud account at all yet, see Signing up for Google Cloud first, then come back here. Already signed up but have no project? The installer will show No projects found and tell you what to do, which is: open the Google Cloud console, accept the terms, set up billing, and come back. Then Create new project on the installer makes your first one without leaving the page. A new project can take a few minutes to appear in the list. There is a refresh beside the dropdown for that.Deploy the hub
Open the installer, sign in, and scroll to MCP Hub. You will need to be connected with the Google account you use for Google Cloud; the installer needs that to see your projects and to deploy into one.1
Choose a project, run the check, and deploy
Pick a project from the Google Cloud project dropdown in the Deploy
your hub card. A project of its own is worth it: the hub is given
access to secrets across the whole project it lives in, so anything else
you keep in that project is in reach. Sharing a project works, it is just
a wider door than it needs to be. Set the region now too; changing it
later means stopping the hub and deploying again.Press Run check first. It turns on the Google APIs the hub needs and
tells you which ones worked. Nothing is created and nothing is billed.Then tick the acknowledgement and press Deploy hub.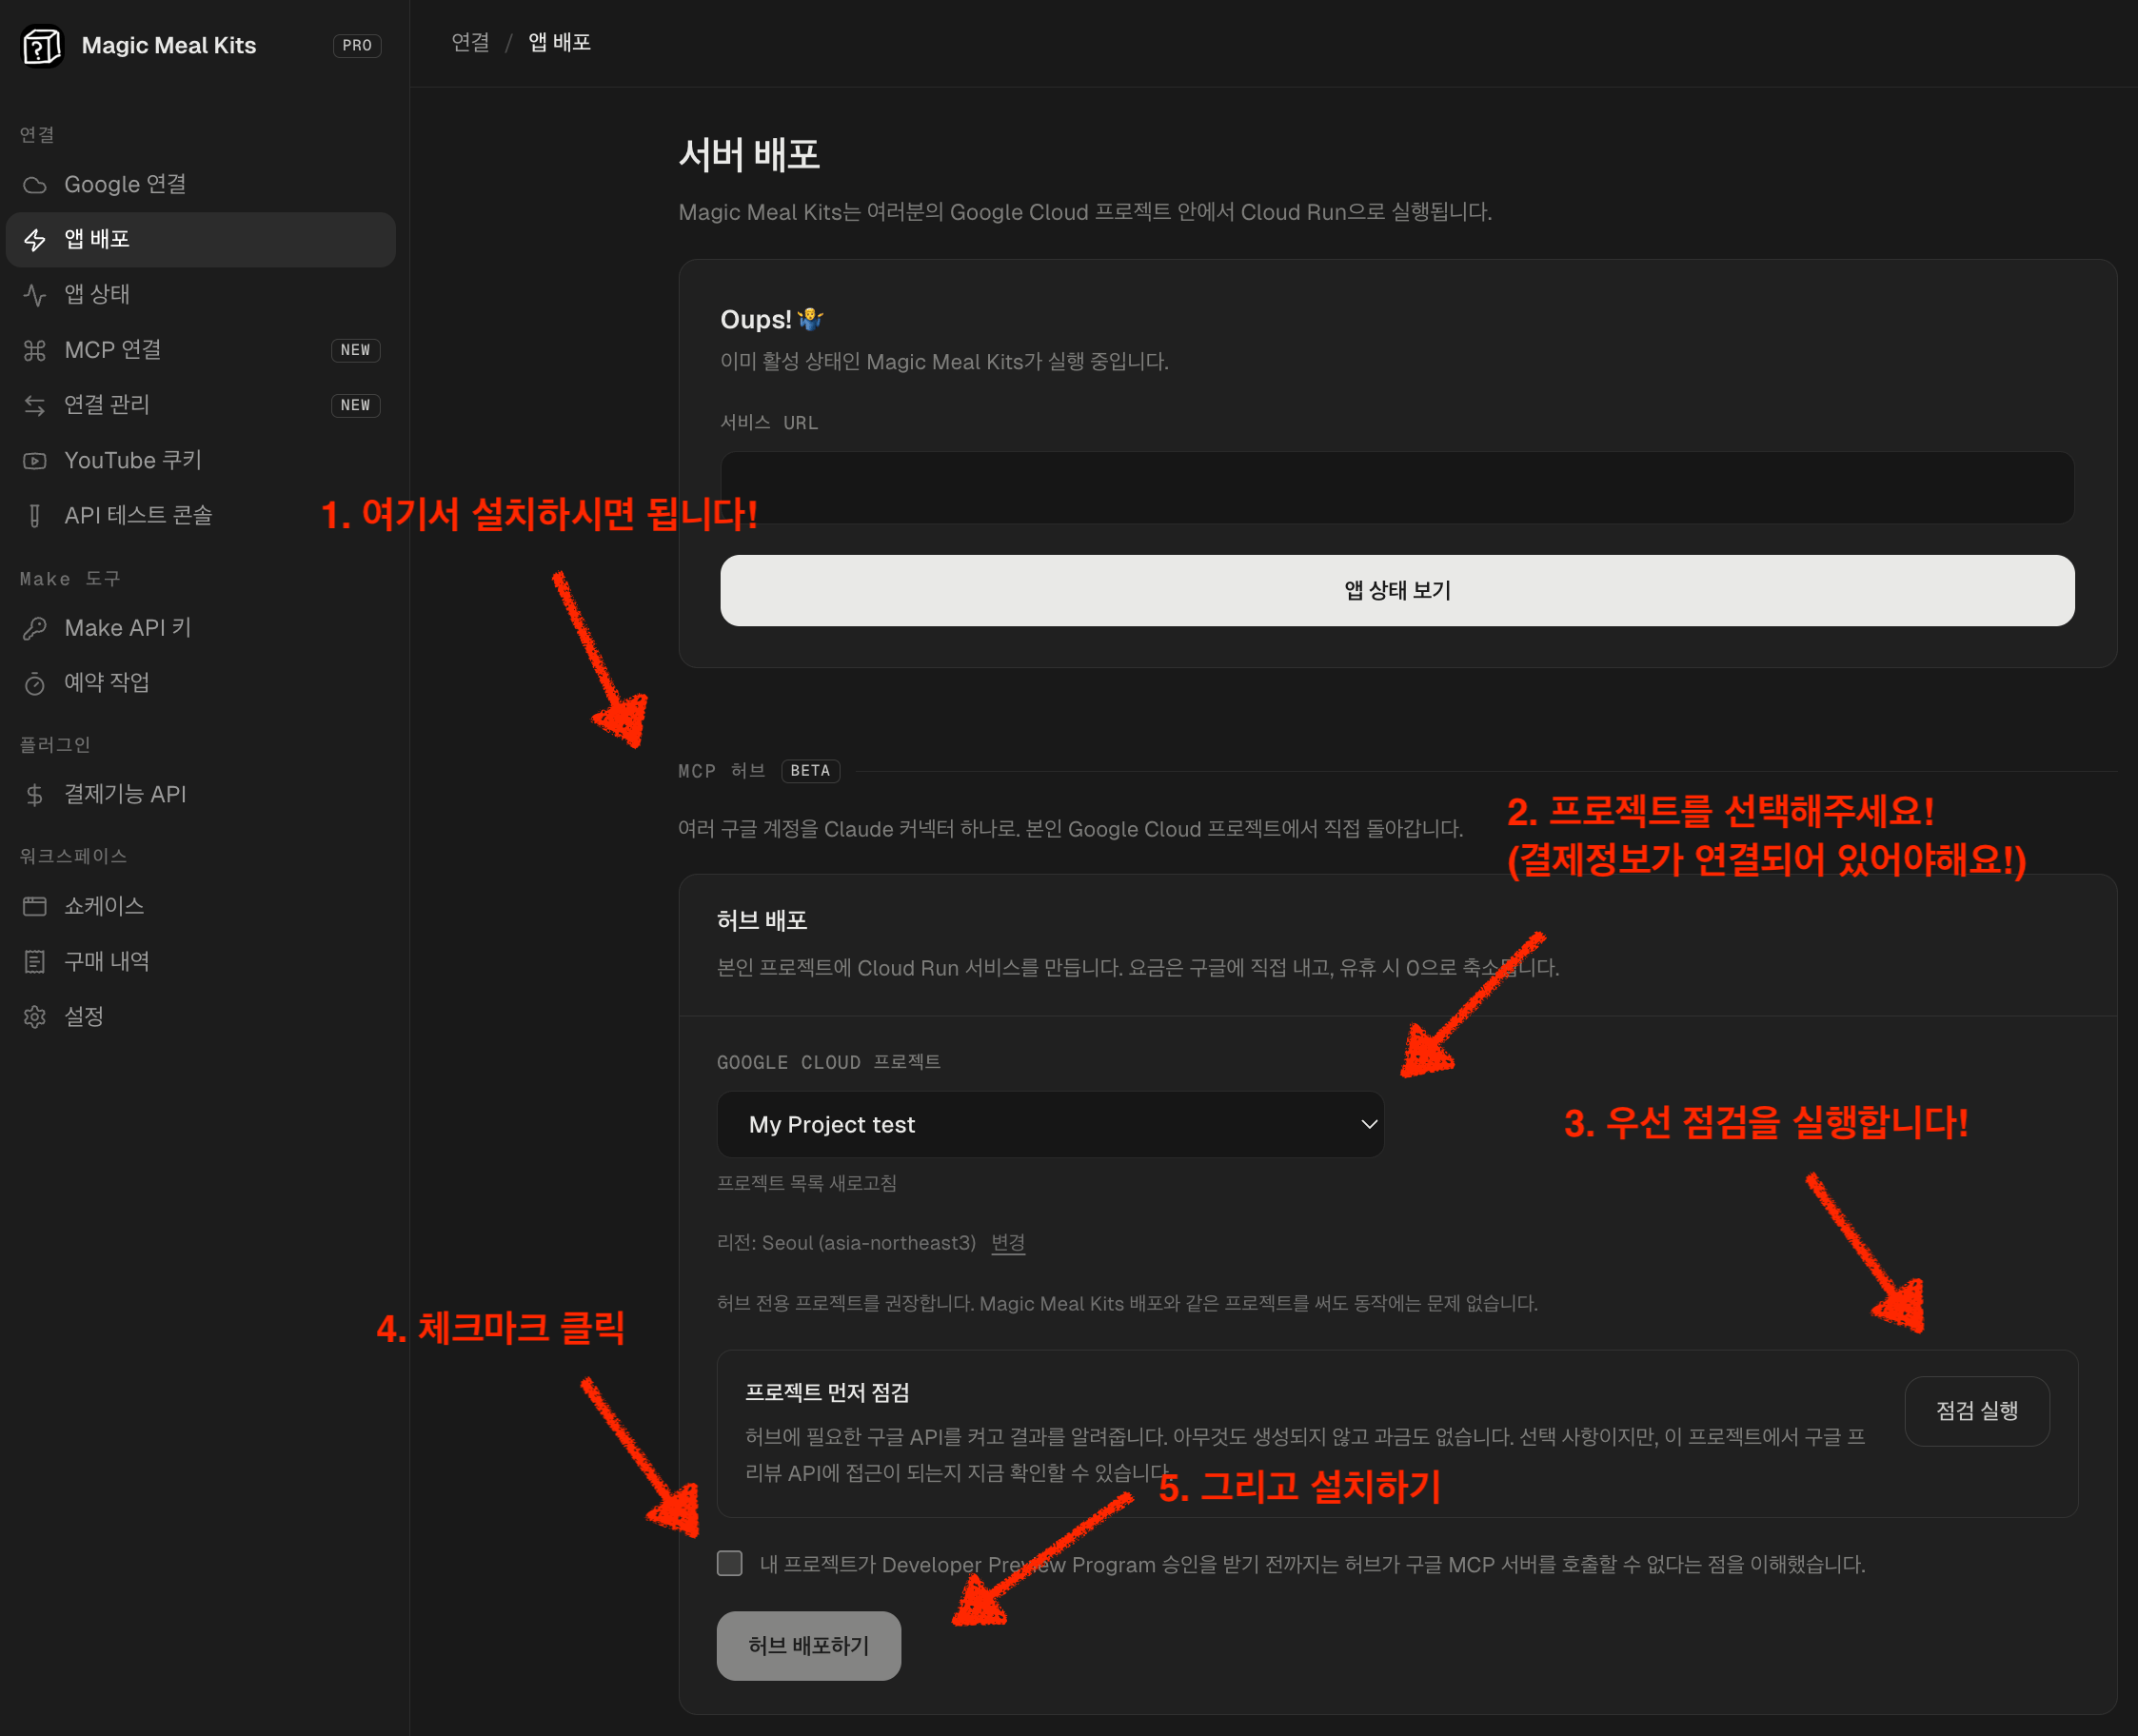
All of them turning on does not mean you are approved. The APIs
switch on with or without Developer Preview
approval. This screen cannot tell you which, and without approval the
refusal arrives later, when Claude actually asks for something.
2
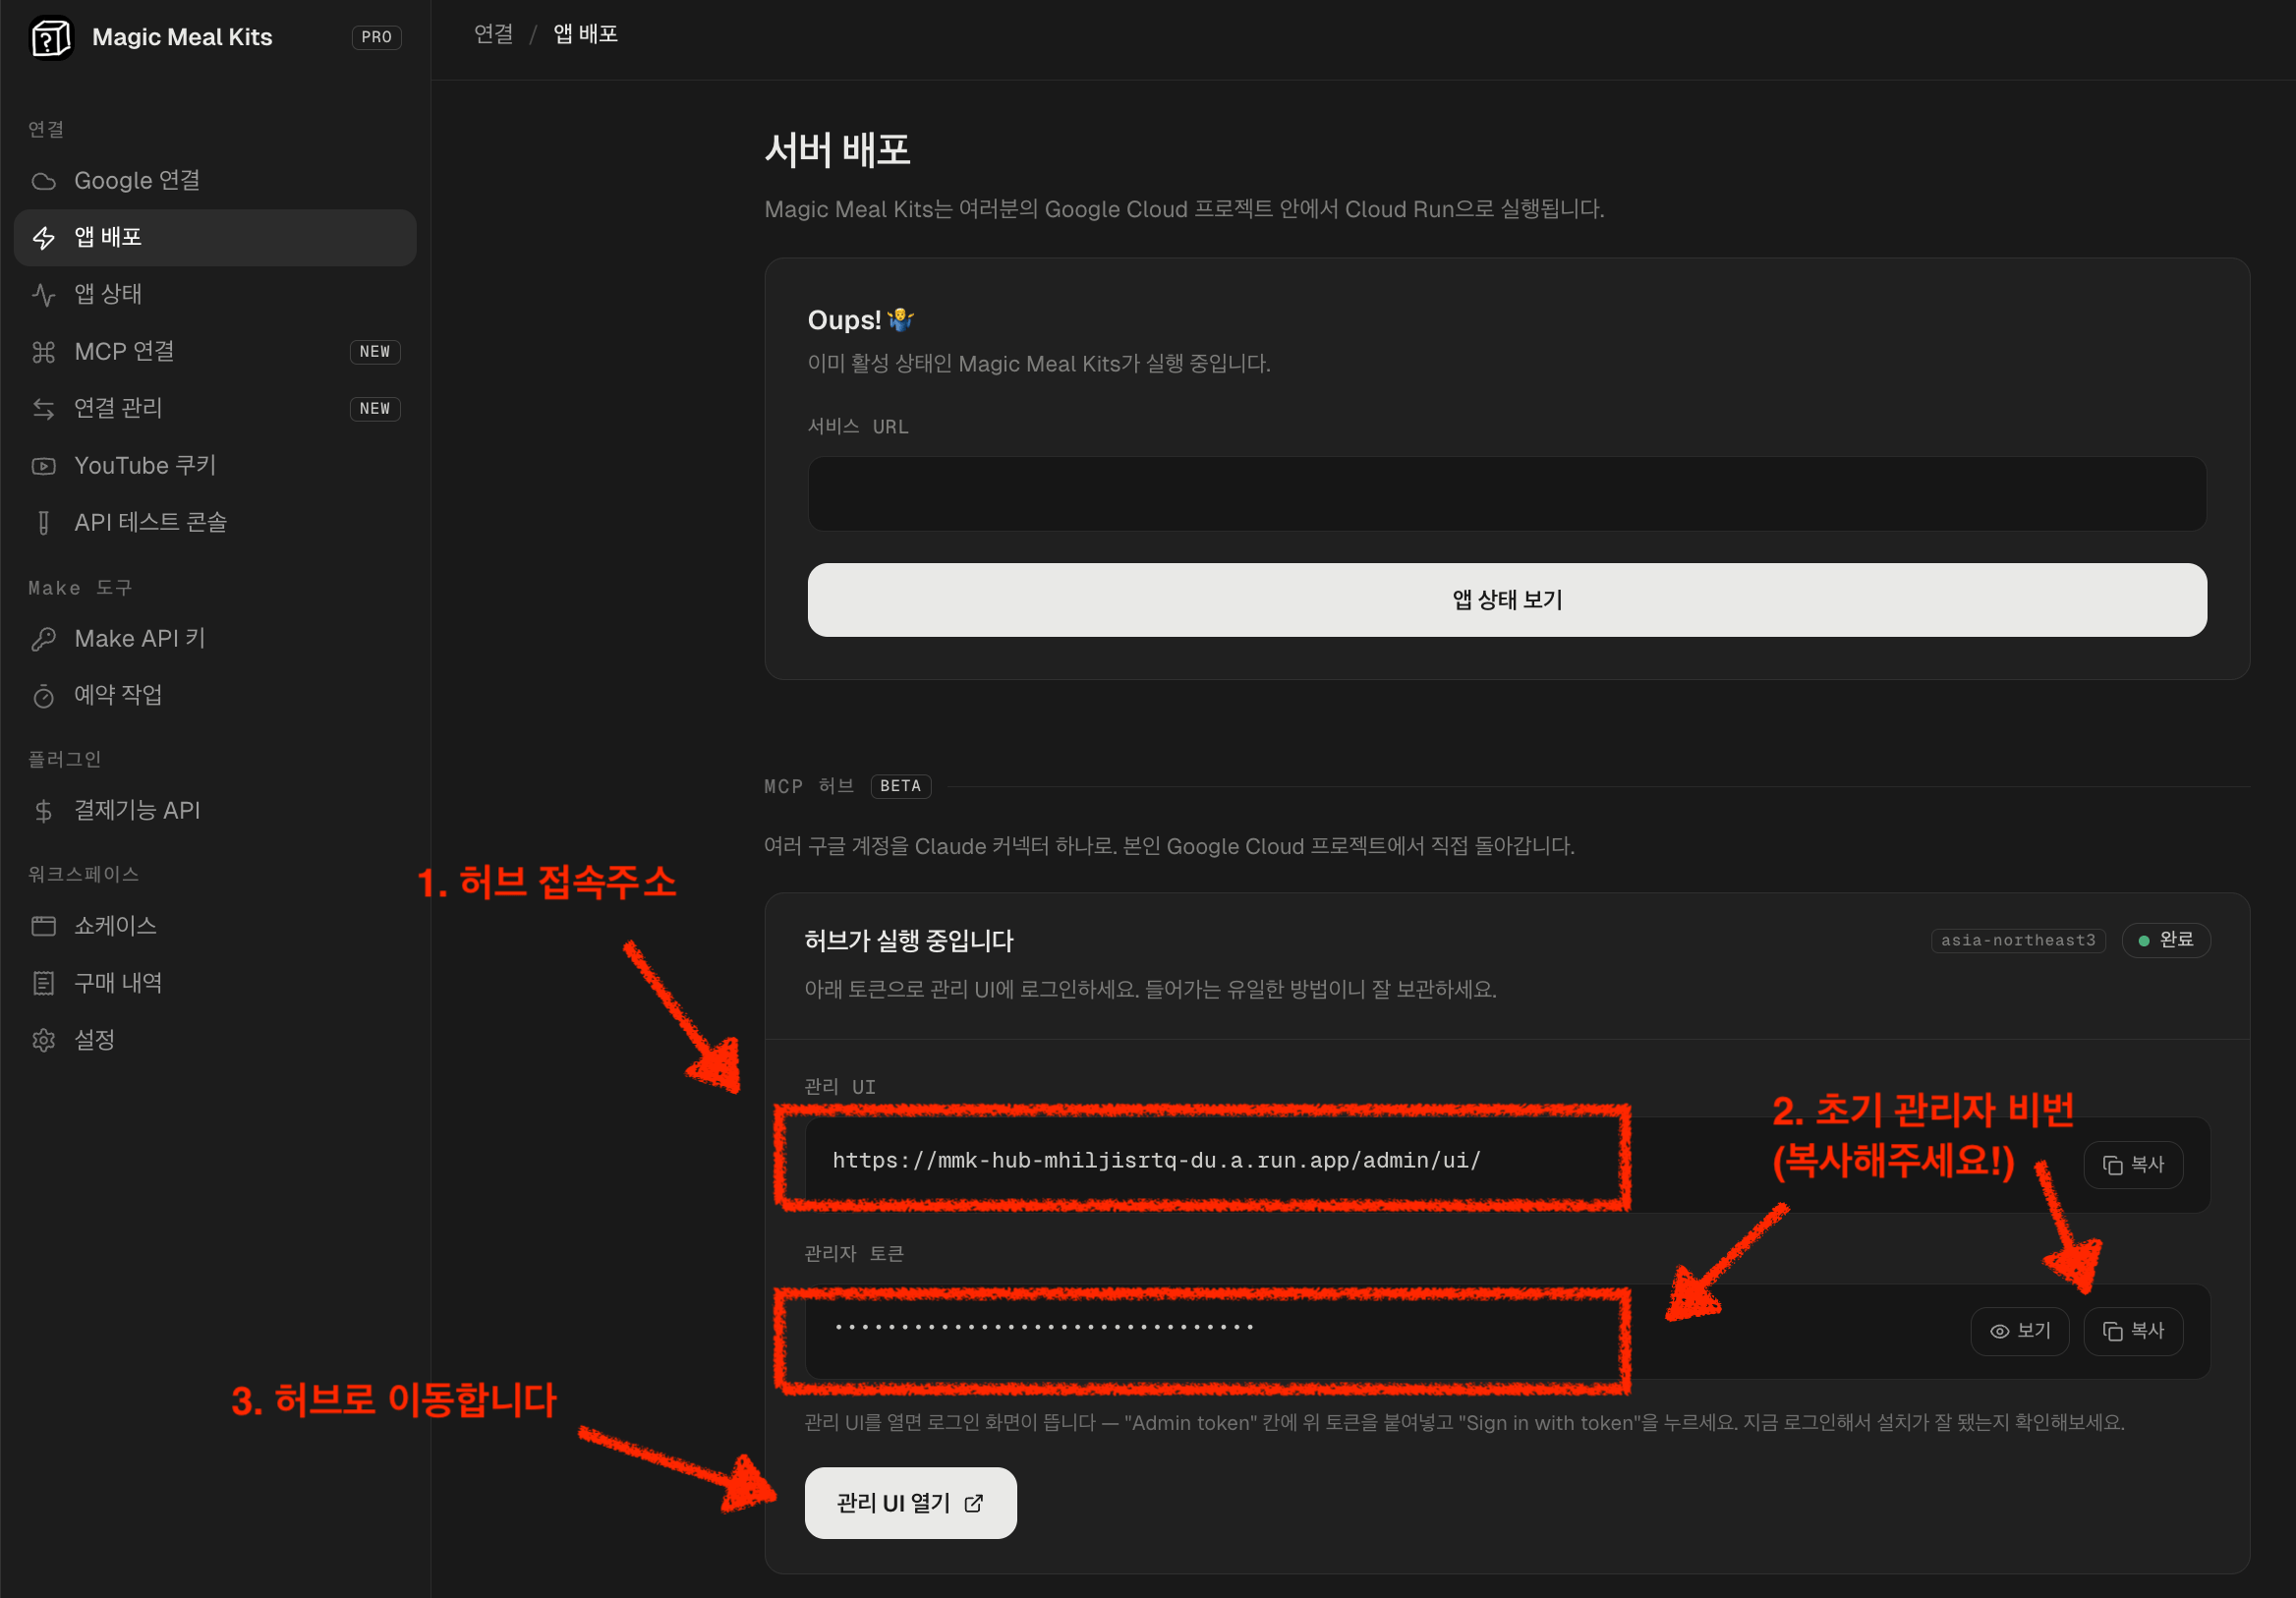
The hub is running
3
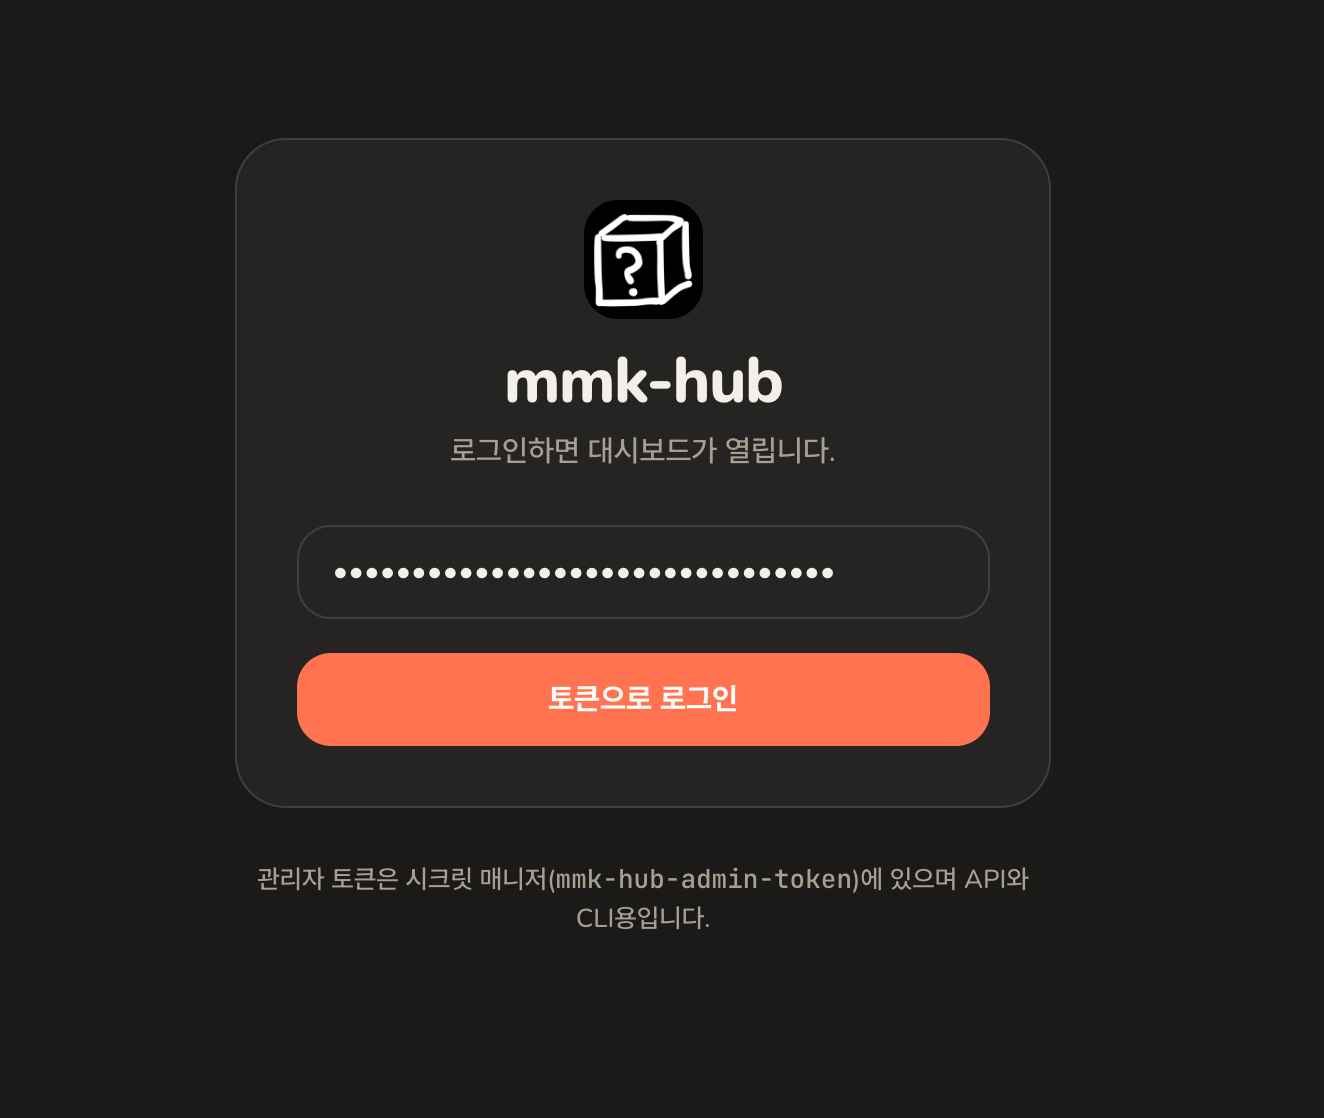
Sign in
Apply for Developer Preview
Do this next. Approval usually comes back within a working day, and everything else below can happen while you wait for it. Google keeps the Gmail, Calendar and Drive services this hub uses closed until your project is approved. Until then the hub runs and looks healthy, and every request comes back refused. Back on the installer, scroll down to Apply for the Developer Preview Program. It opens Google’s form with your project number already filled in.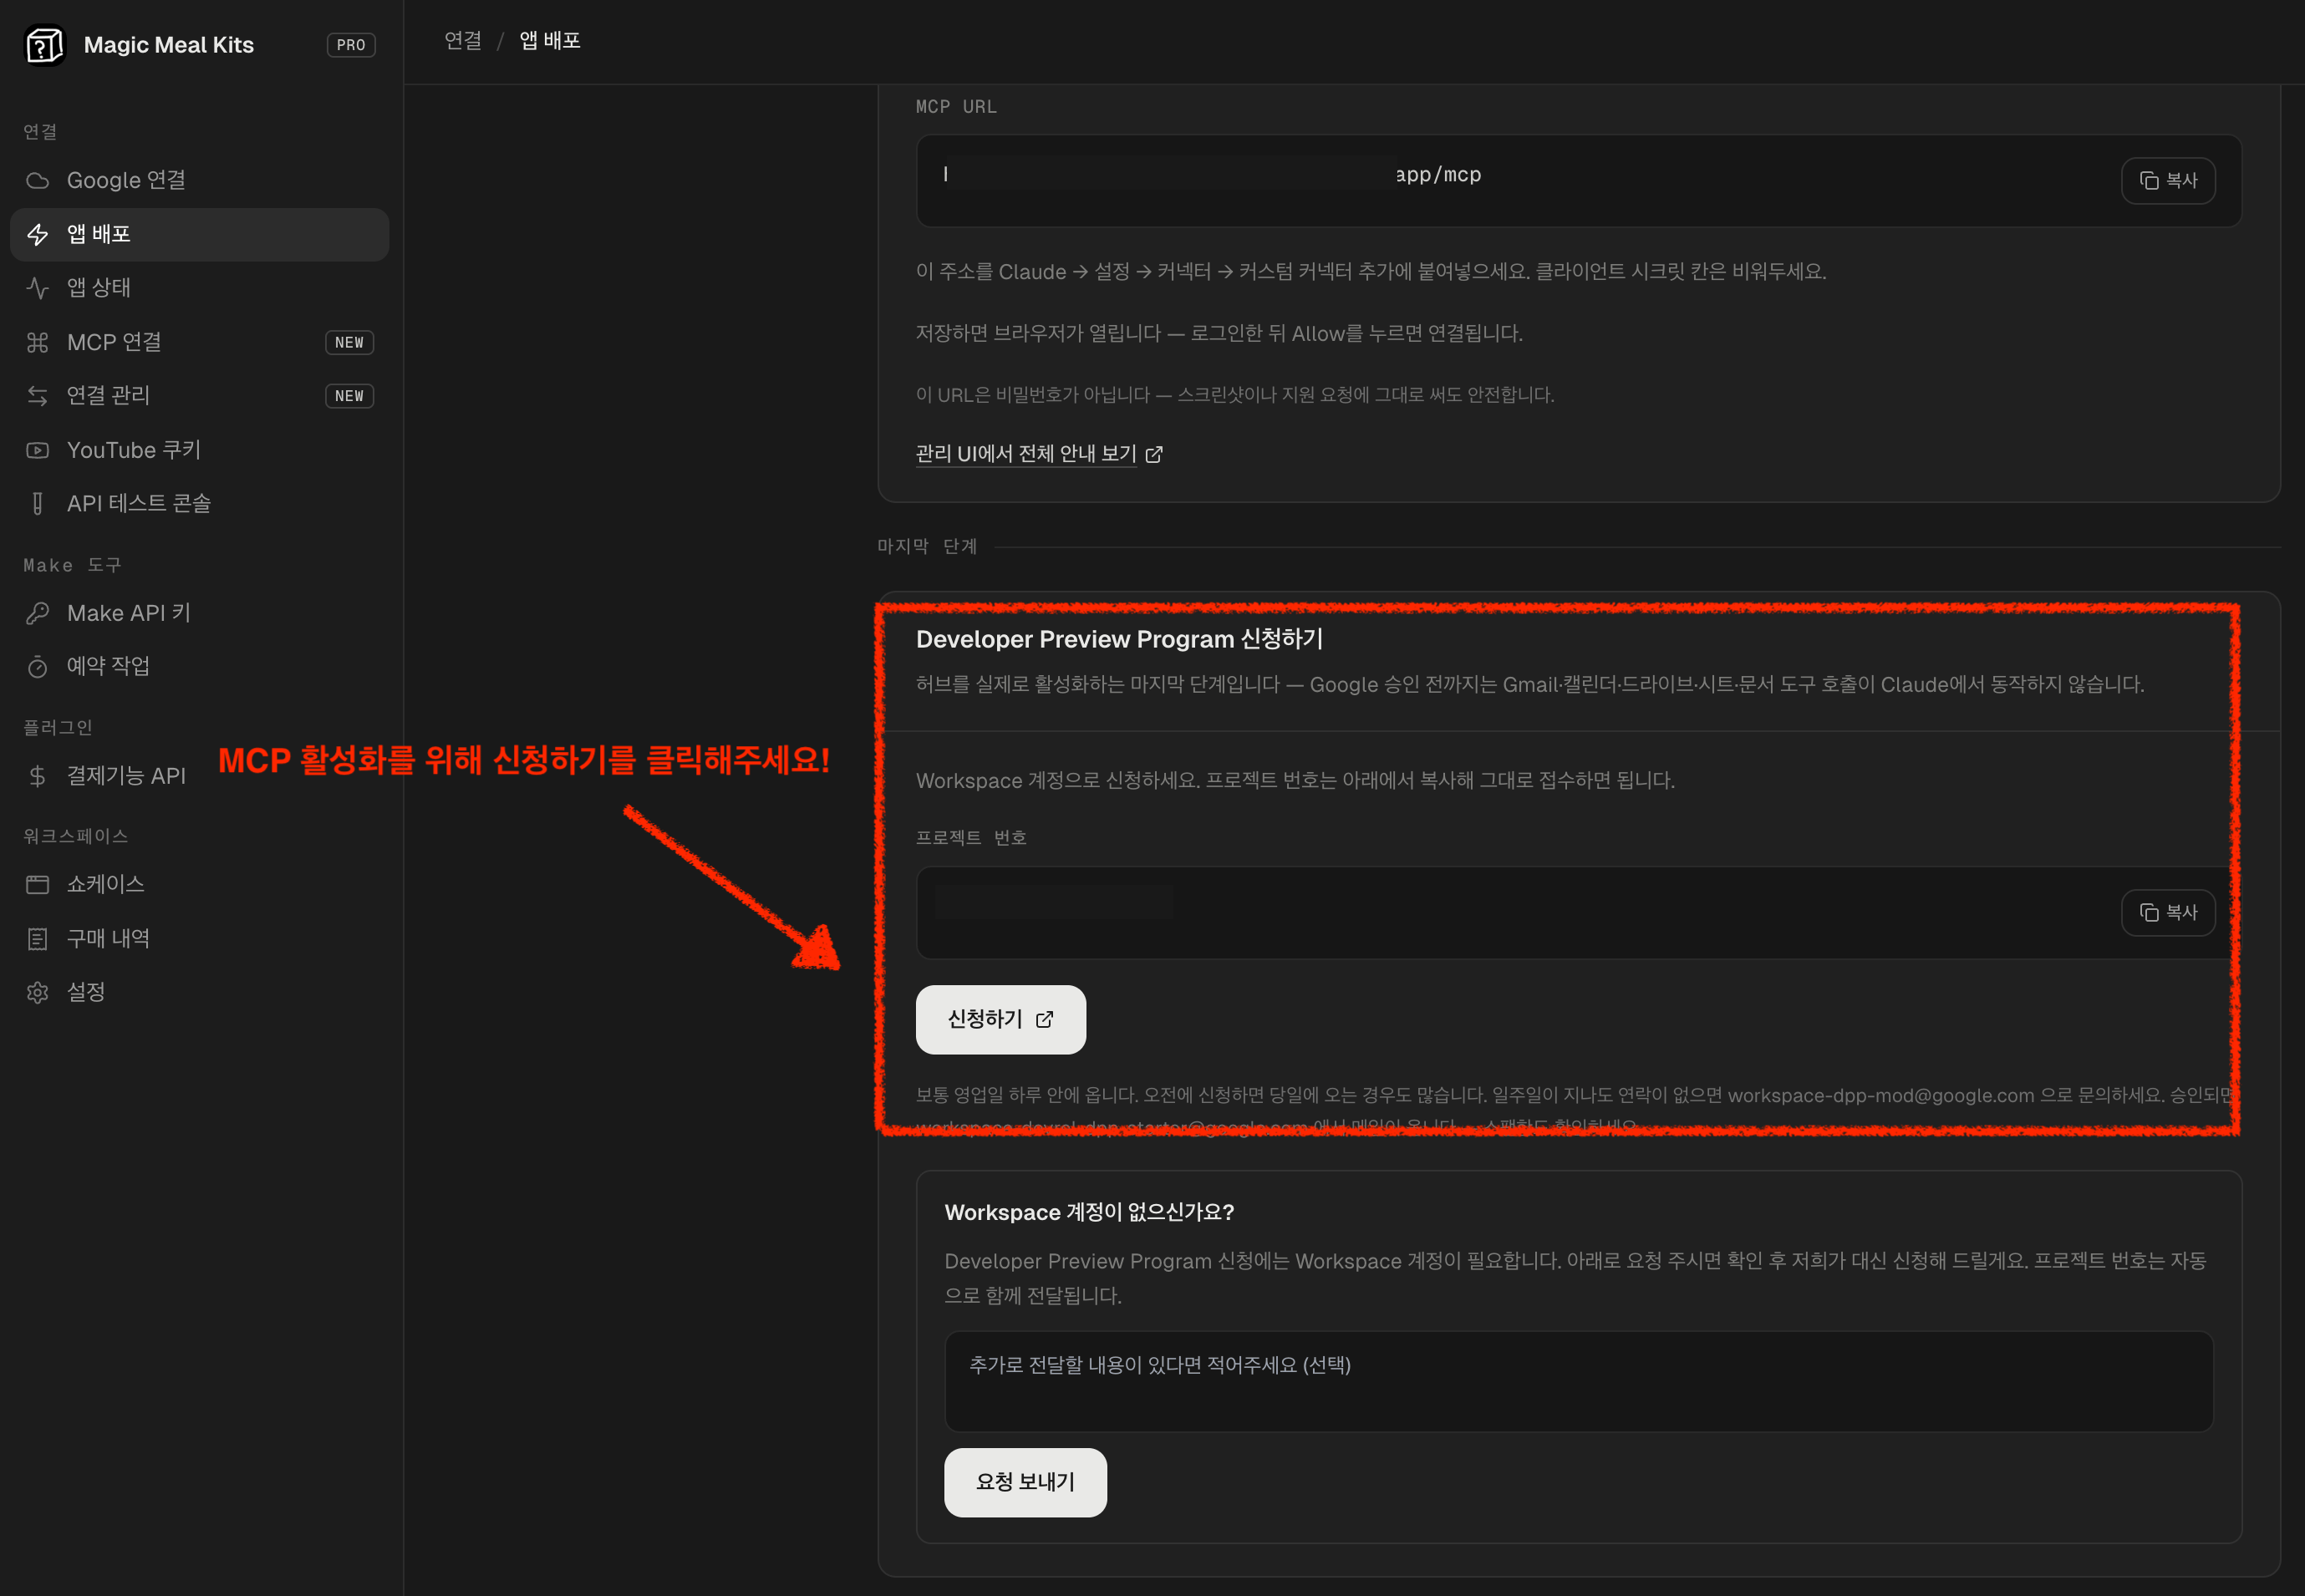
Create your OAuth client
This is the one part the installer cannot do for you: Google offers no way to create these credentials automatically, so you make them yourself in the console. They live in your project. We never hold them.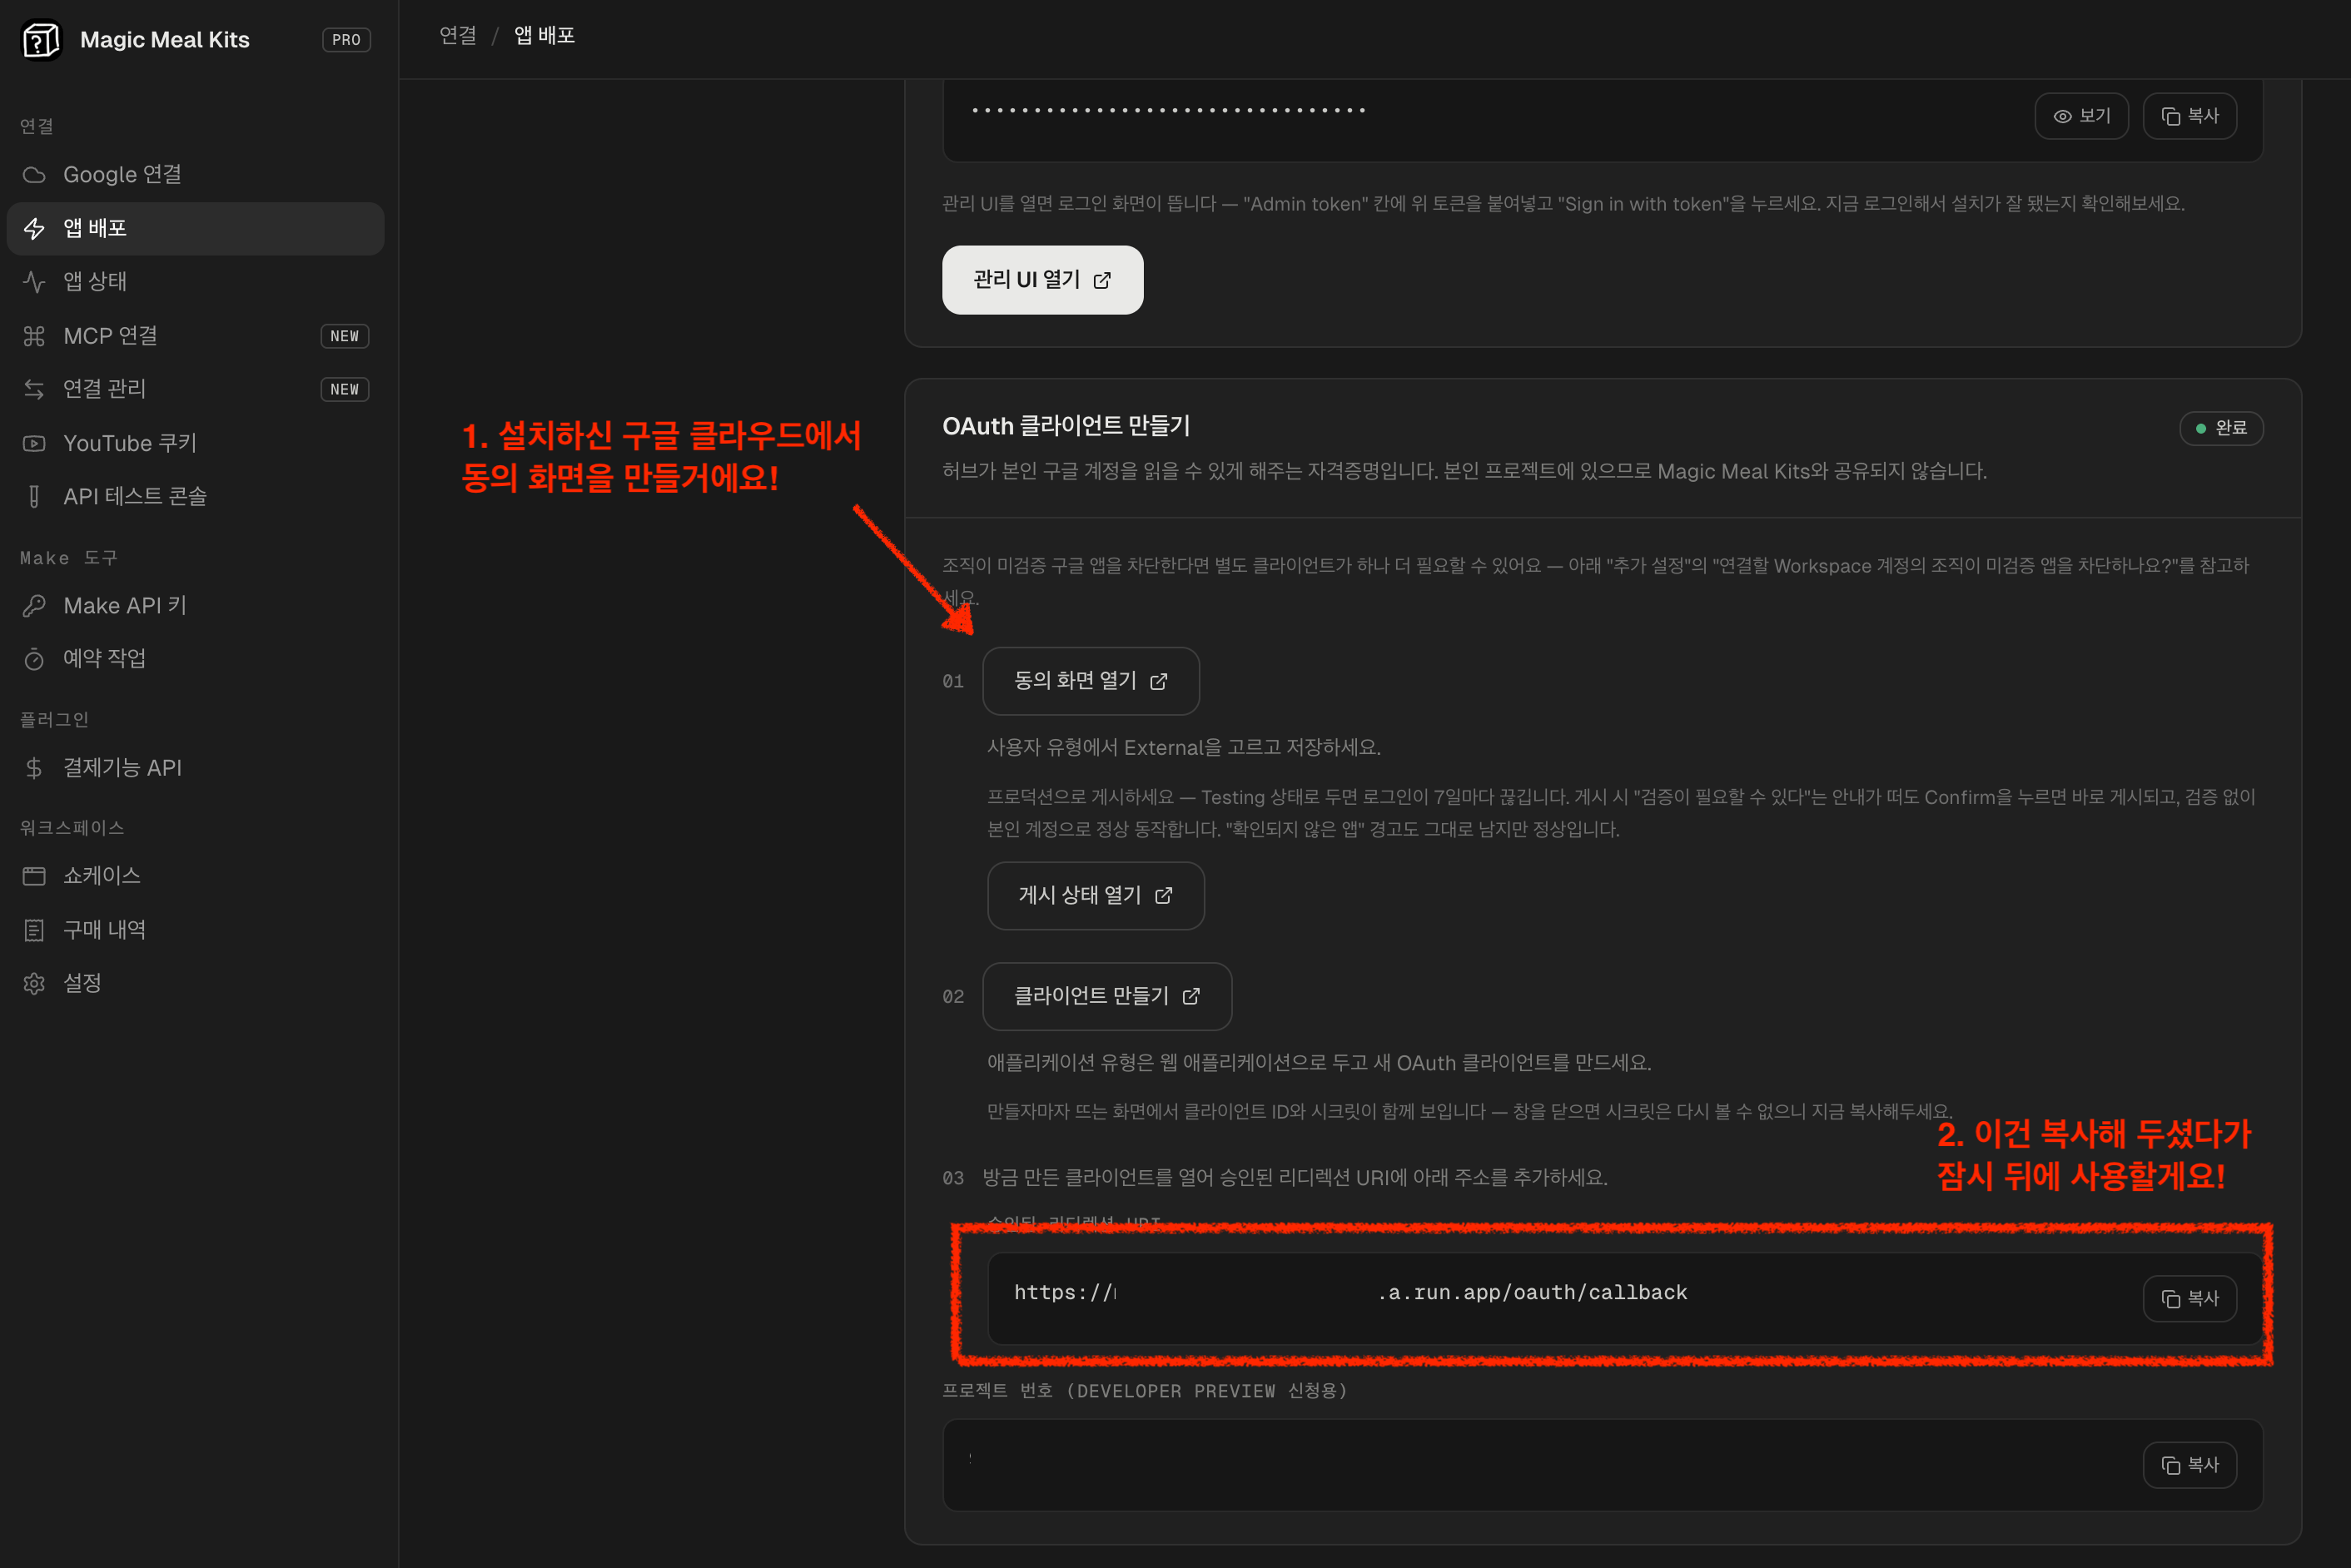
Add a Google account
This is where you decide which of your Google accounts the hub may act on. One entry per account, and each one says which services it may reach. Nothing is connected until you add it here, and removing it here disconnects it. An account and a client are two different things, and this screen asks for both. Accounts and clients is a two minute read if that distinction is not clear yet.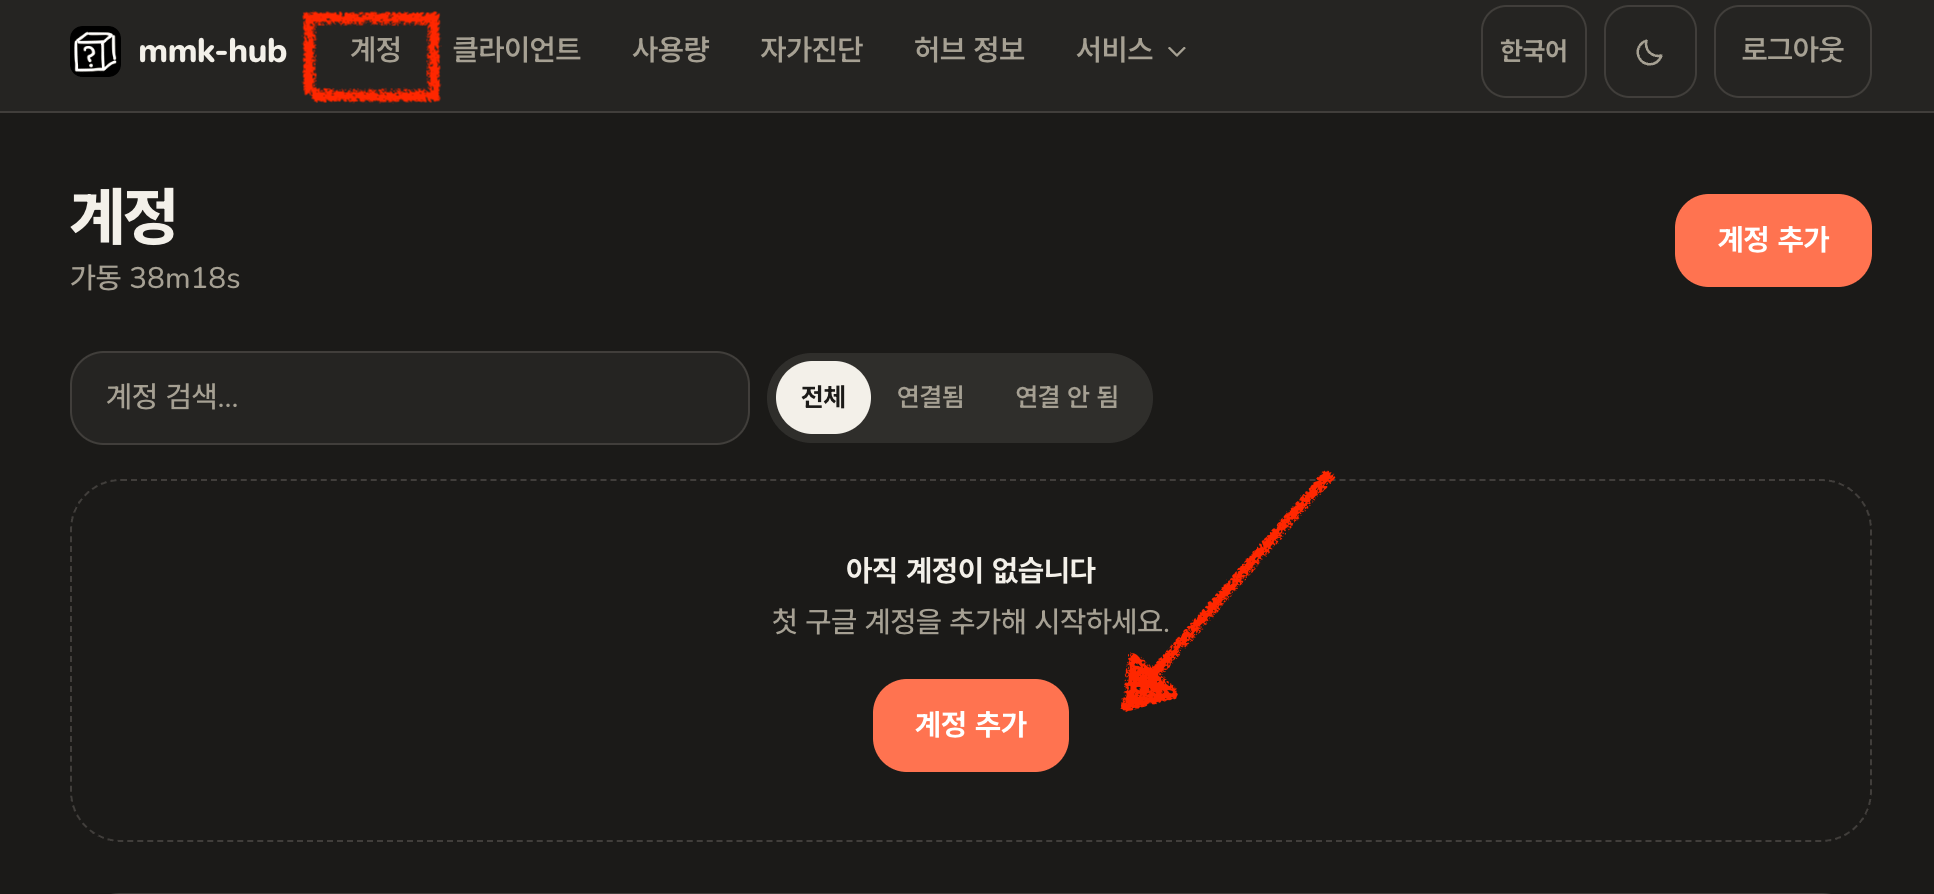
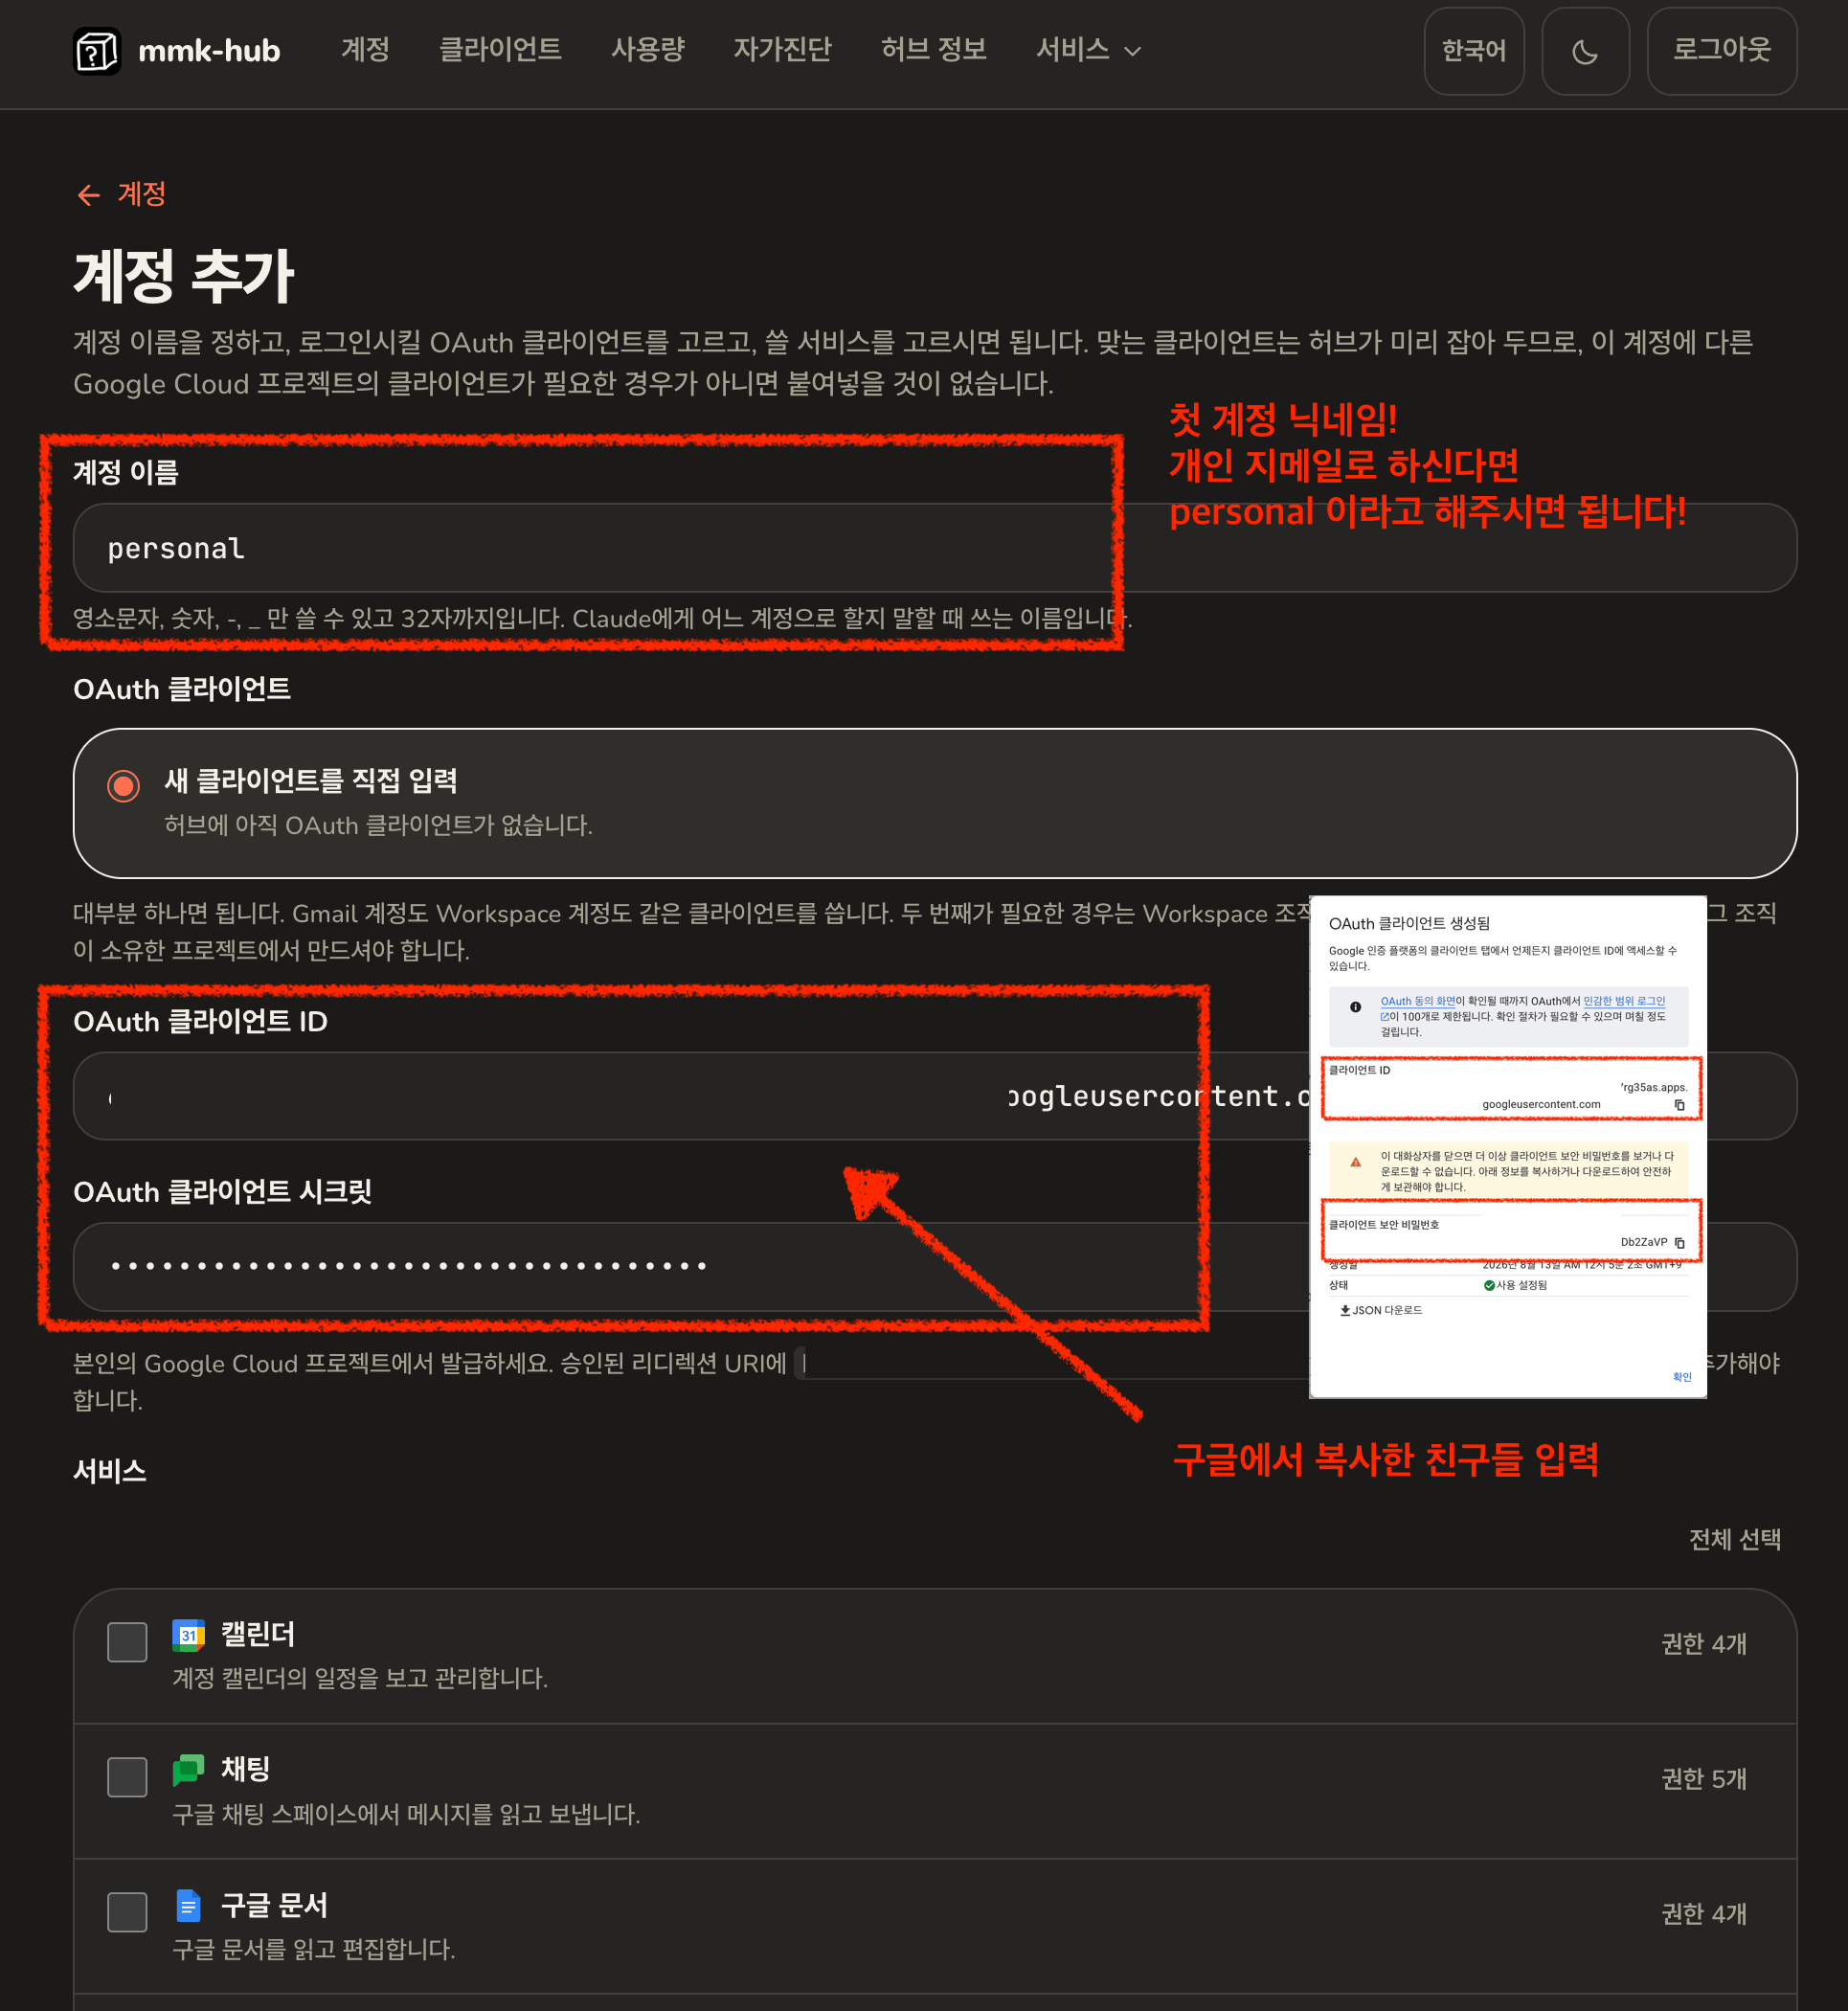
personal, work. Lowercase letters, numbers,
- and _ only.
For the very first account there is no client yet, so choose Enter a new
client and paste the client ID and secret from the previous step. After that
the client is in the list and every further account picks it automatically.
Connect it to Google
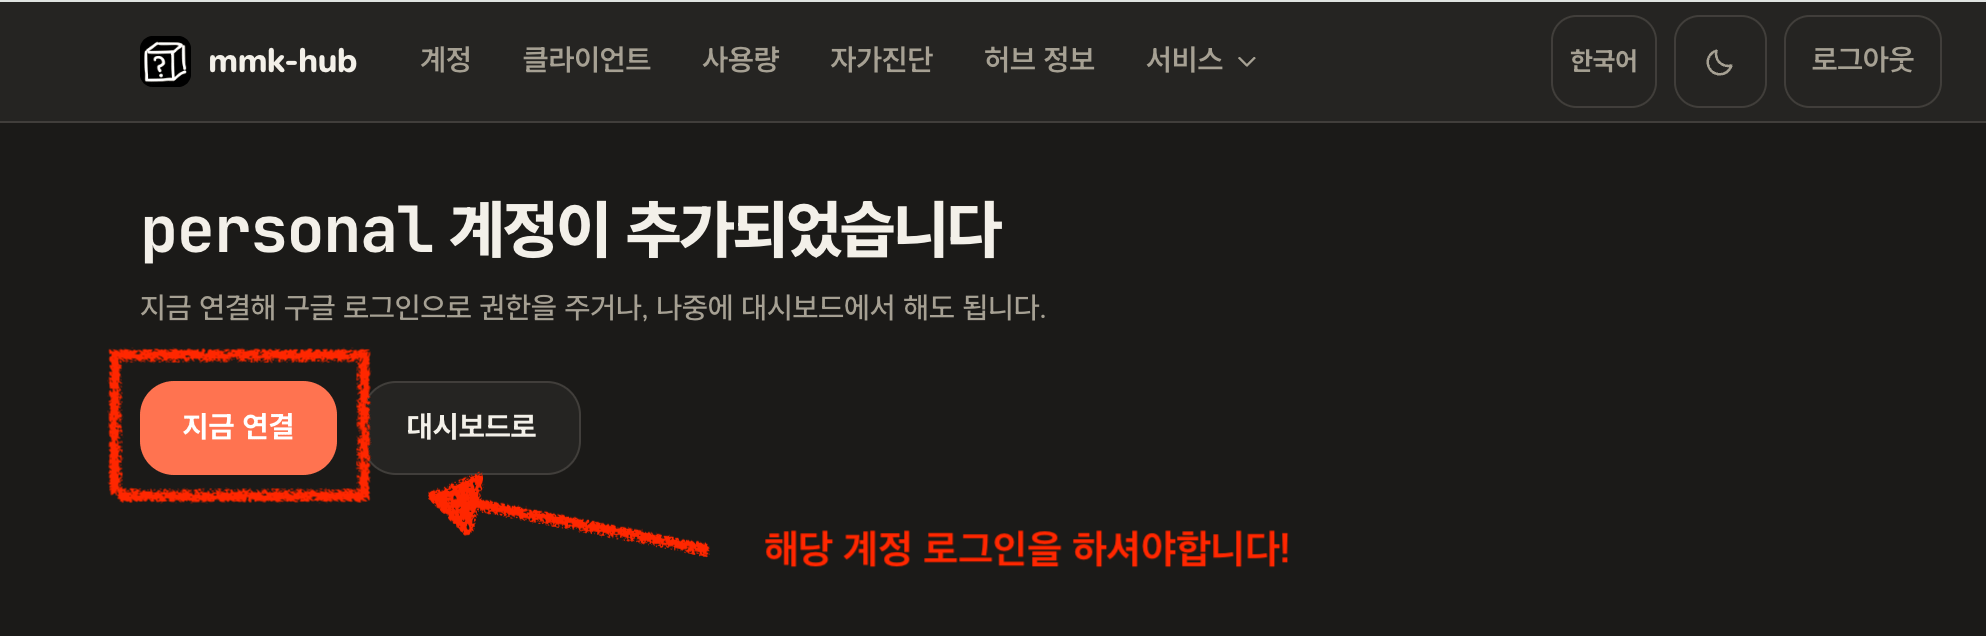
Press Connect, and you land in Google’s own sign-in flow.1
Connect now
2
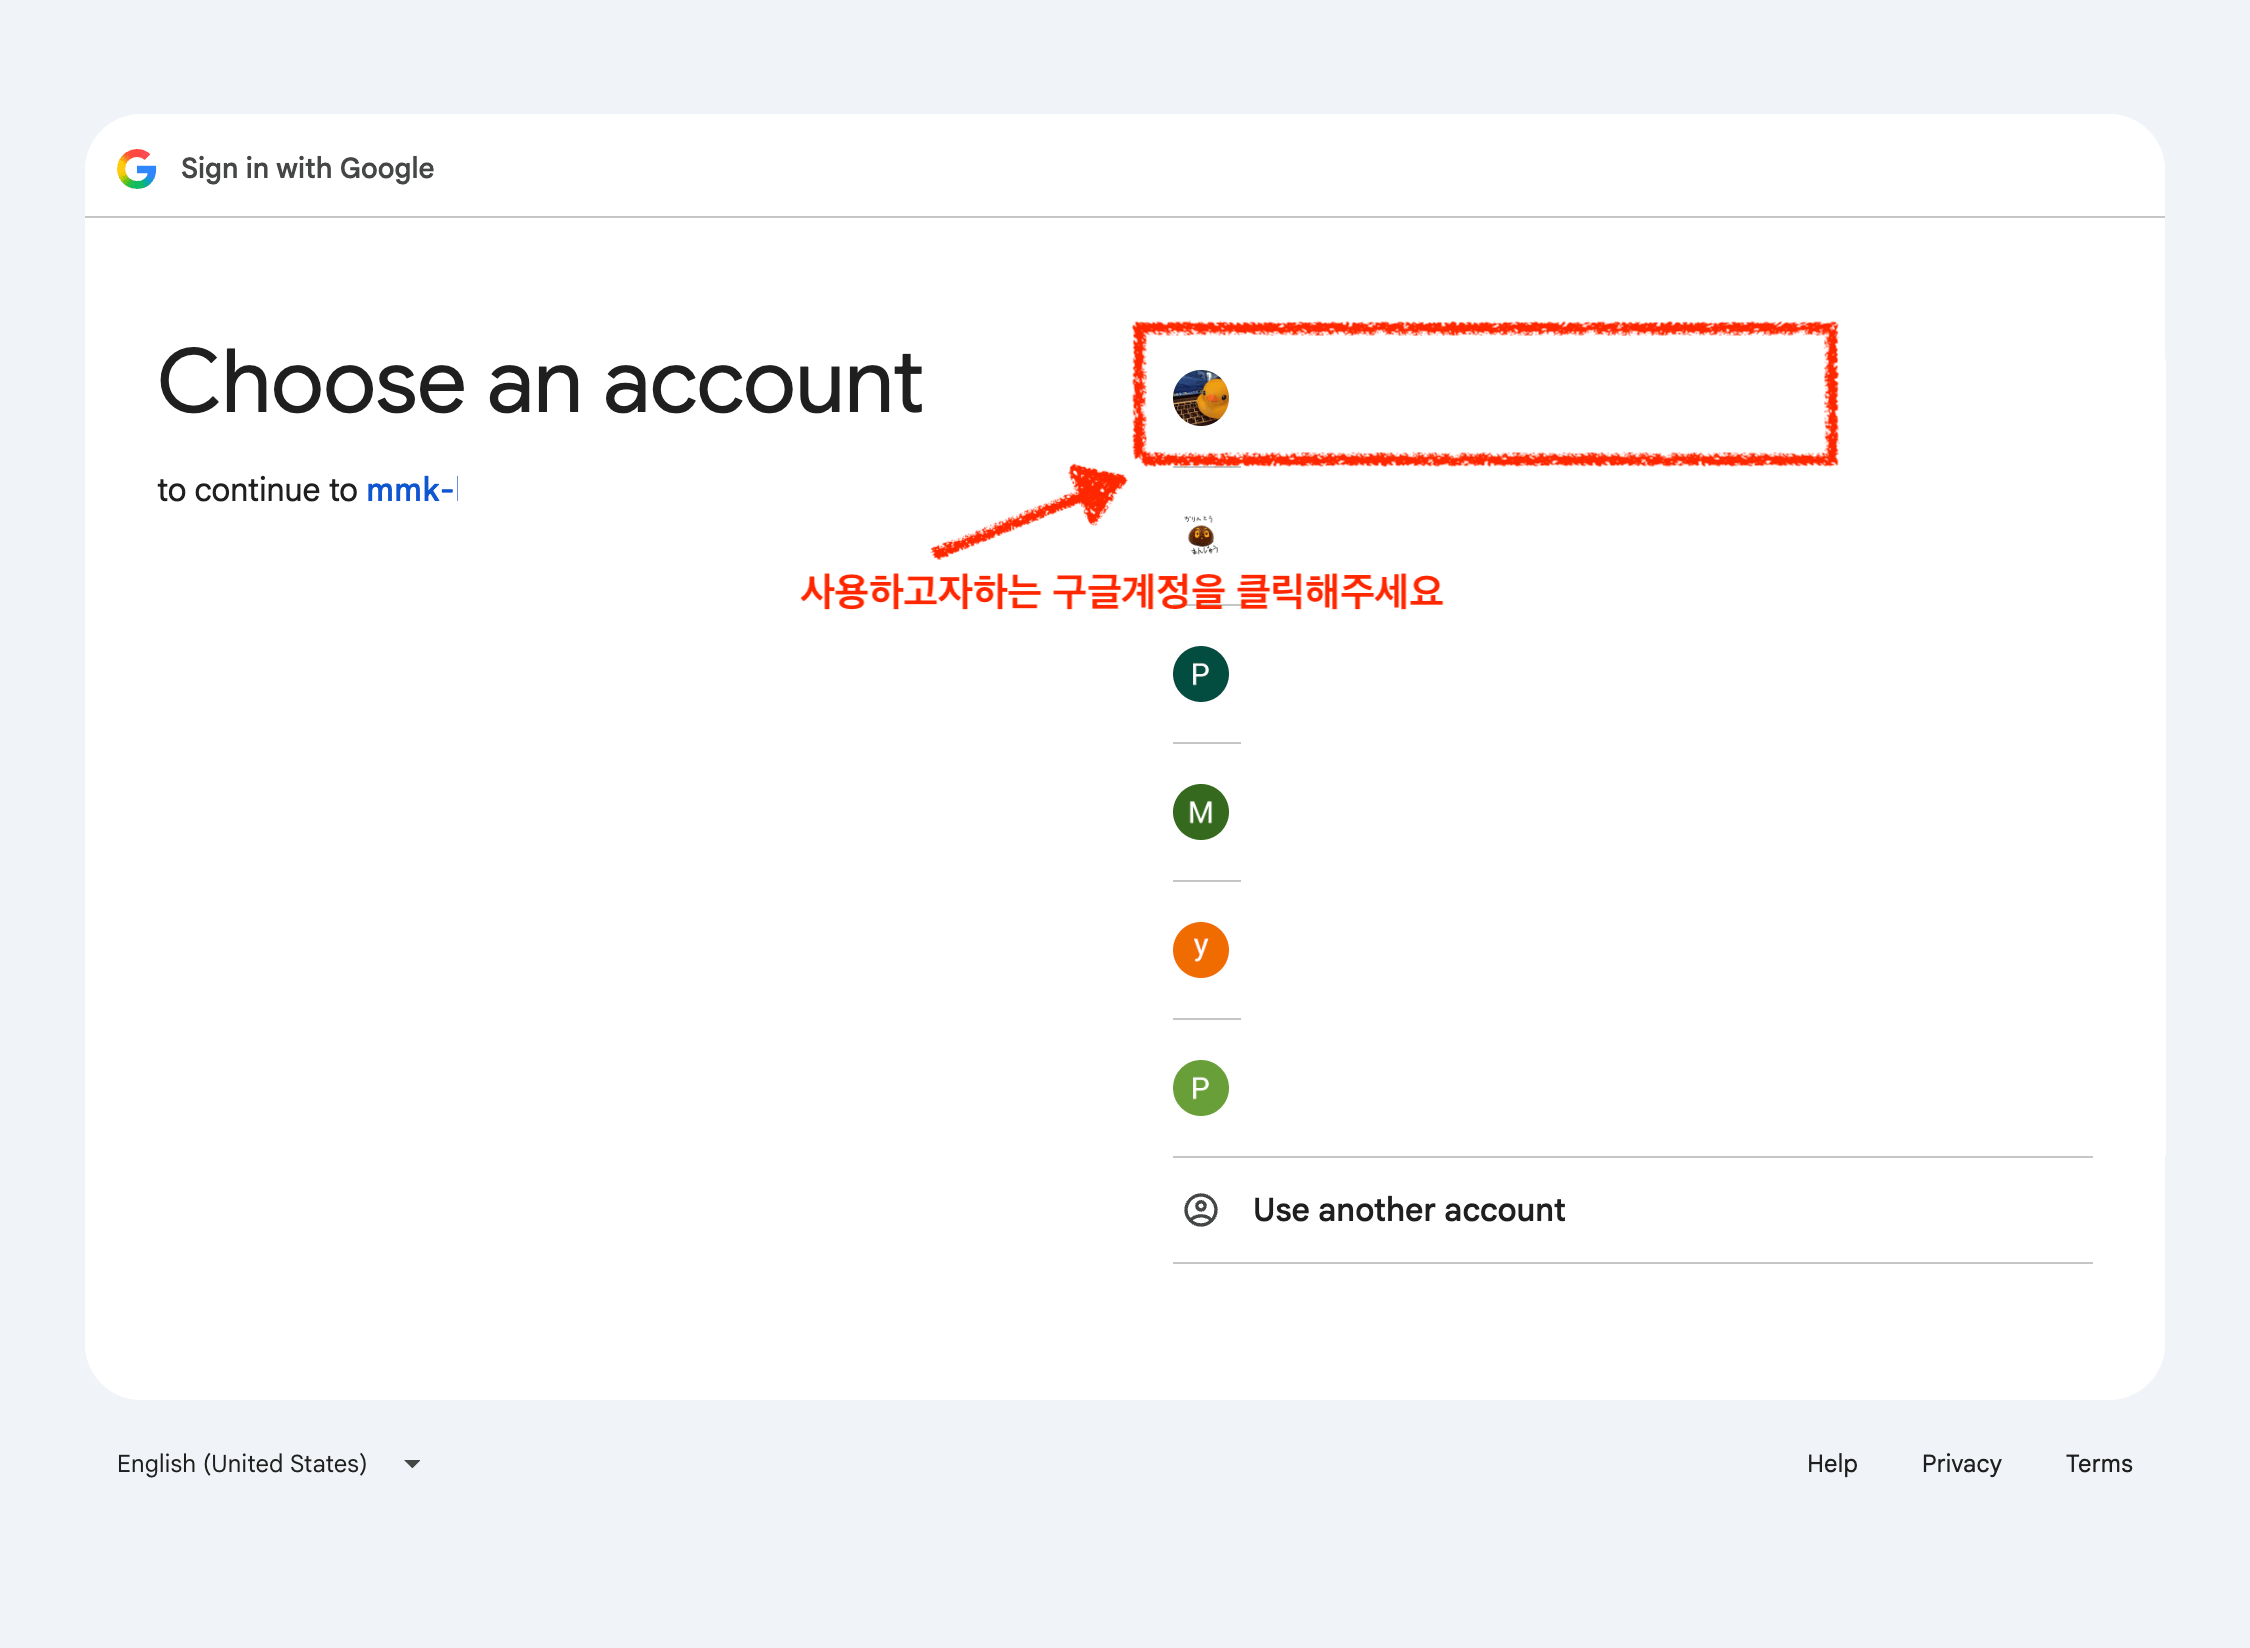
Choose the account
3
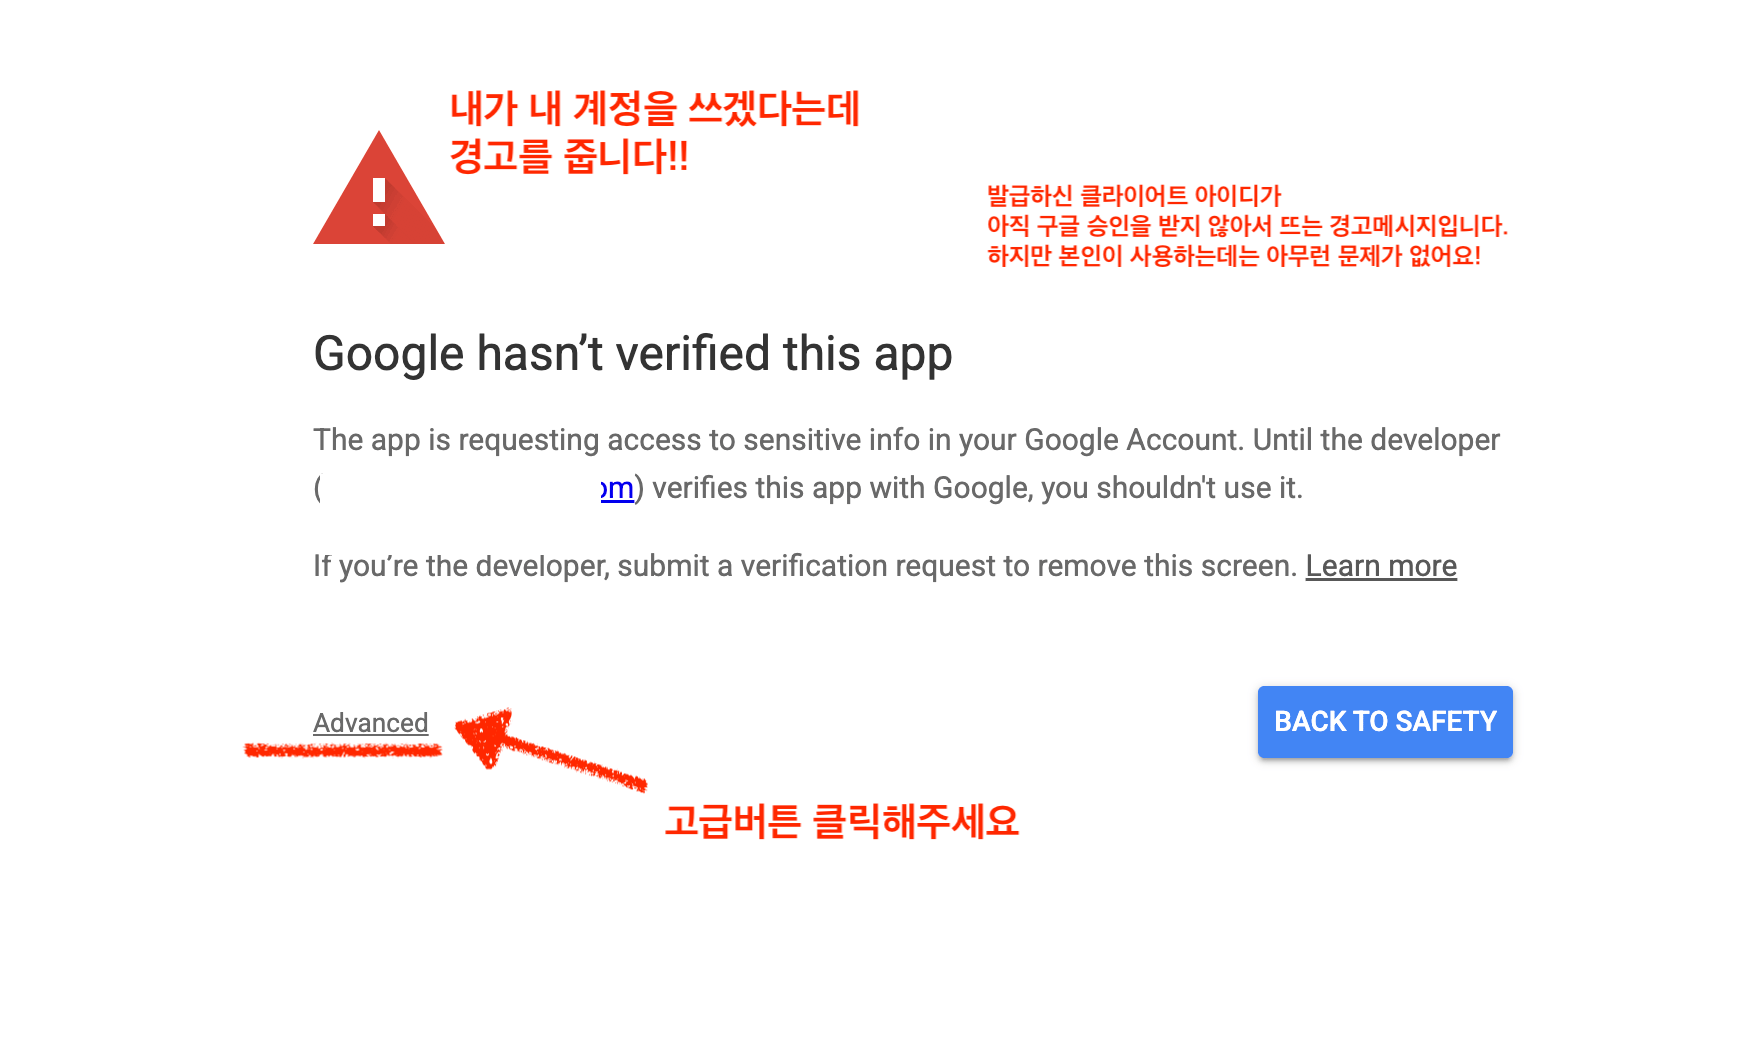
Google warns the app is unverified
4
Go to the app anyway
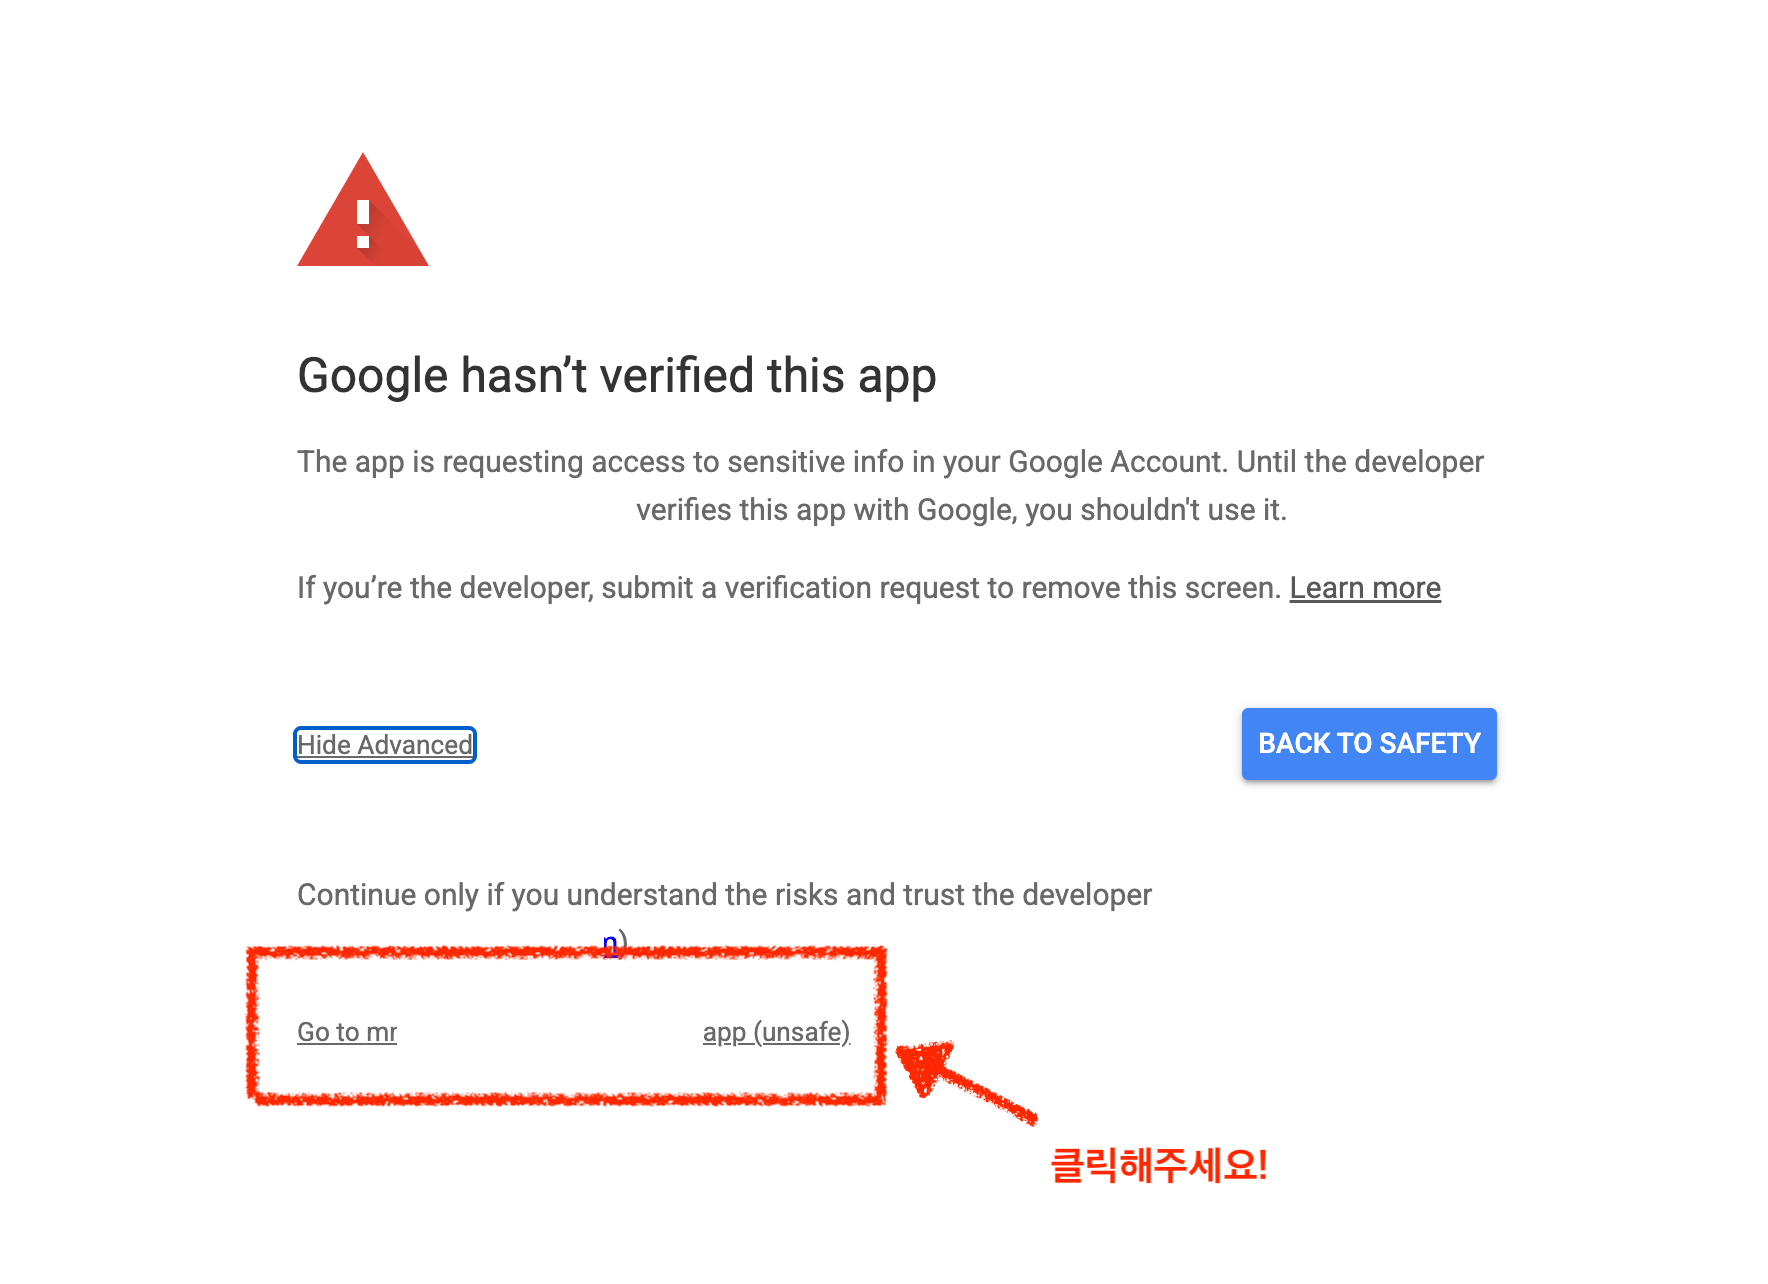
The link only appears after you expand Advanced.
5
Continue
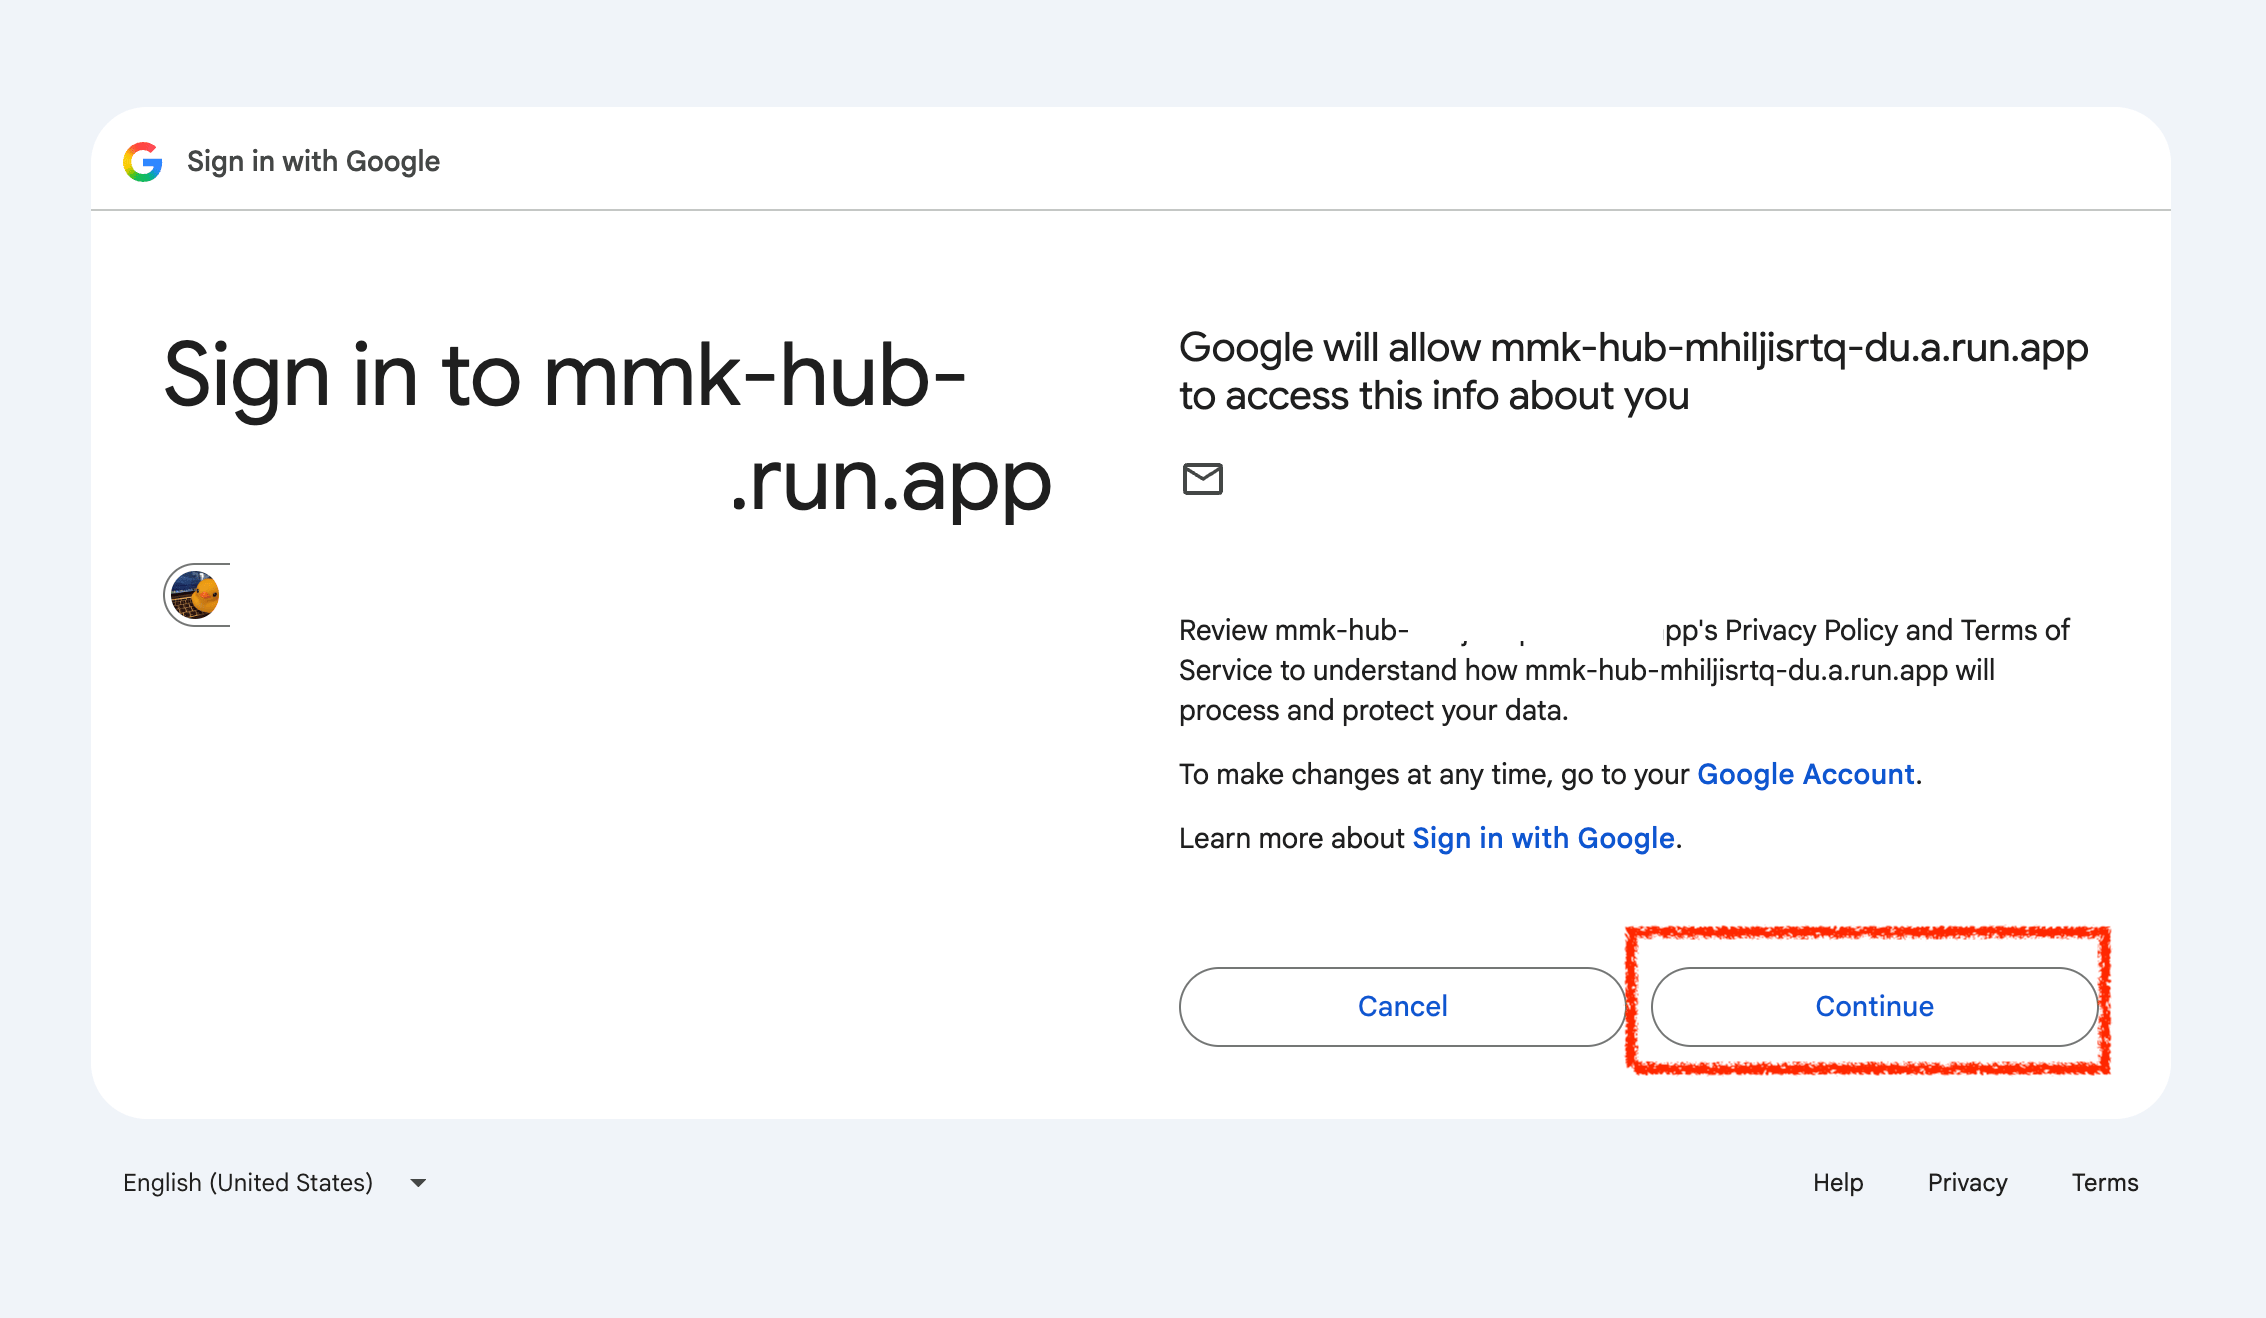
6
Tick Select all
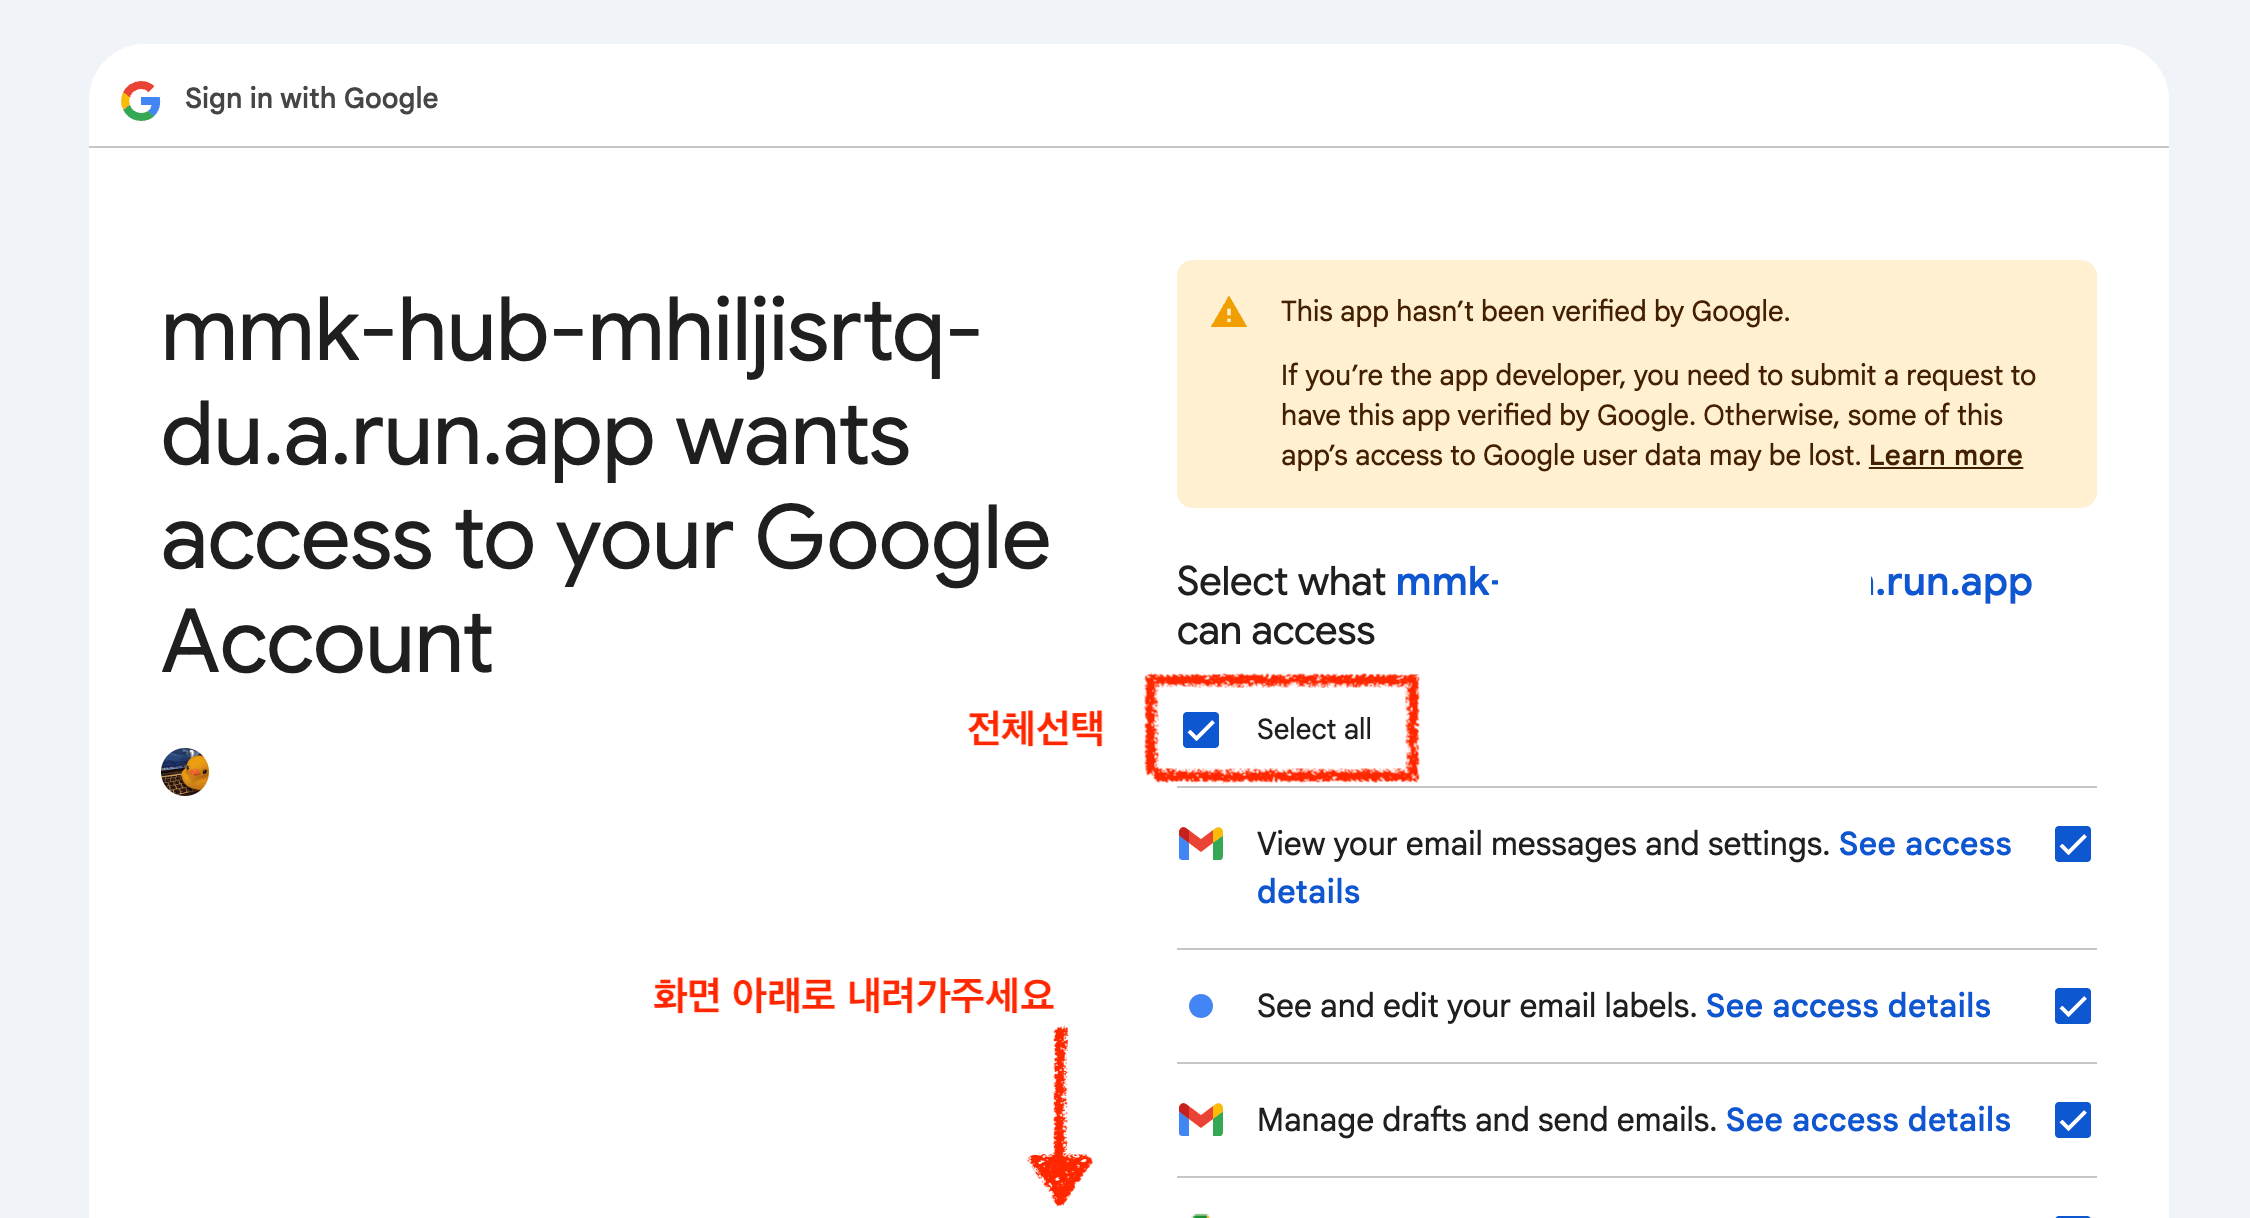
7
Trust the app, and continue
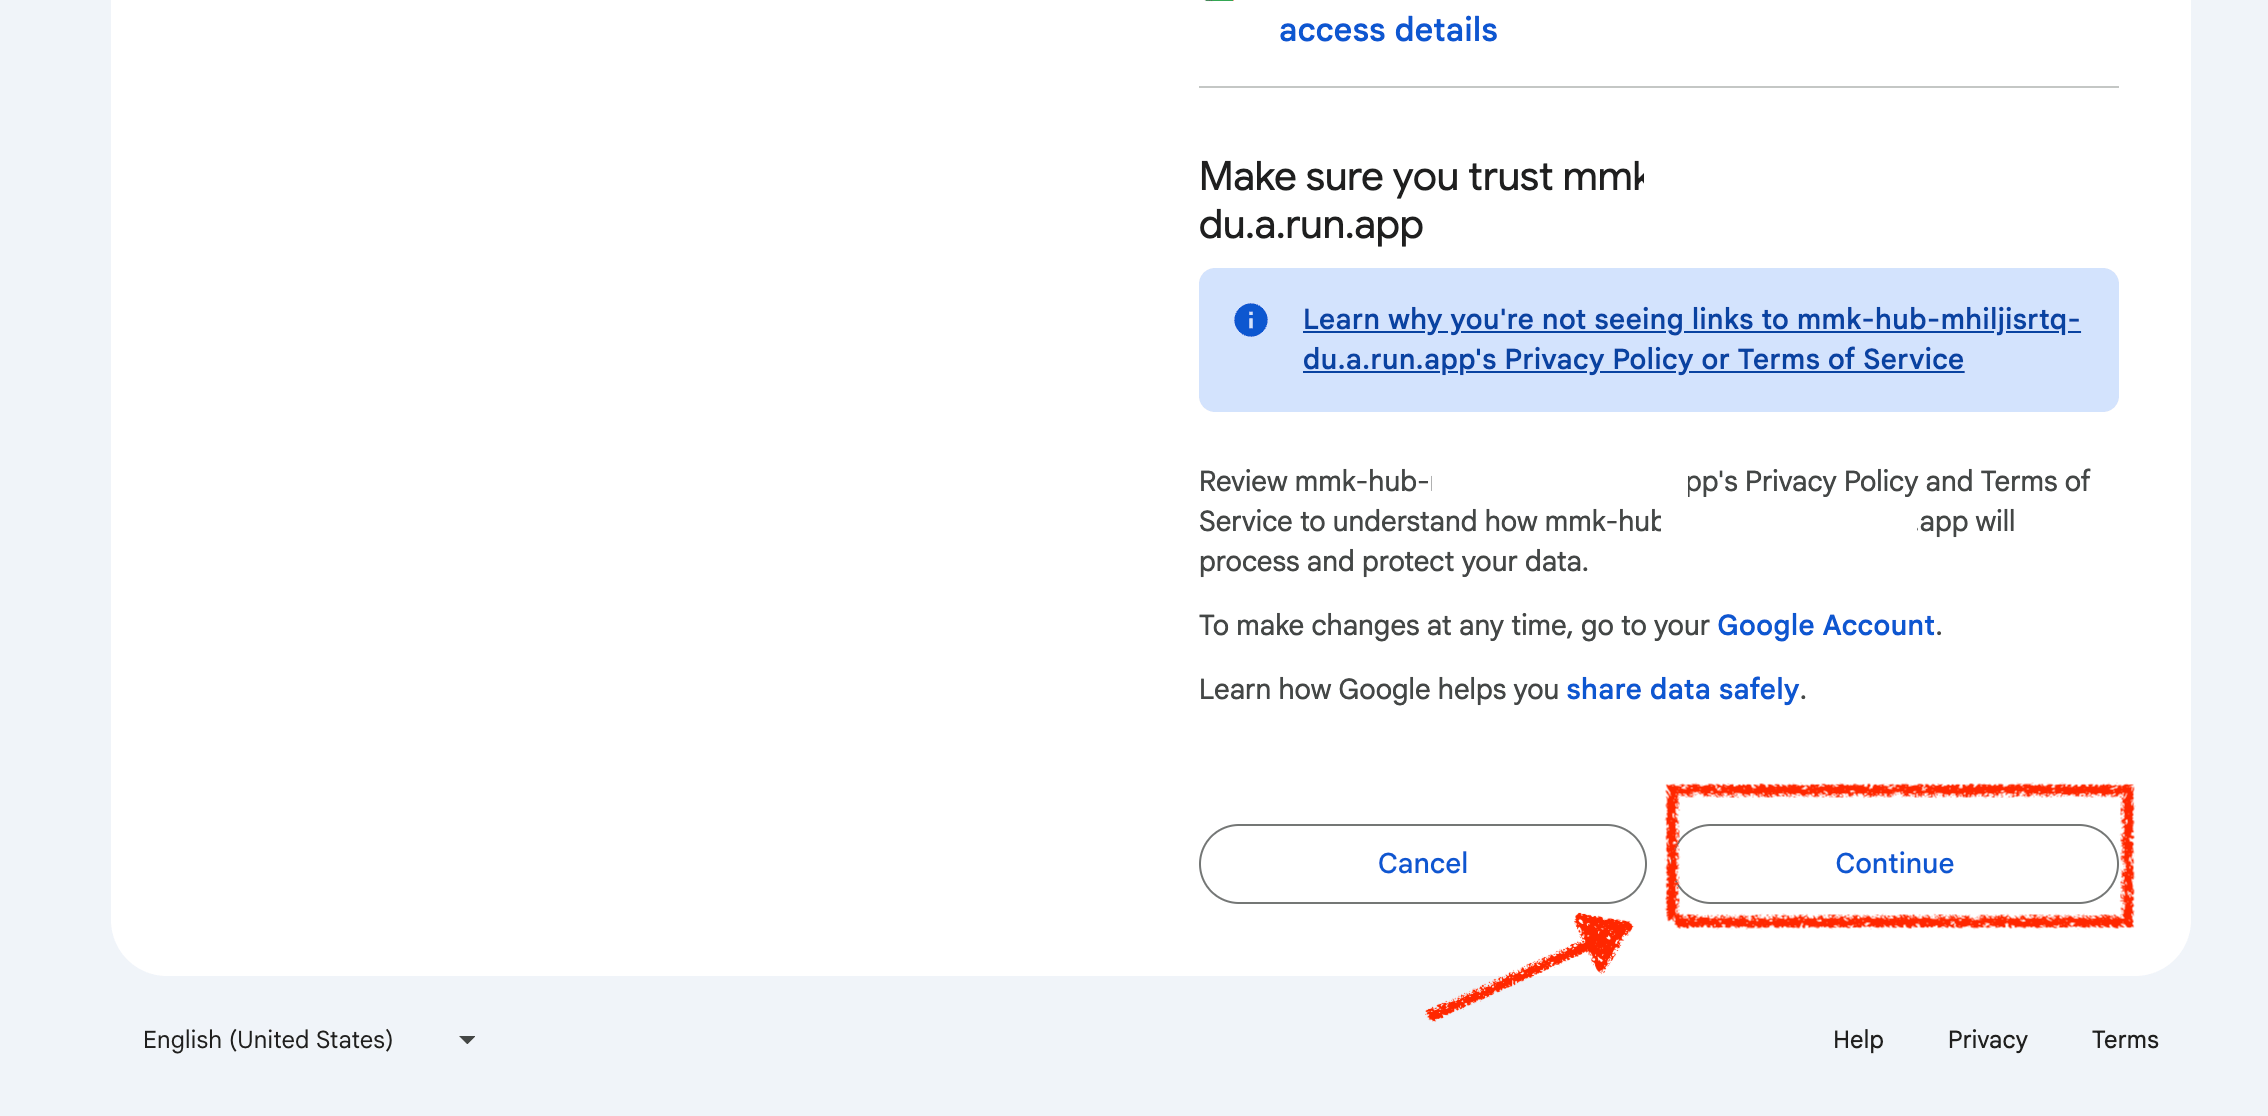
8
Connected
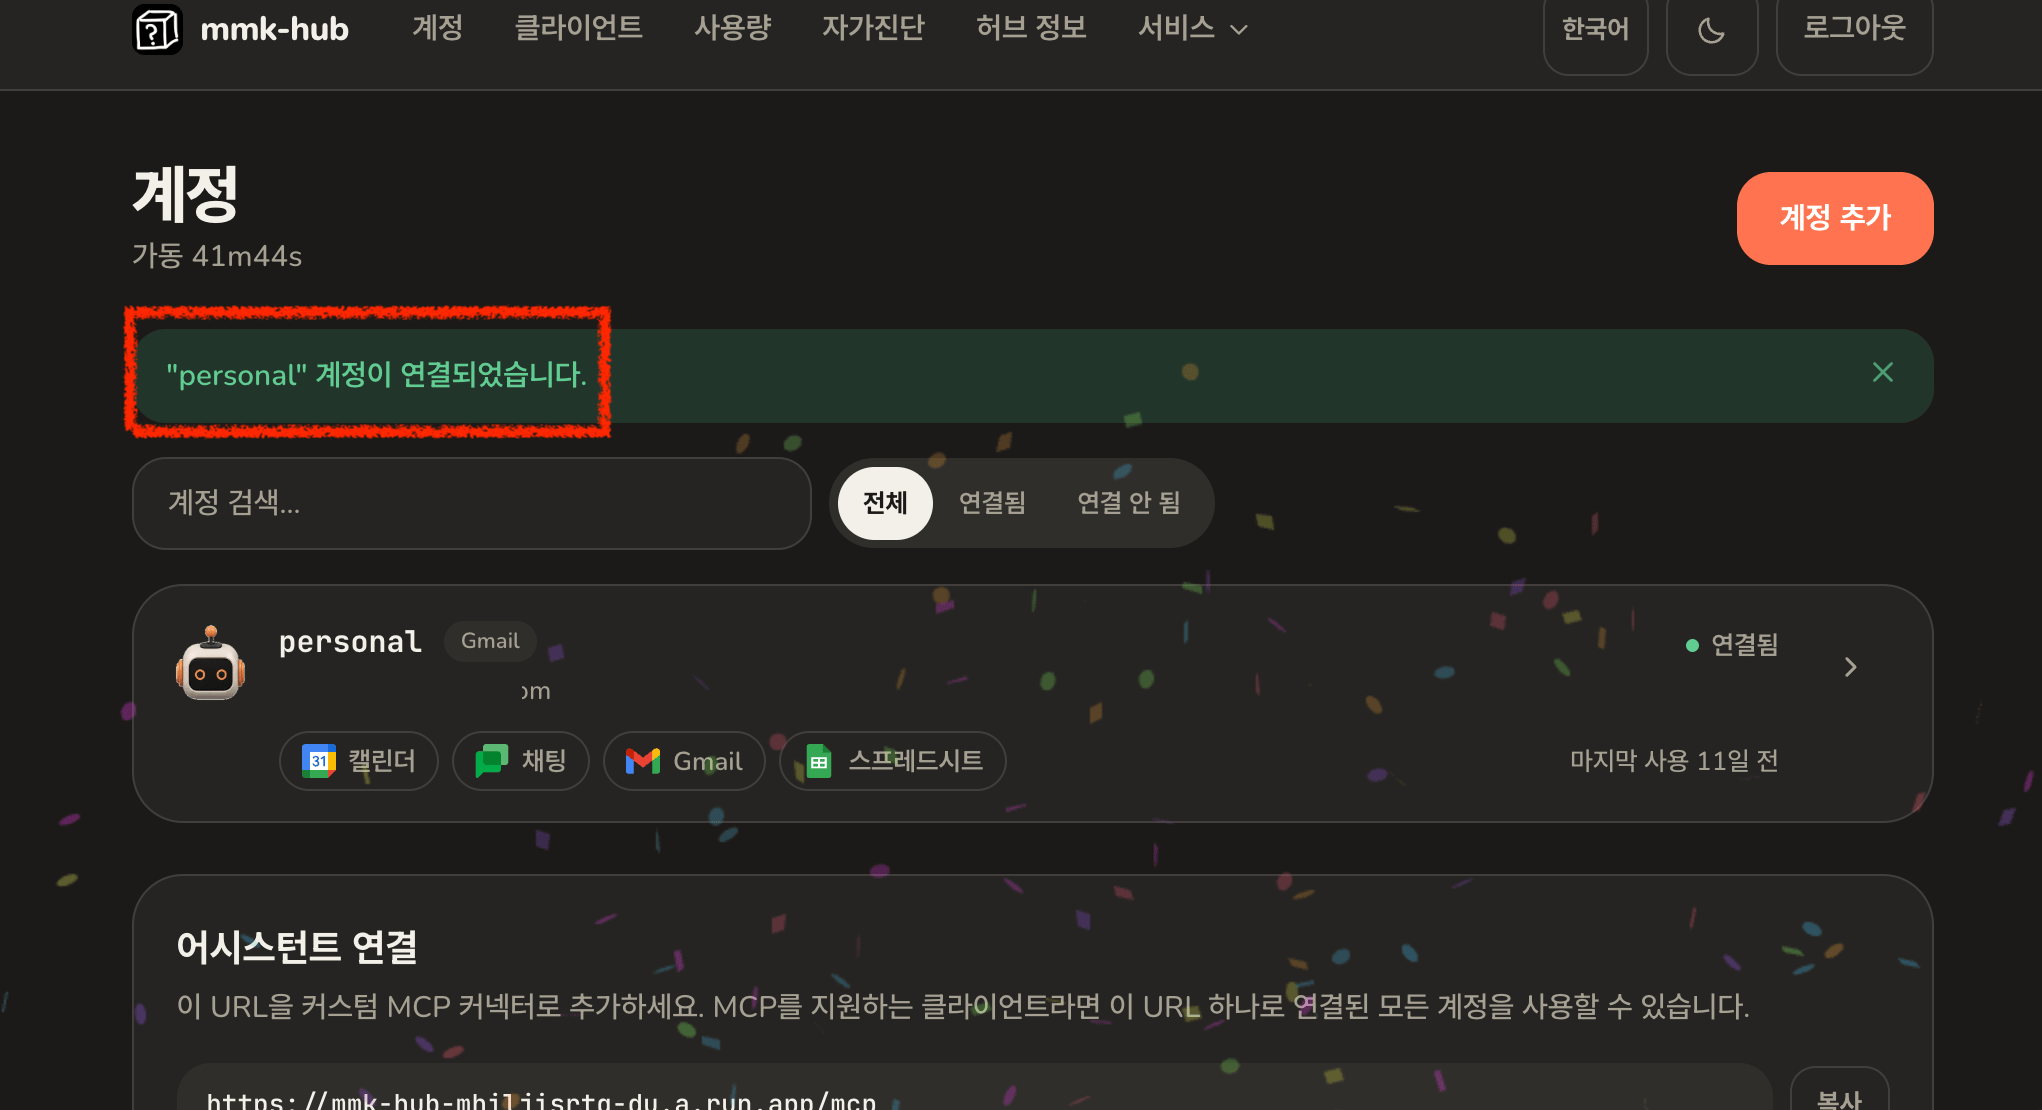
Add a second account
Add as many accounts as you like, and mix personal and work accounts freely. The steps are the same as above, with one shortcut: you do not need a new OAuth client.1
Add account, again
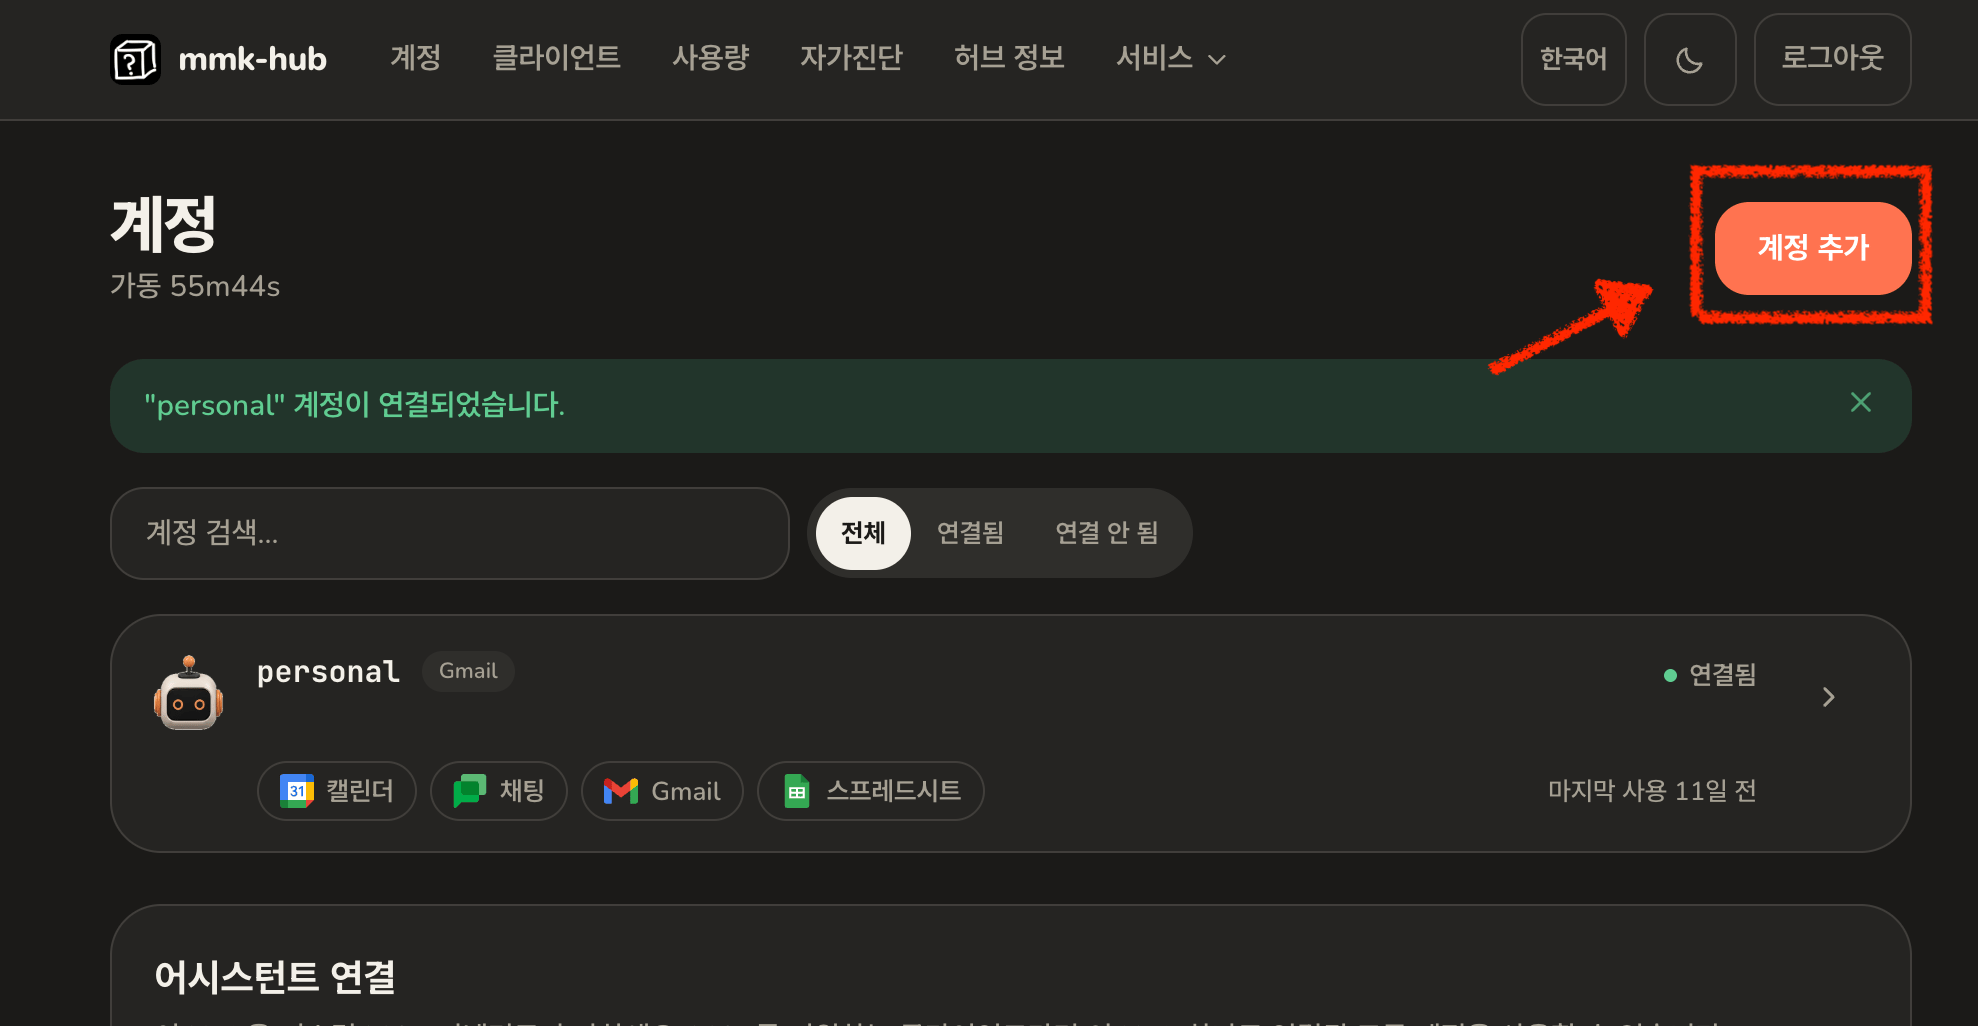
2
Name it, and reuse the existing client
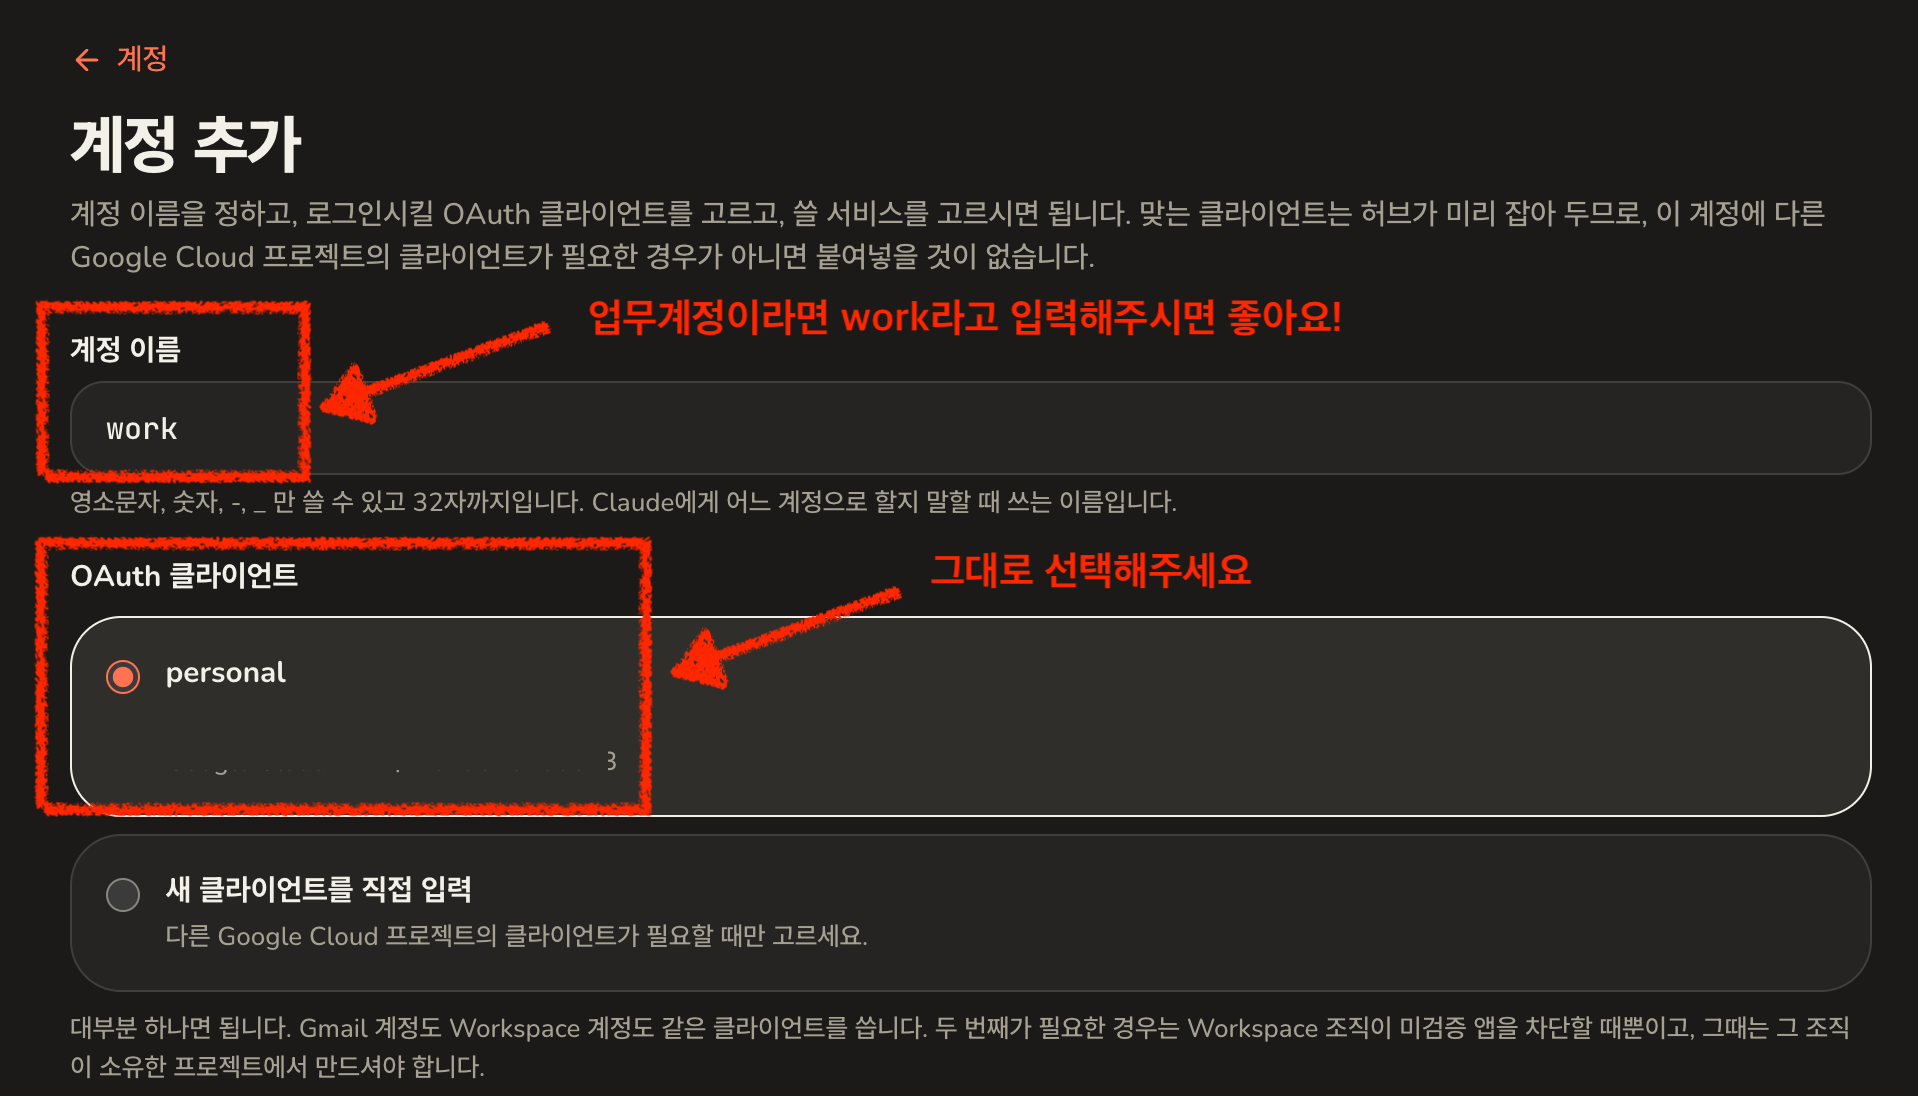
work for instance, and this time pick the client you
already made instead of Enter a new client. Almost always one client
covers a personal Gmail account and a work Workspace account both.
The one case it does not, and what to do instead, is covered in
how many projects you need.3
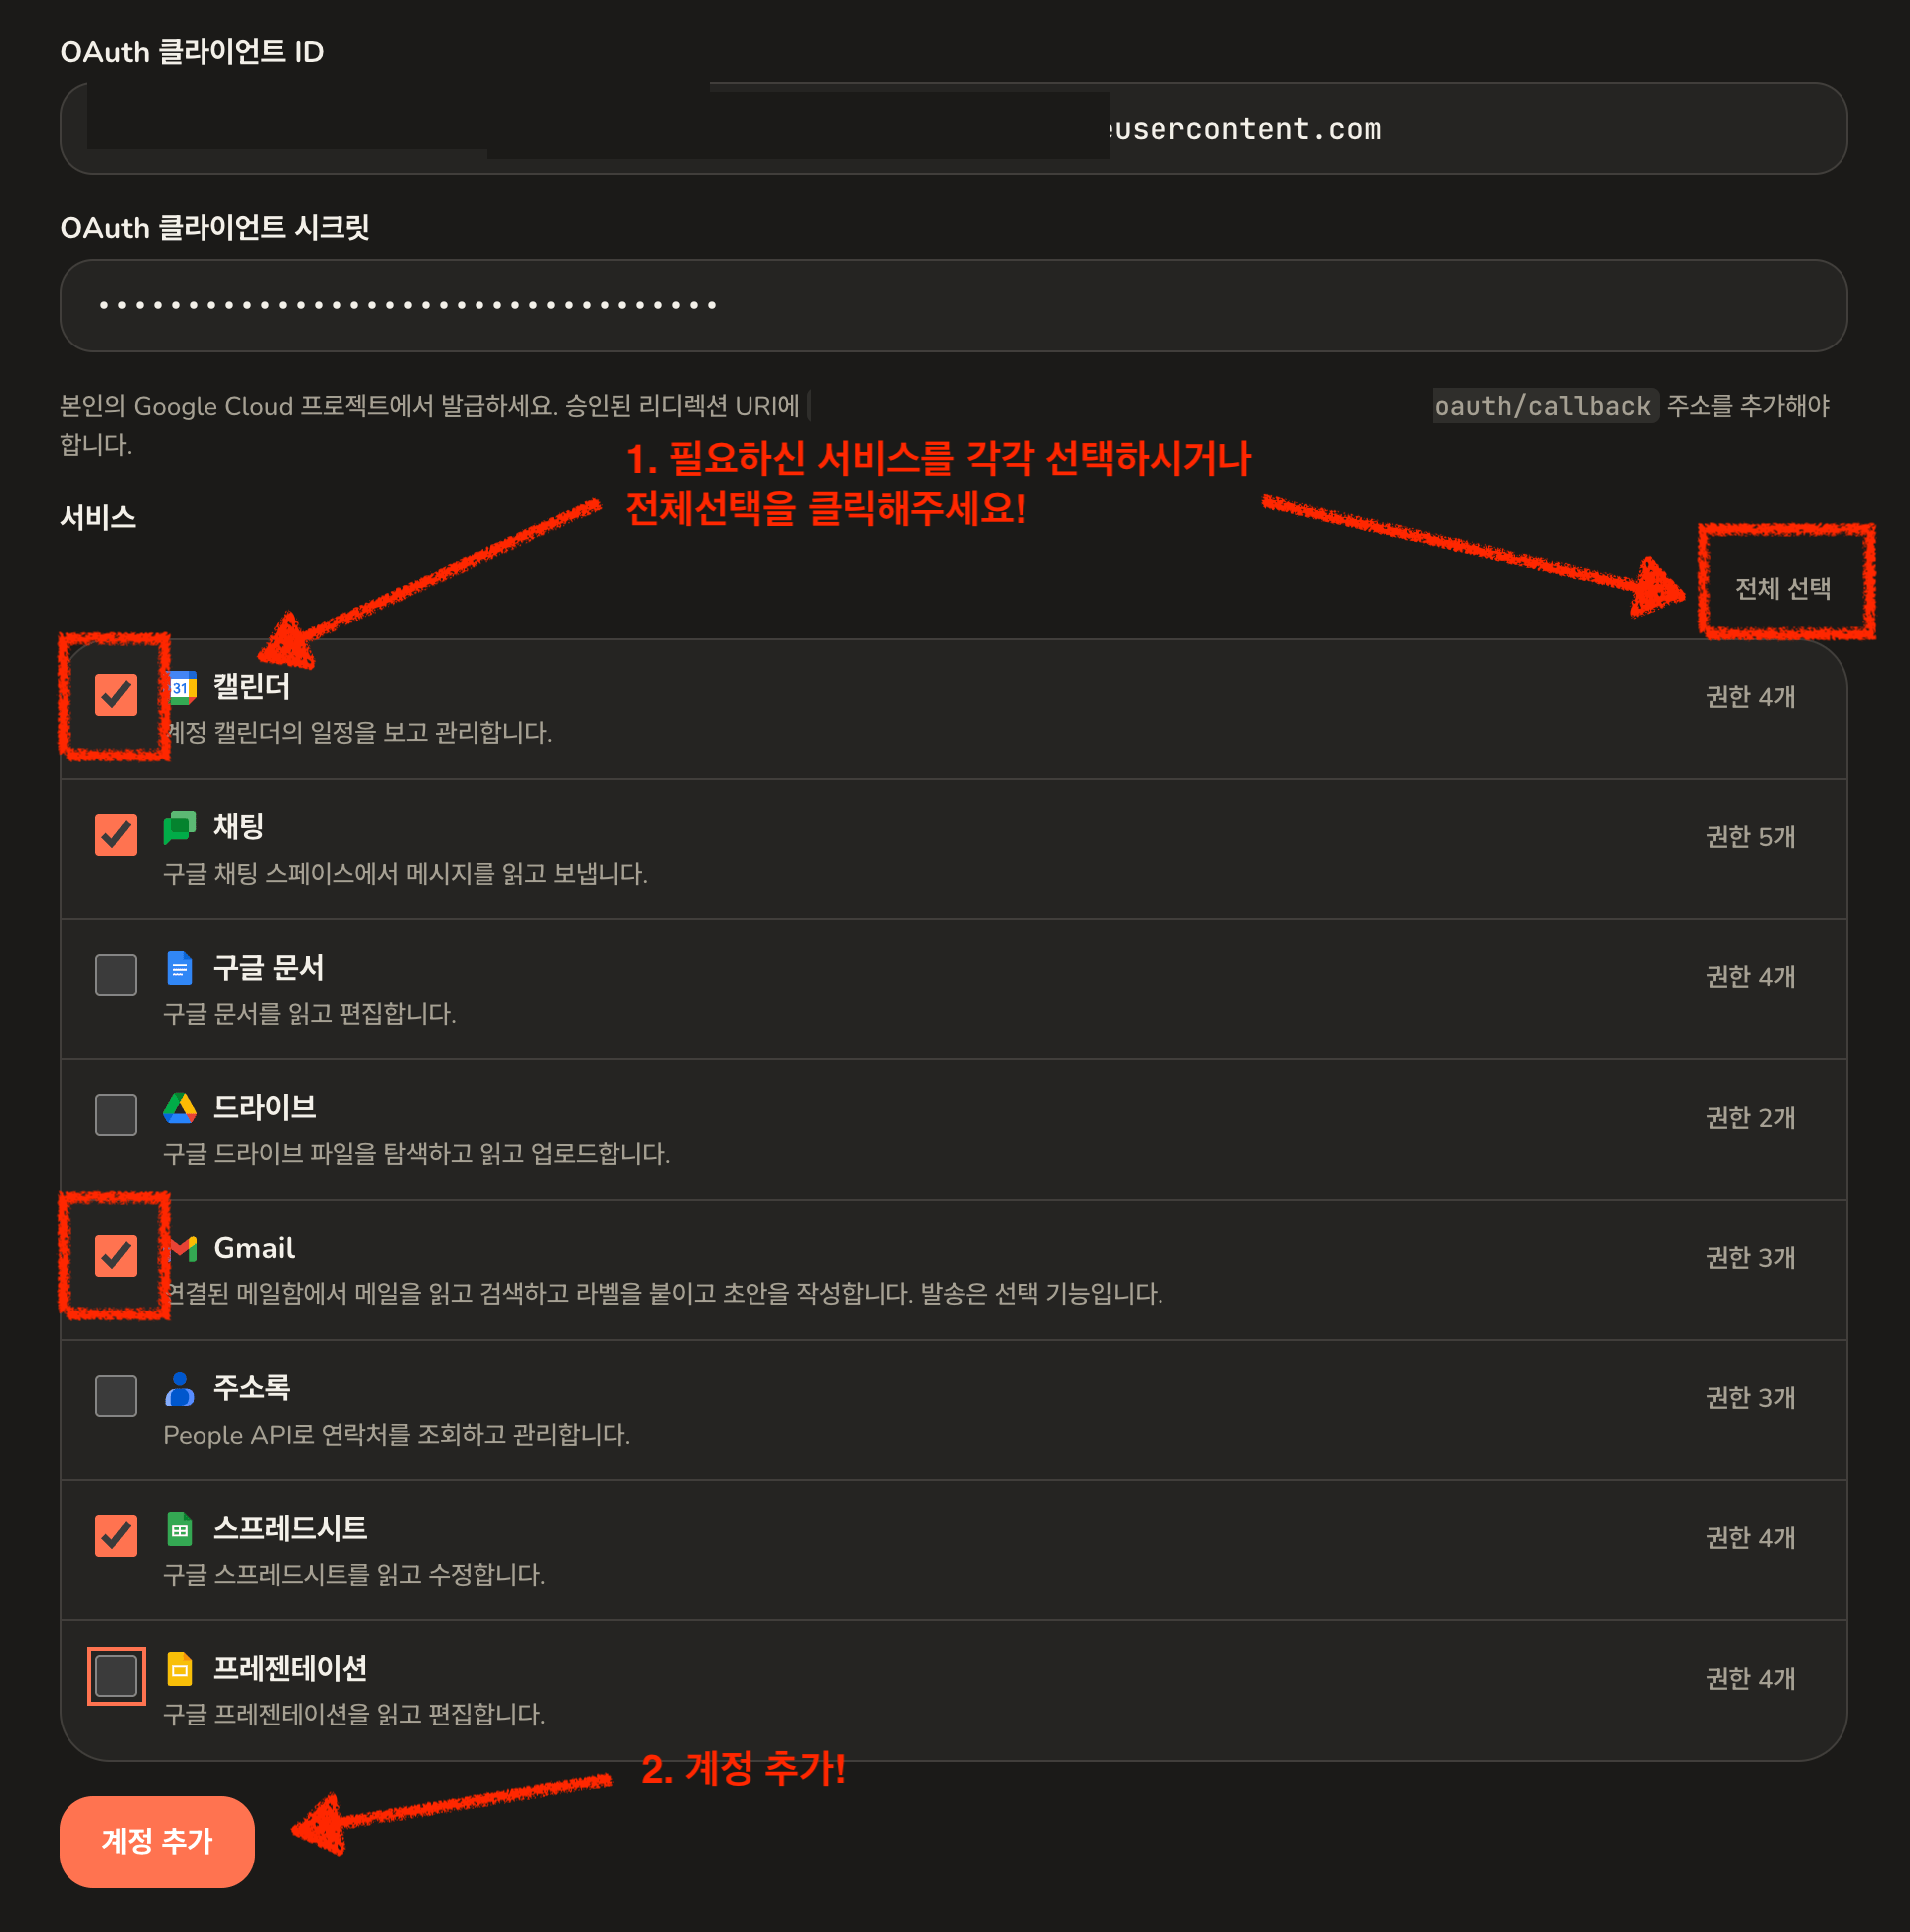
Choose services and submit
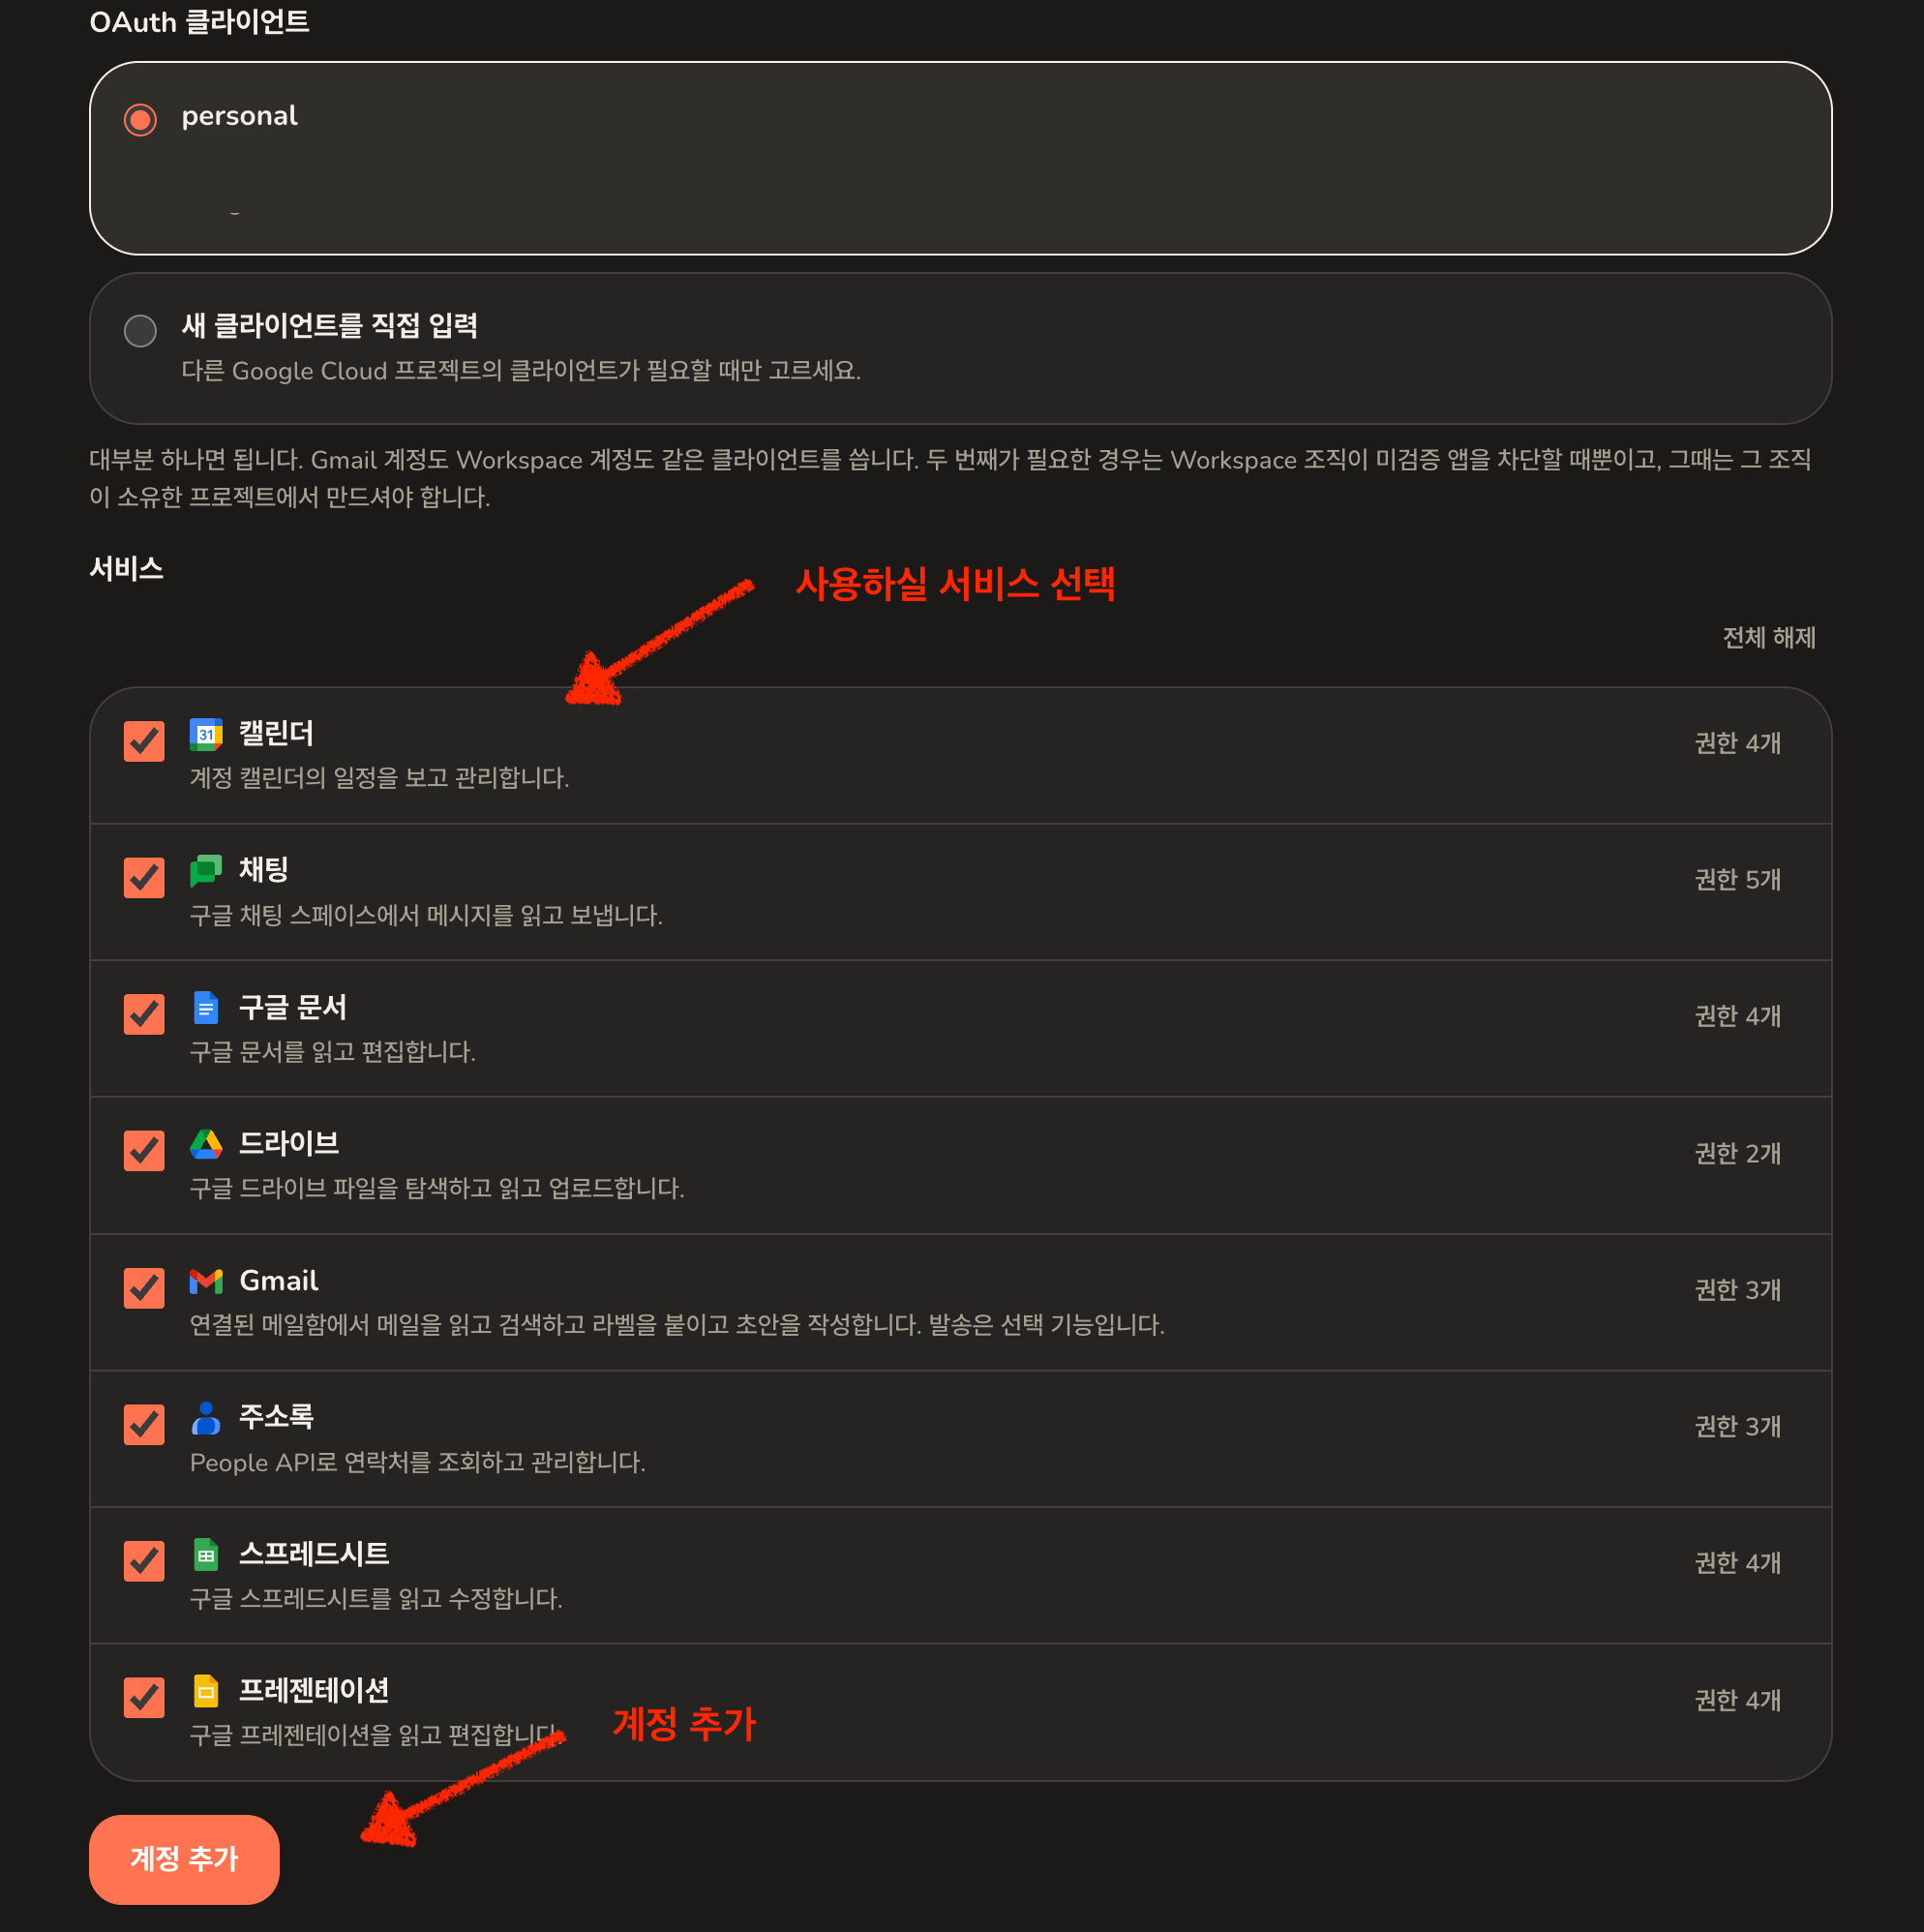
4
Connect it
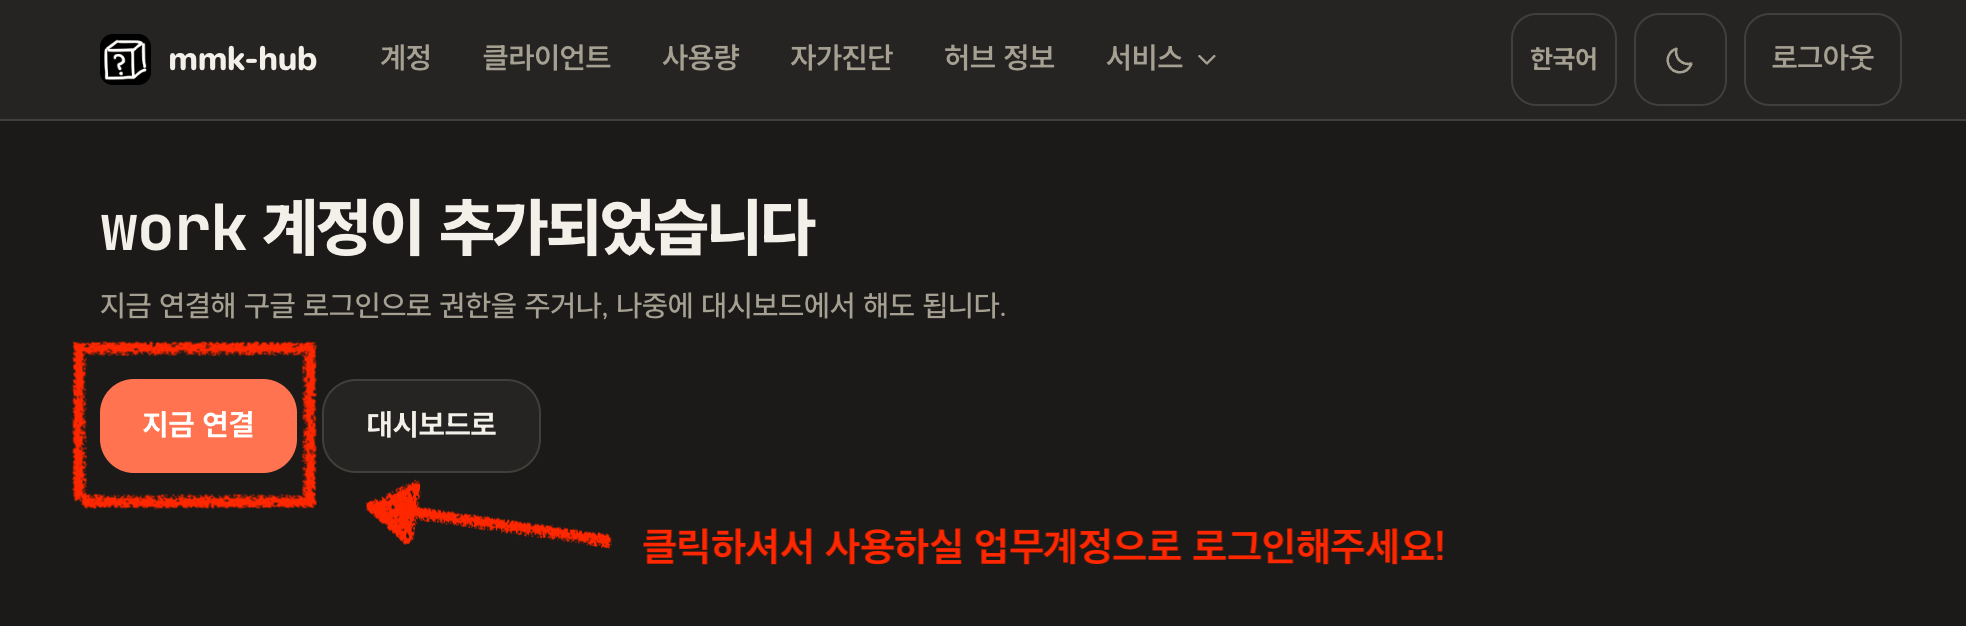
5
Both accounts connected
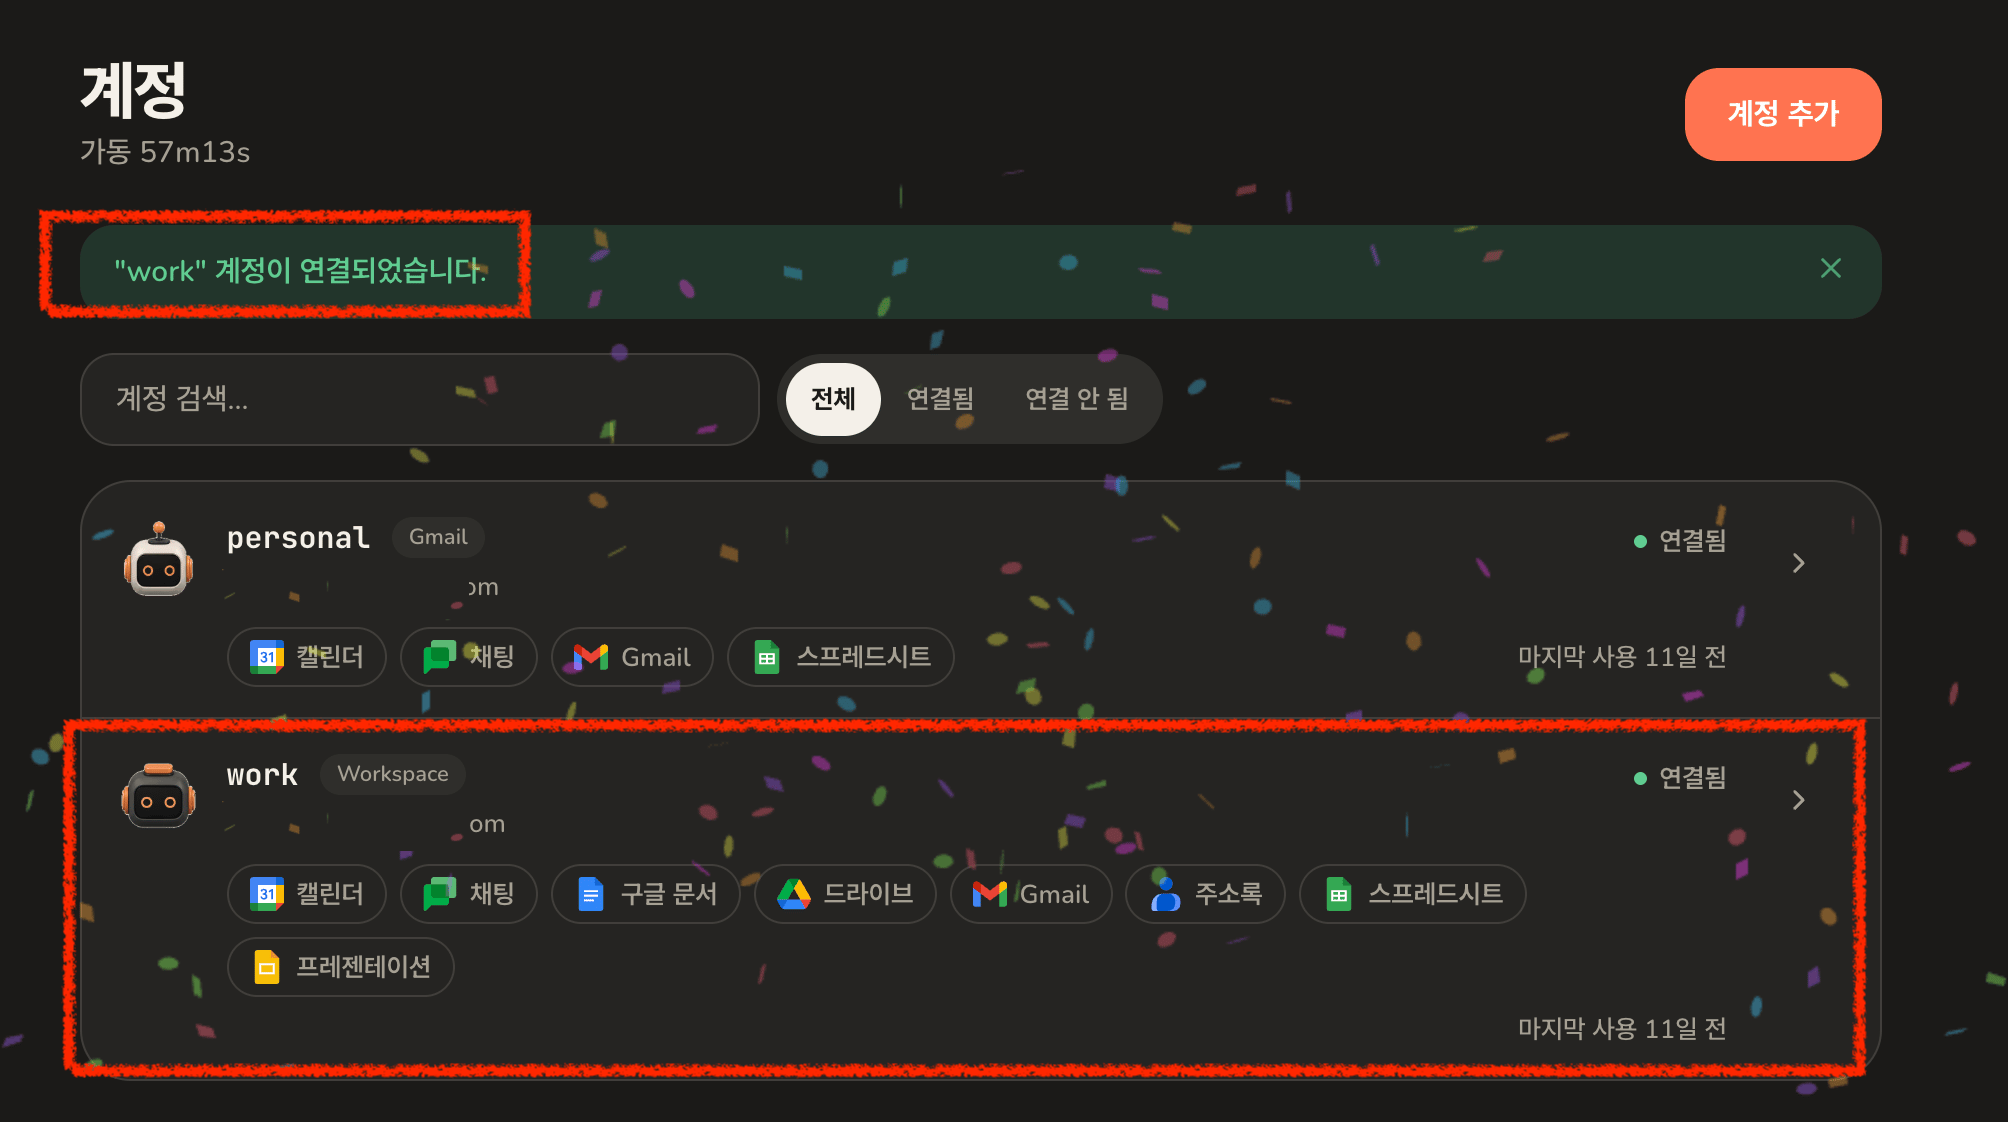
6
Check it back on the installer
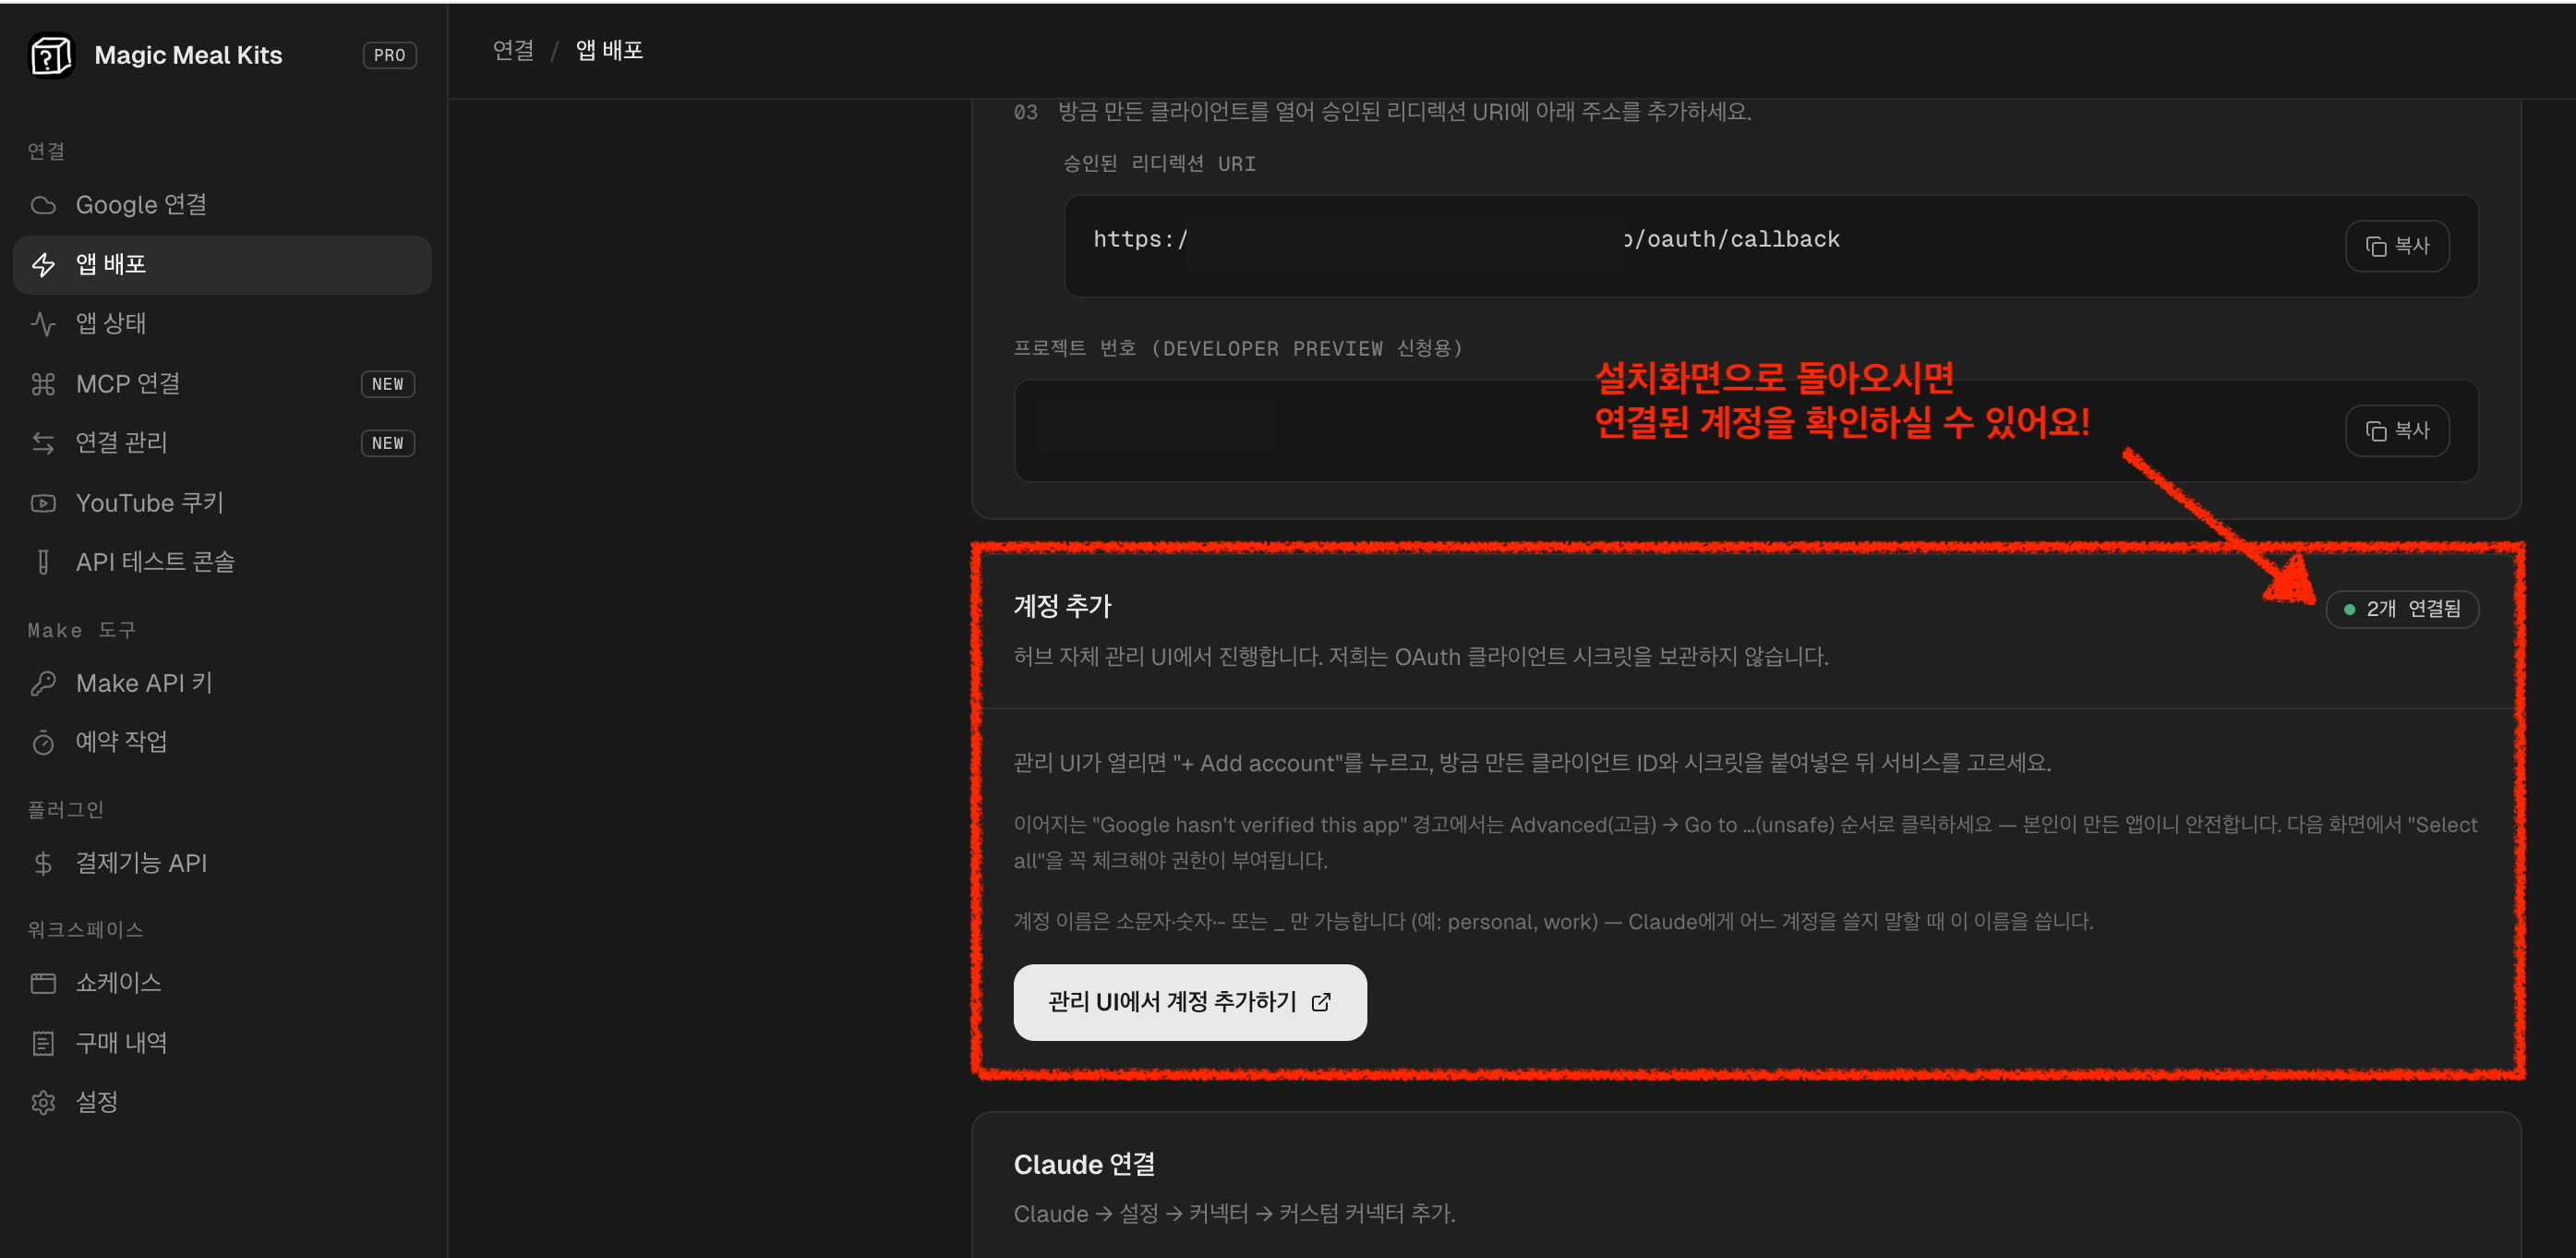
Optional: open the admin screen with your Google account
Nothing above depends on this and you can come back to it any time. This is only about how you get into the admin screen. Out of the box that is the admin token, which means anyone holding the token can open it. Turning this on lets you sign in with your Google account instead, and only the address you signed up with is allowed through. Token sign-in keeps working either way. This adds a door rather than moving one.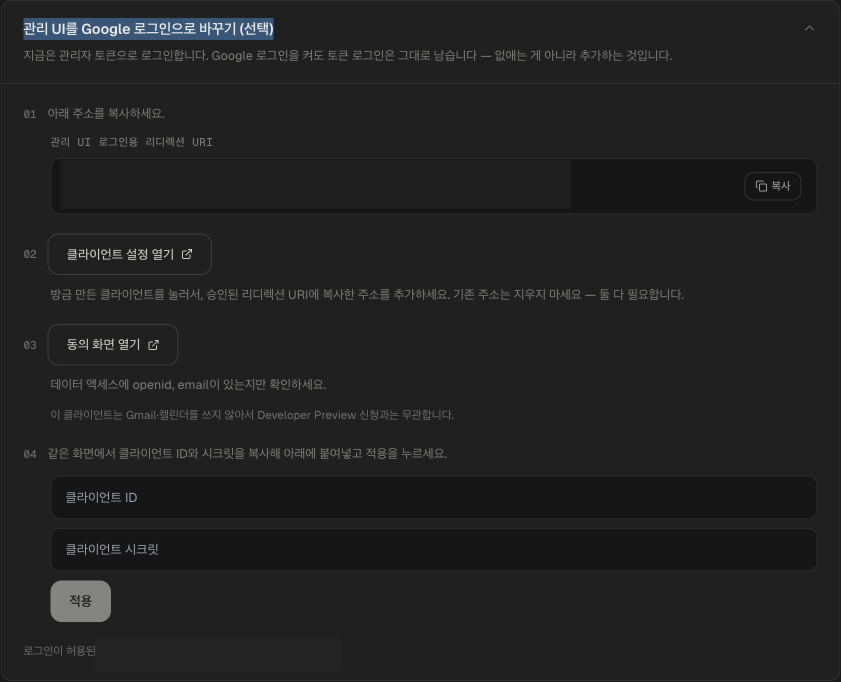
- Copy the redirect address it shows you. This is a second address, for signing in rather than for connecting accounts.
- Open client settings takes you to the client you made earlier. Add the address there, alongside the one already in the list. Do not replace it.
- Open consent screen takes you to Data access, where you tick
openidandemail. These say the app may see who you are and your address, and nothing else. - Paste the client ID and secret back into the card and press Apply.
- Open the admin screen again. There should now be a Sign in with Google button on it.
Connect Claude
1
Copy the MCP address
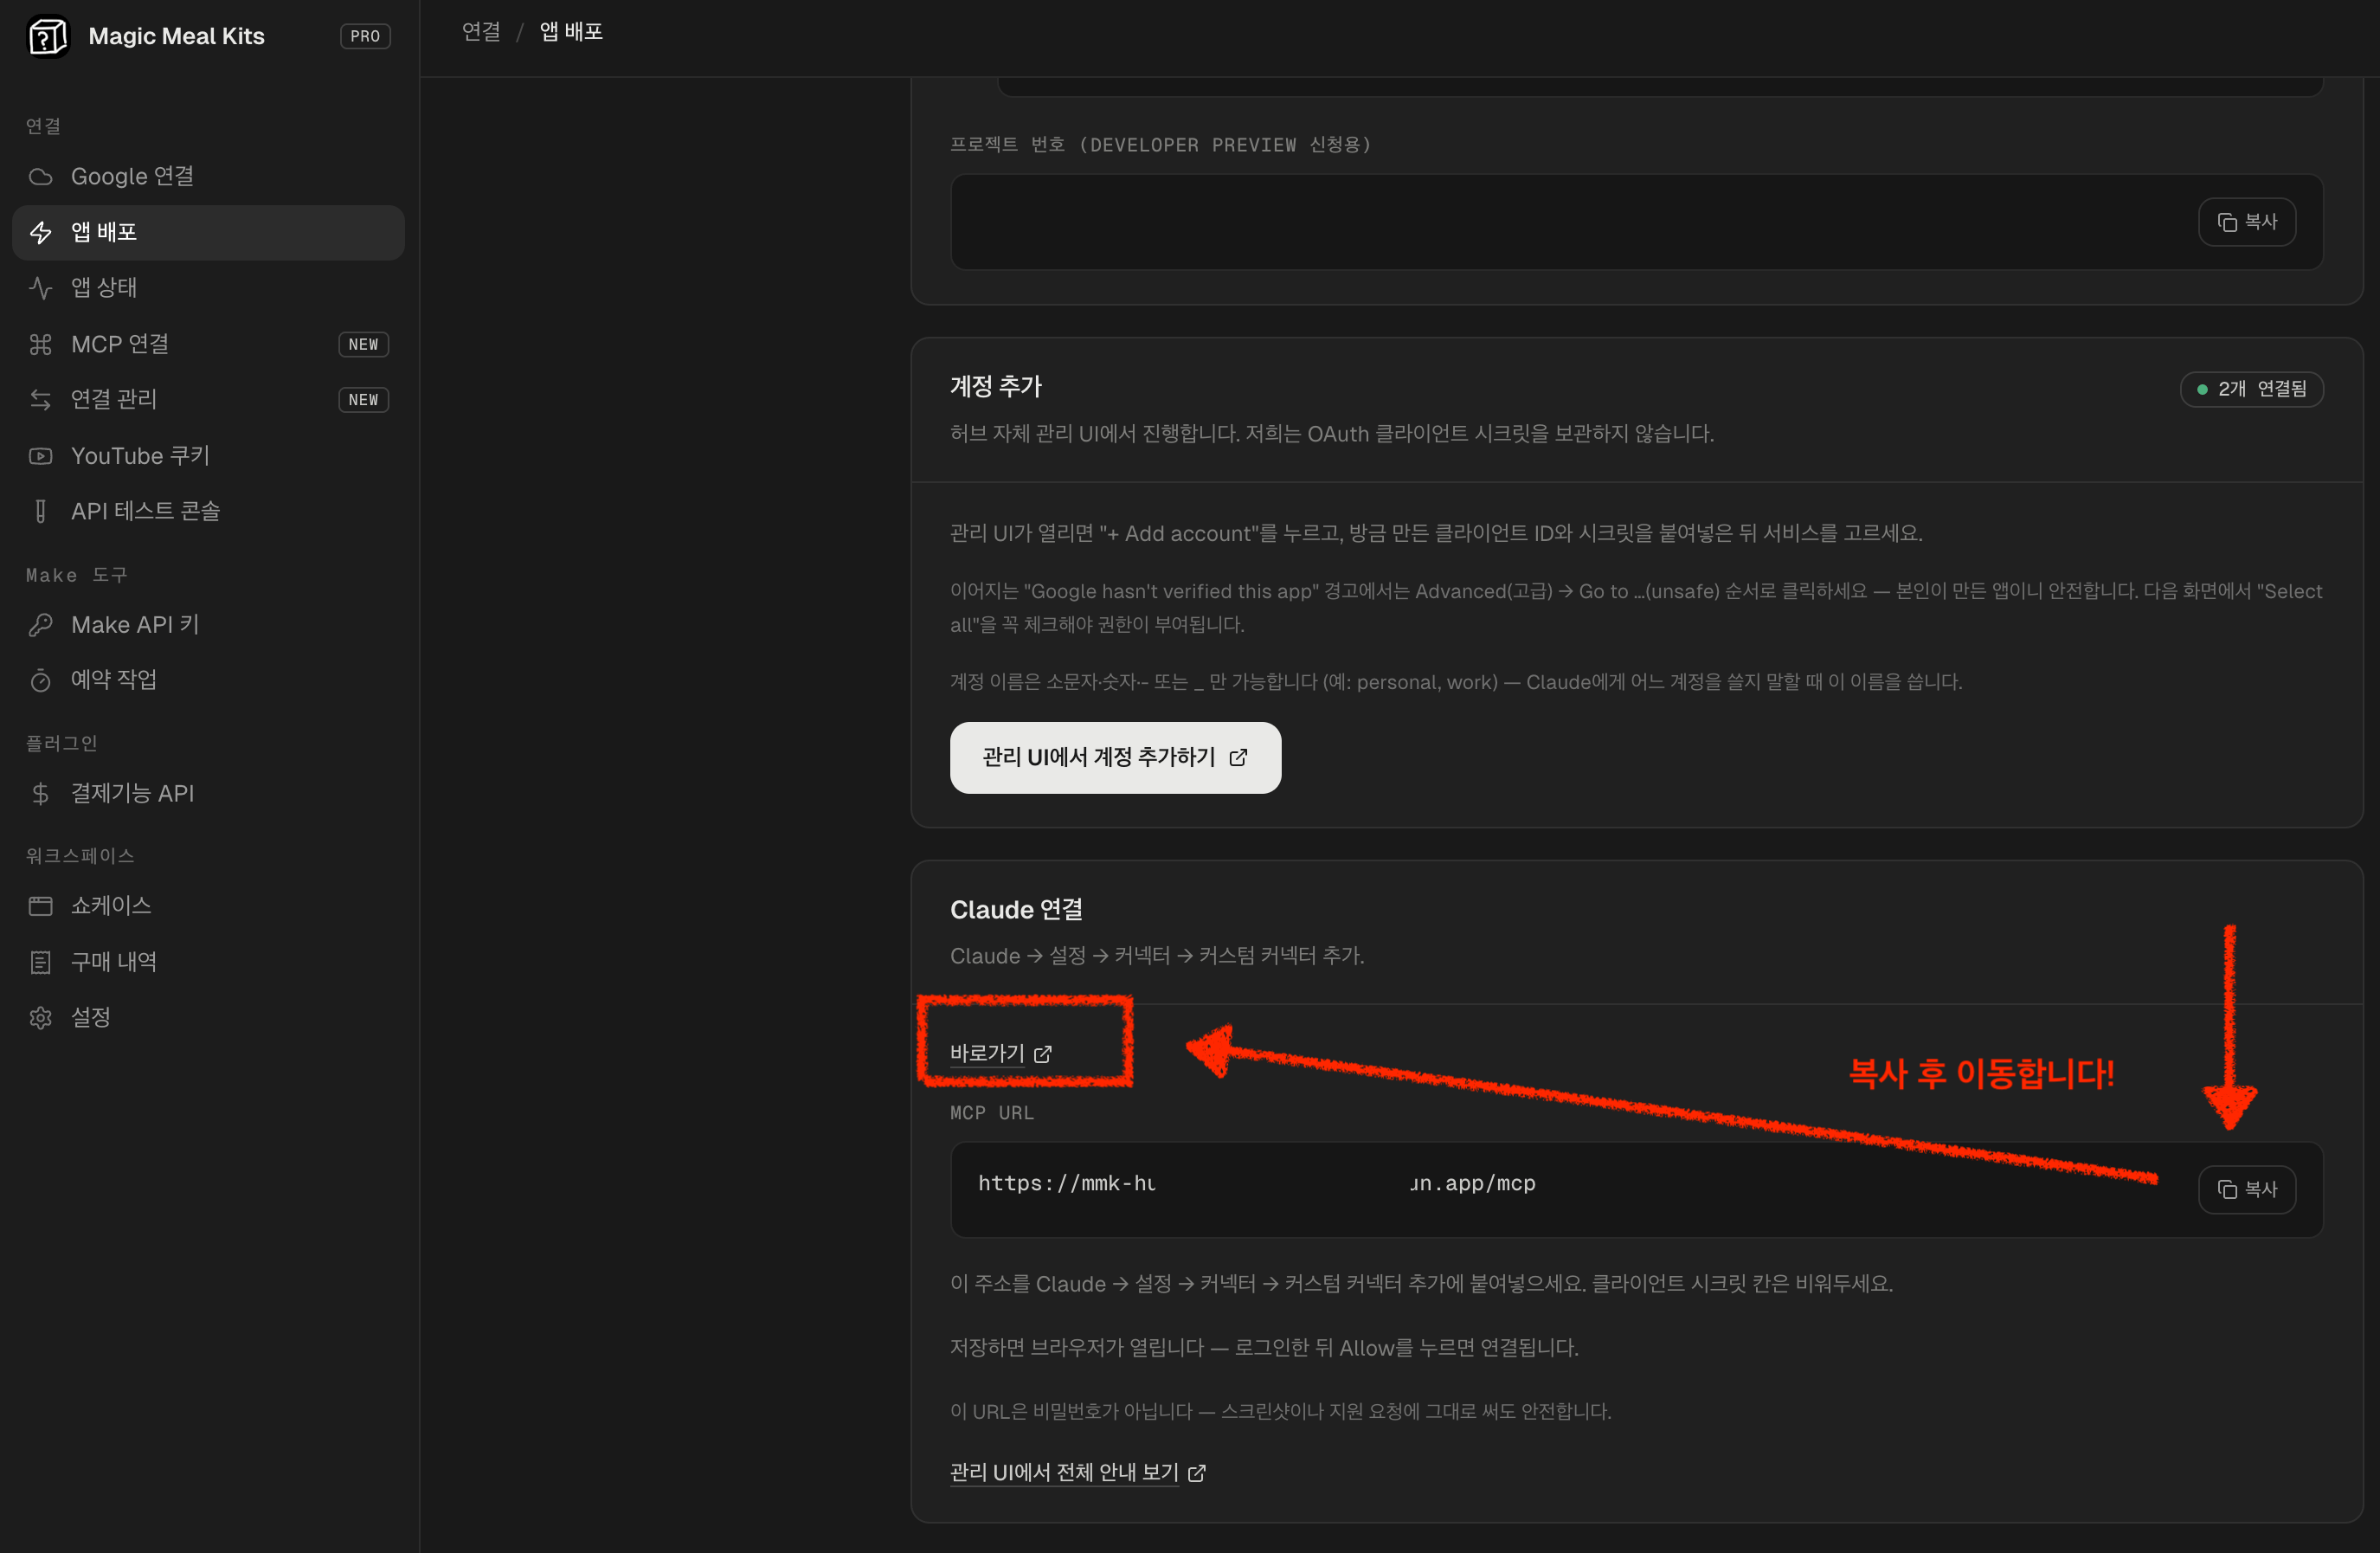
2
Add a custom connector in Claude
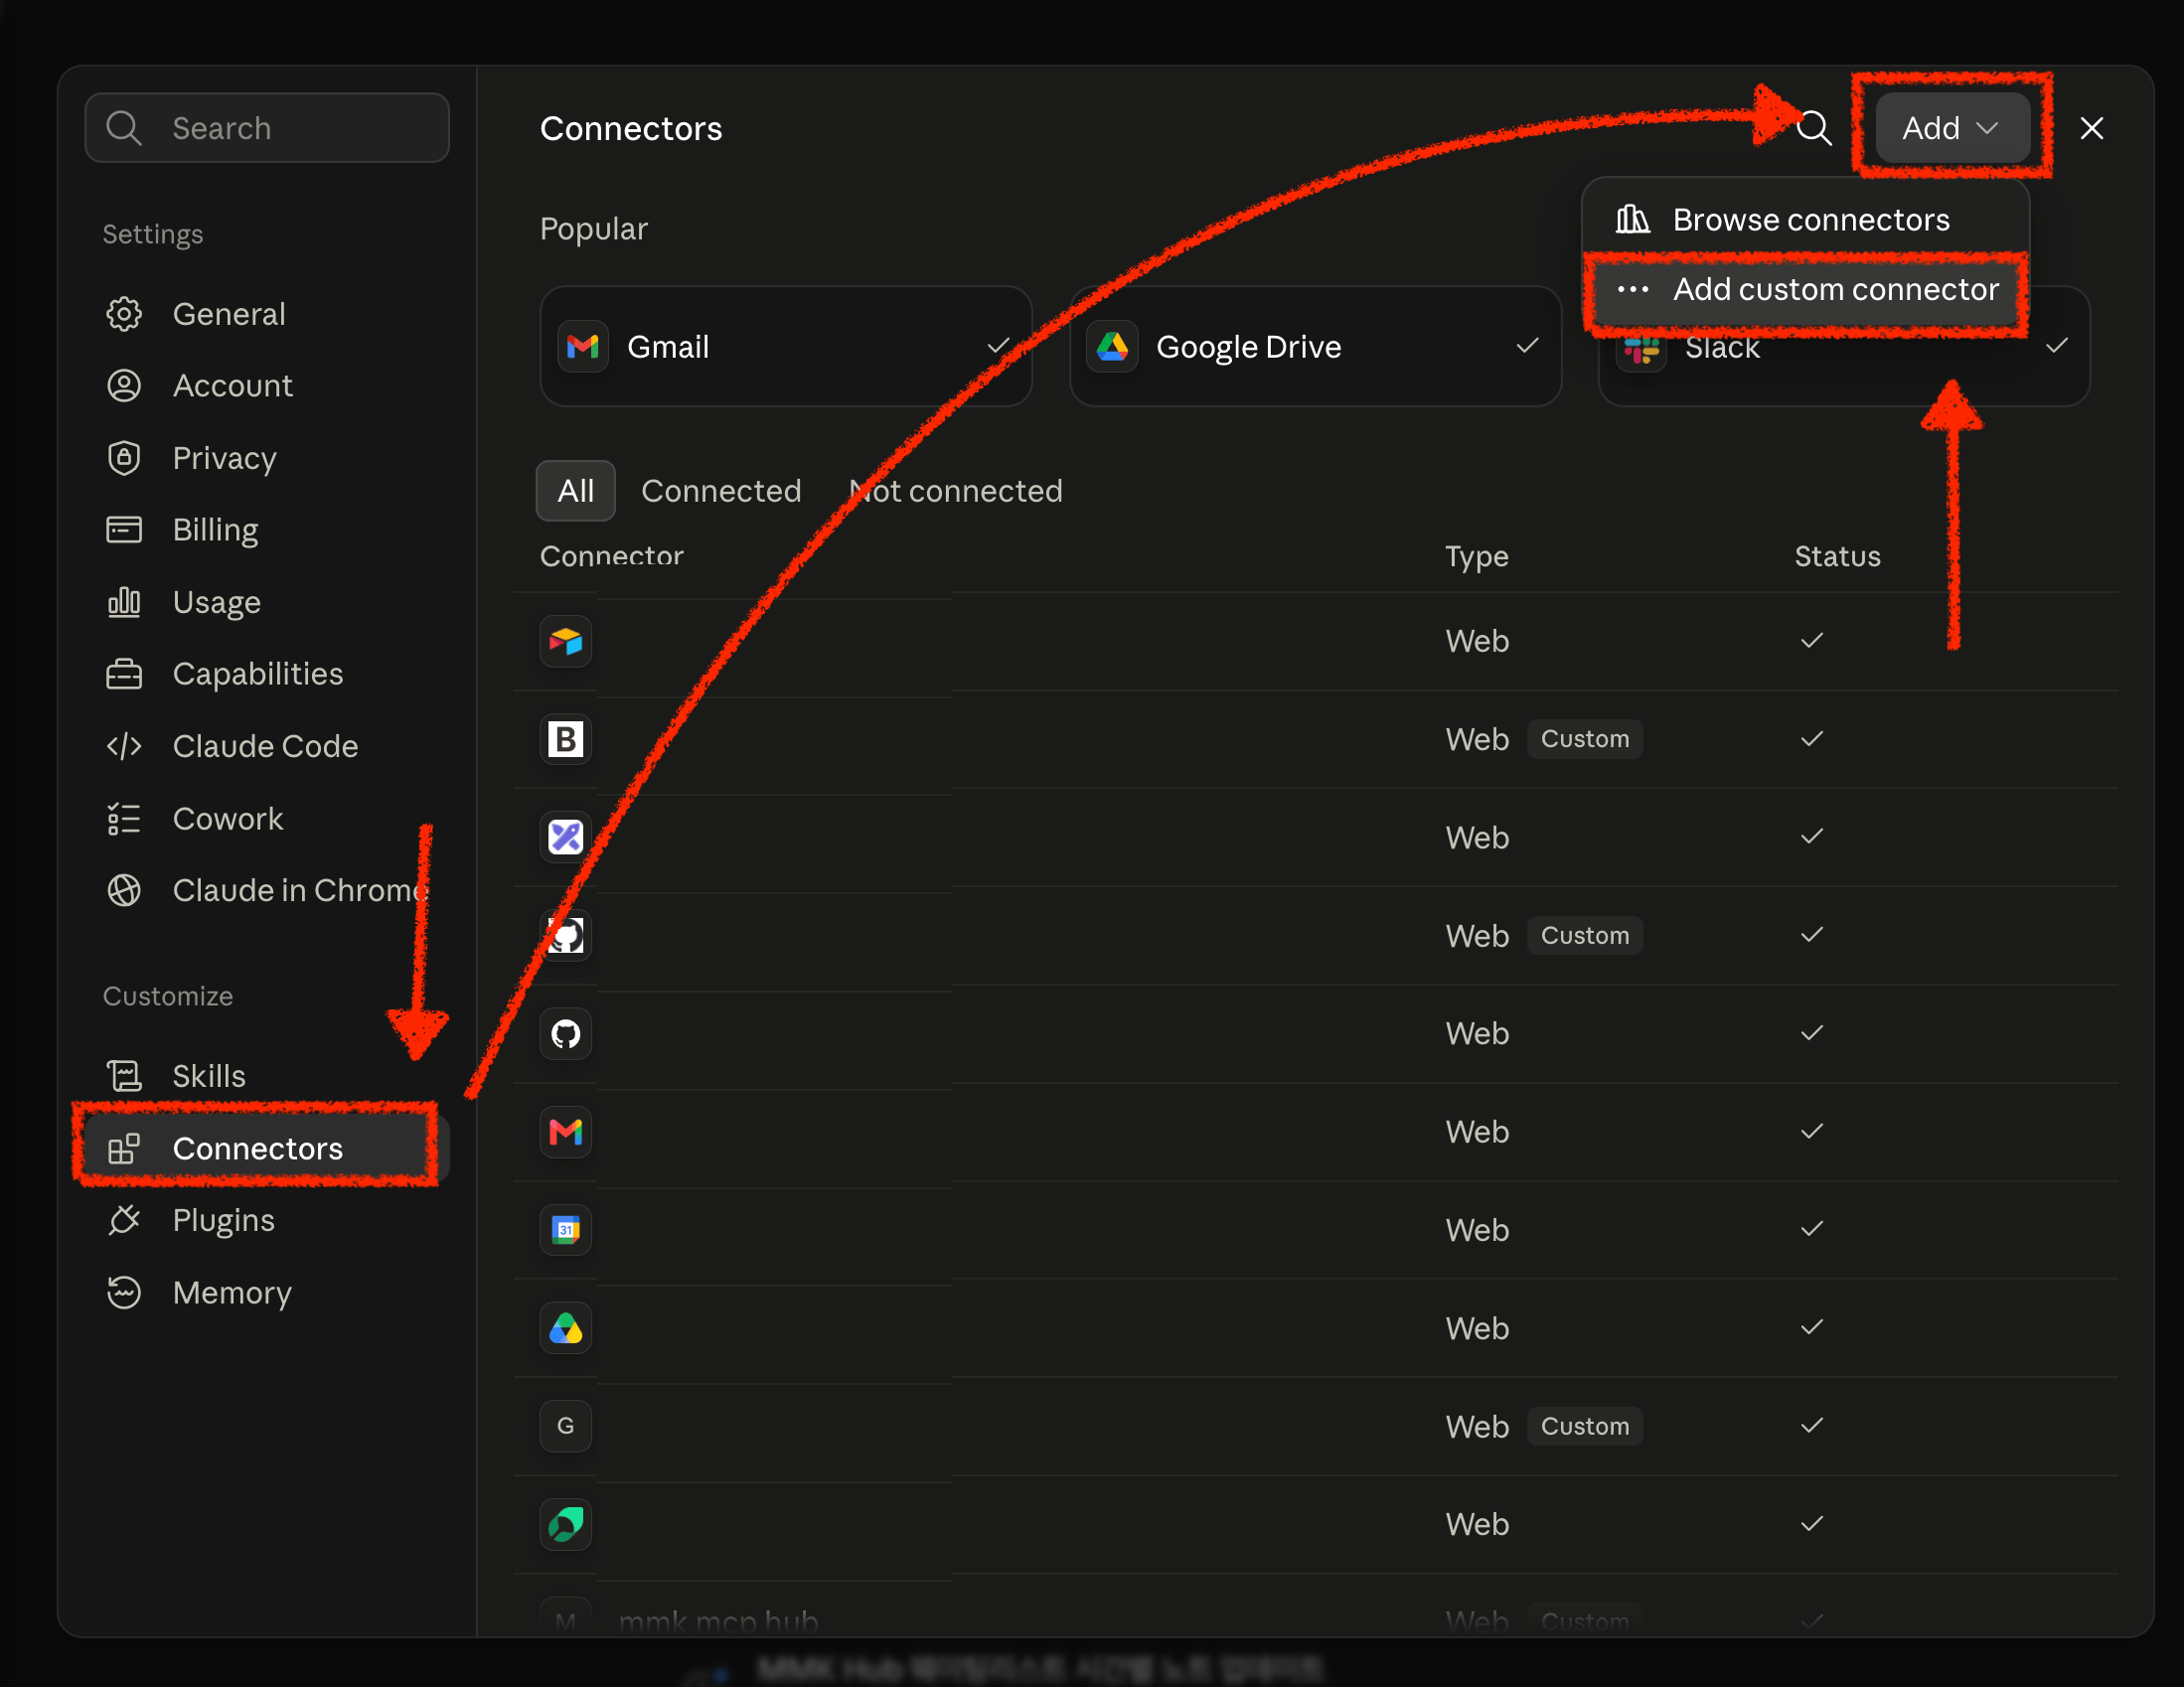
3
Paste the address
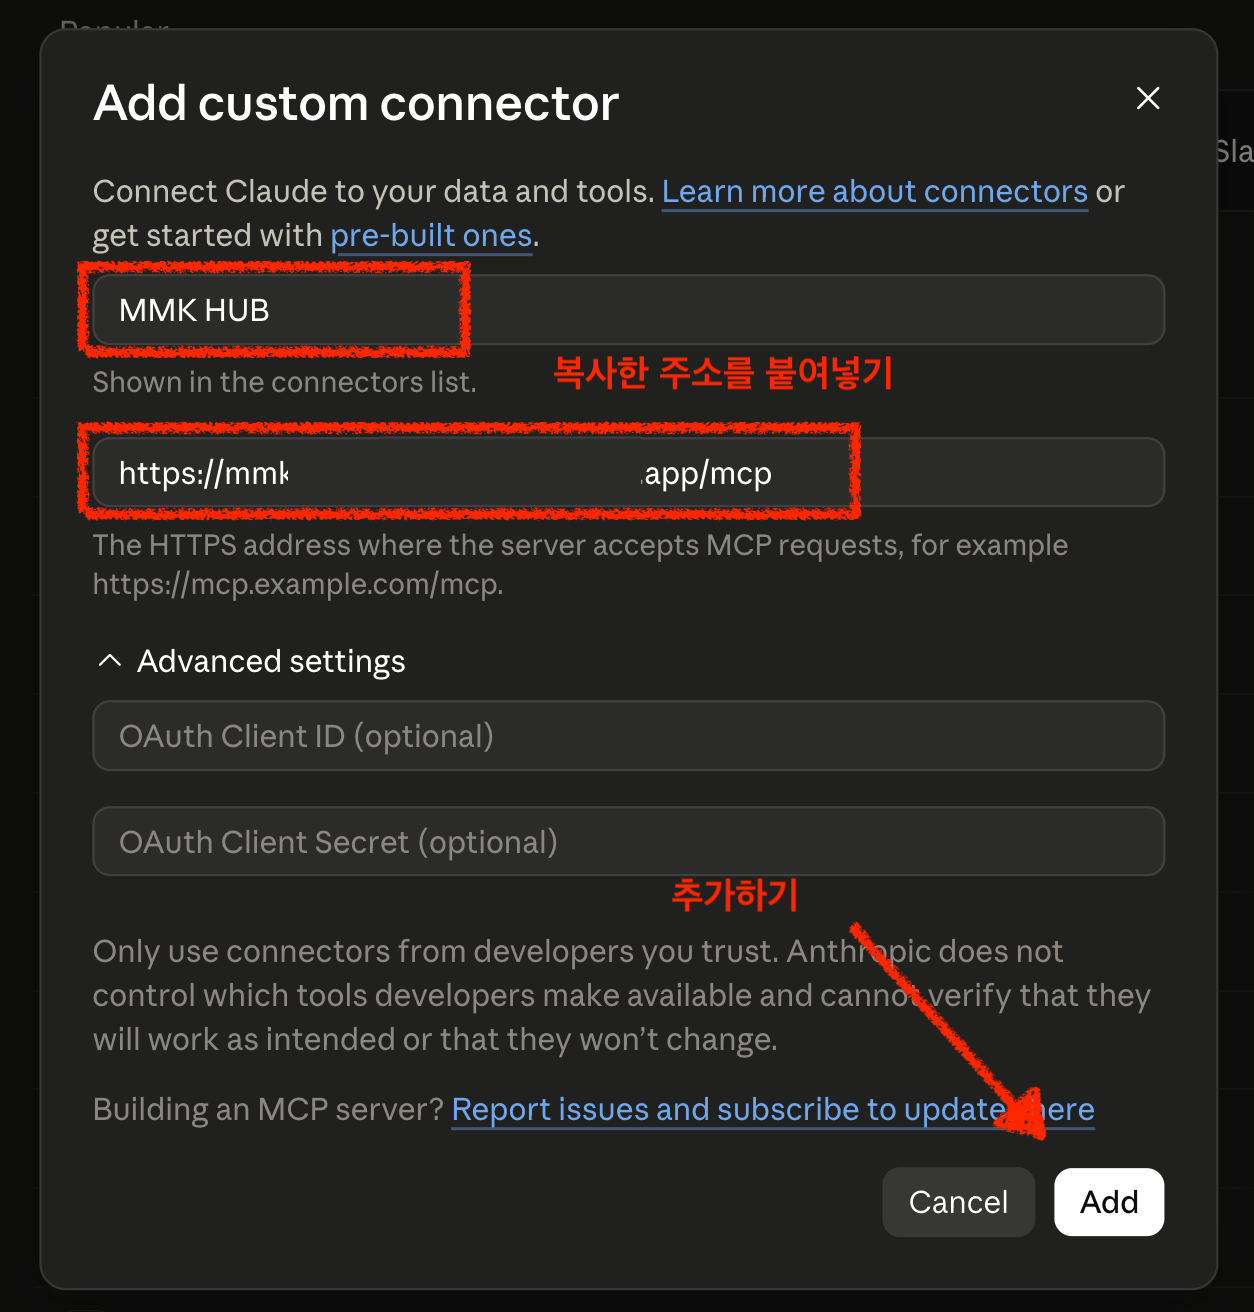
4
Connect
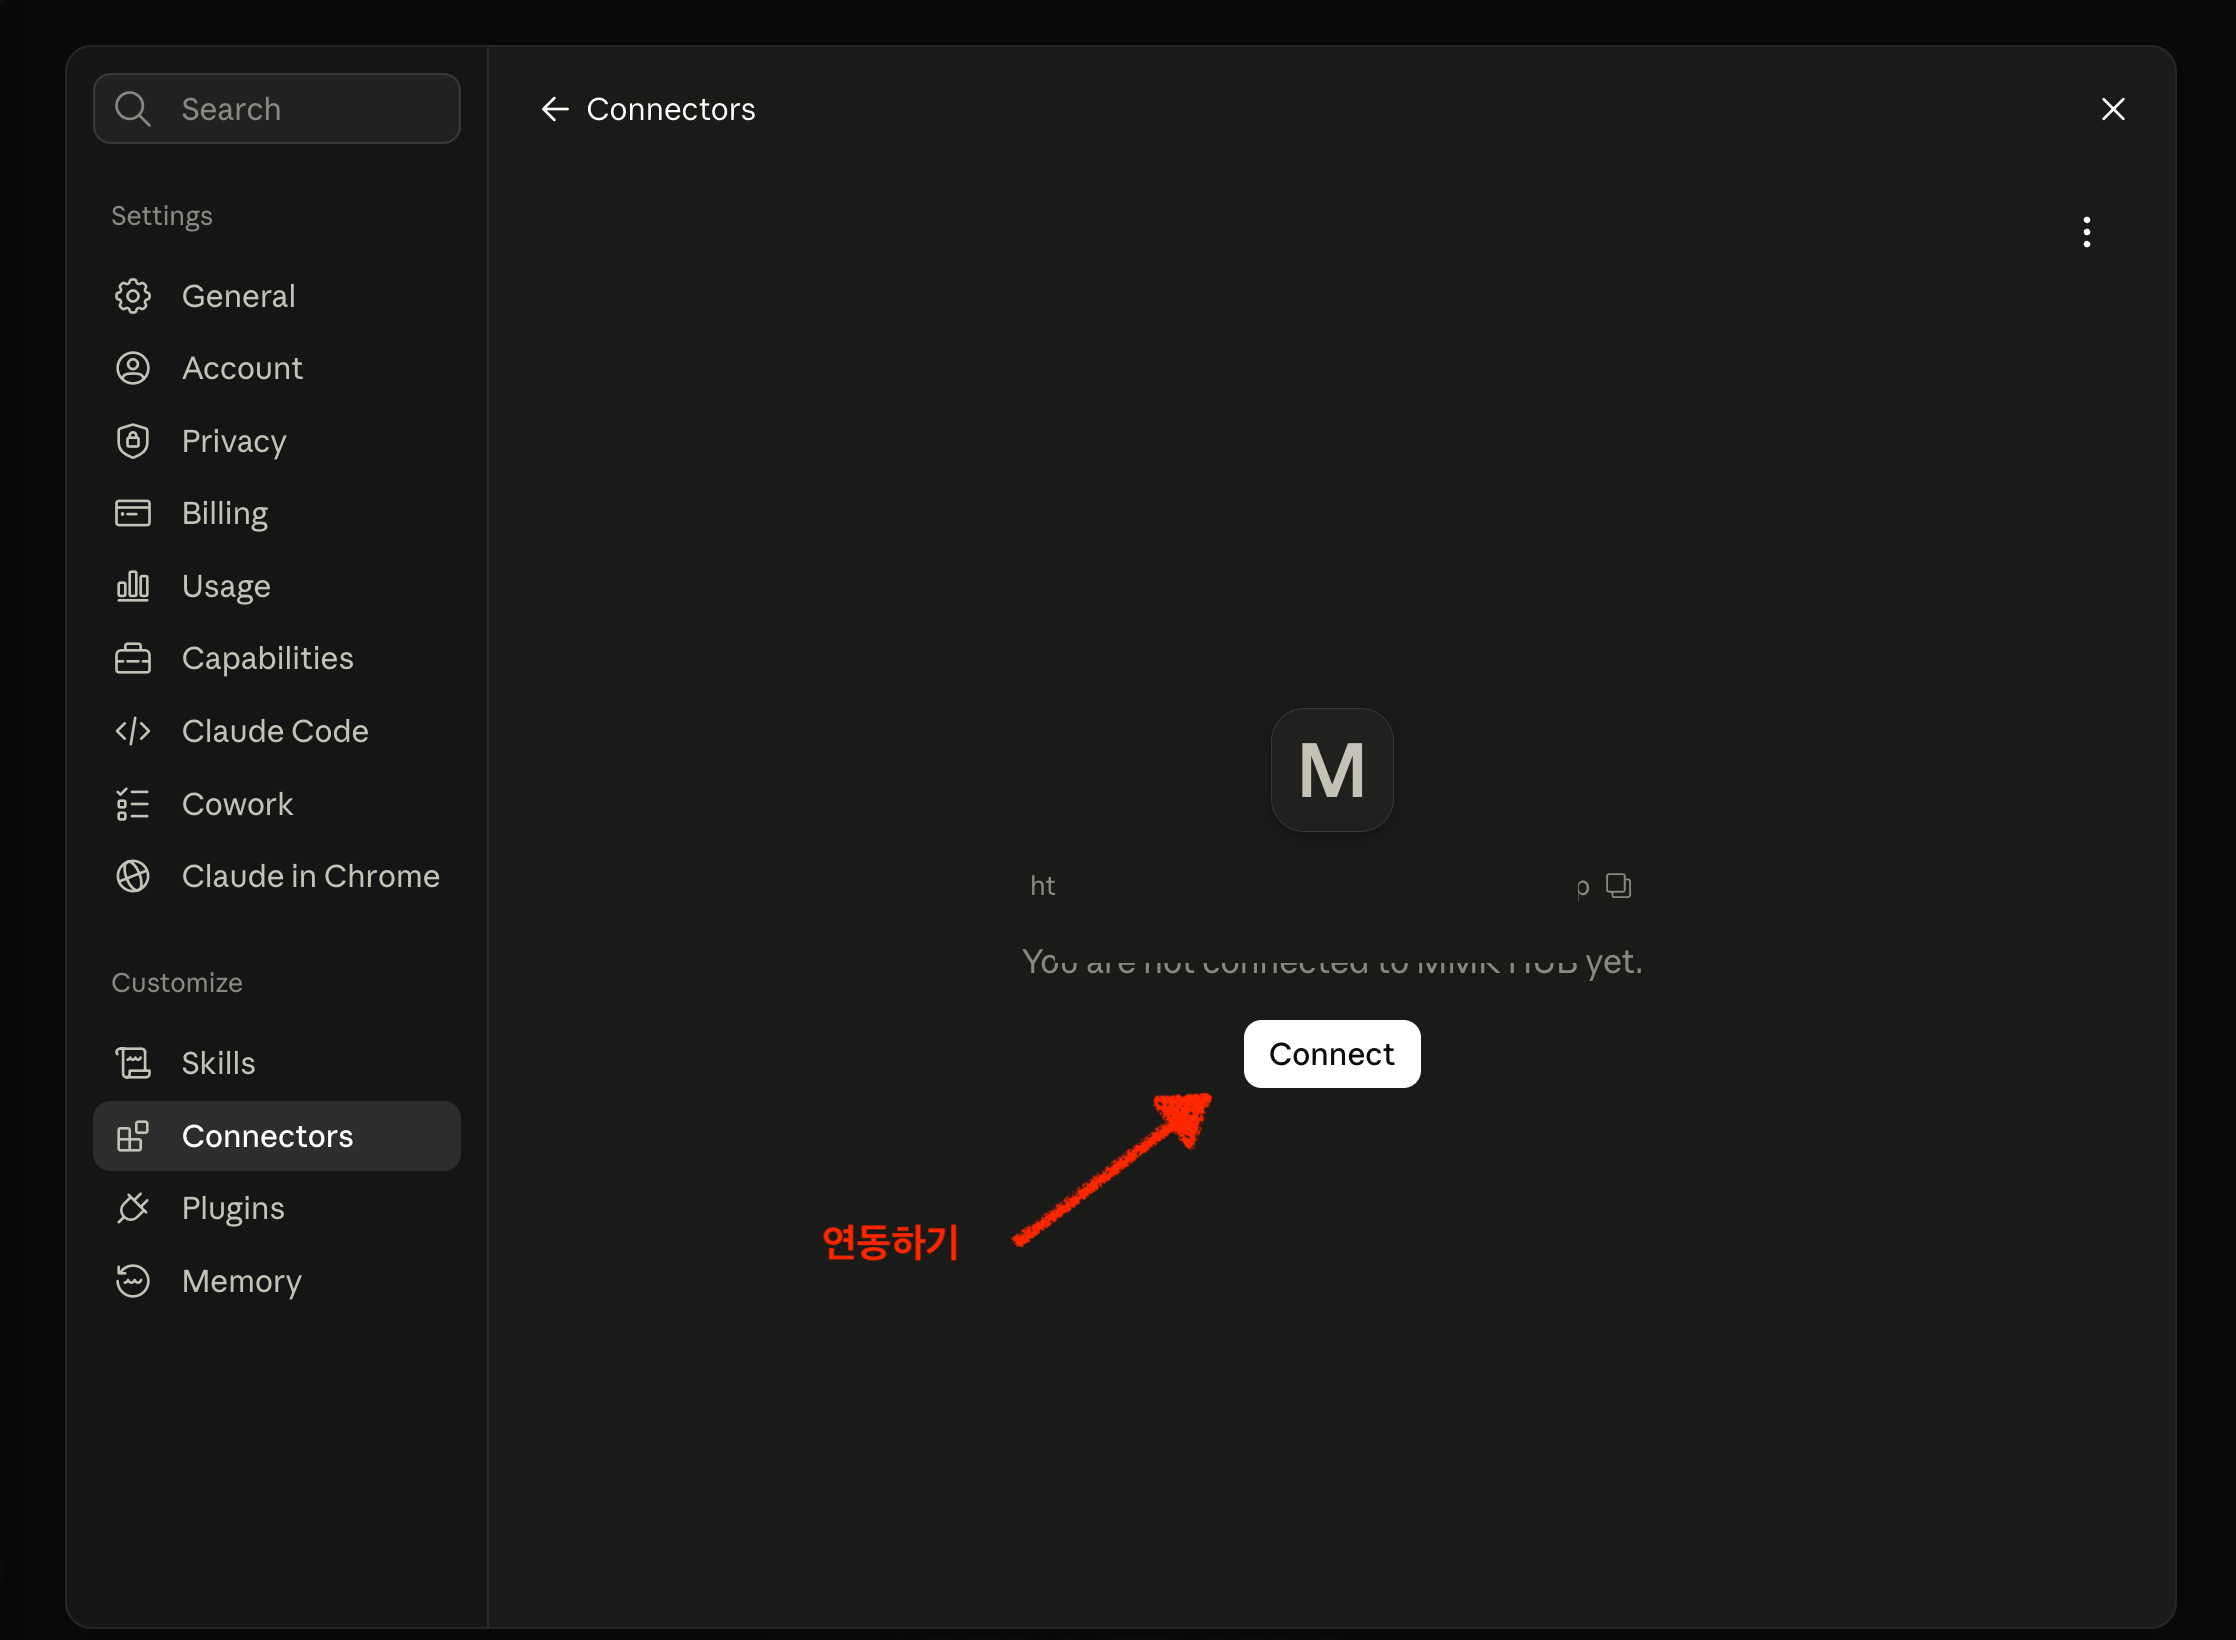
5
Allow it
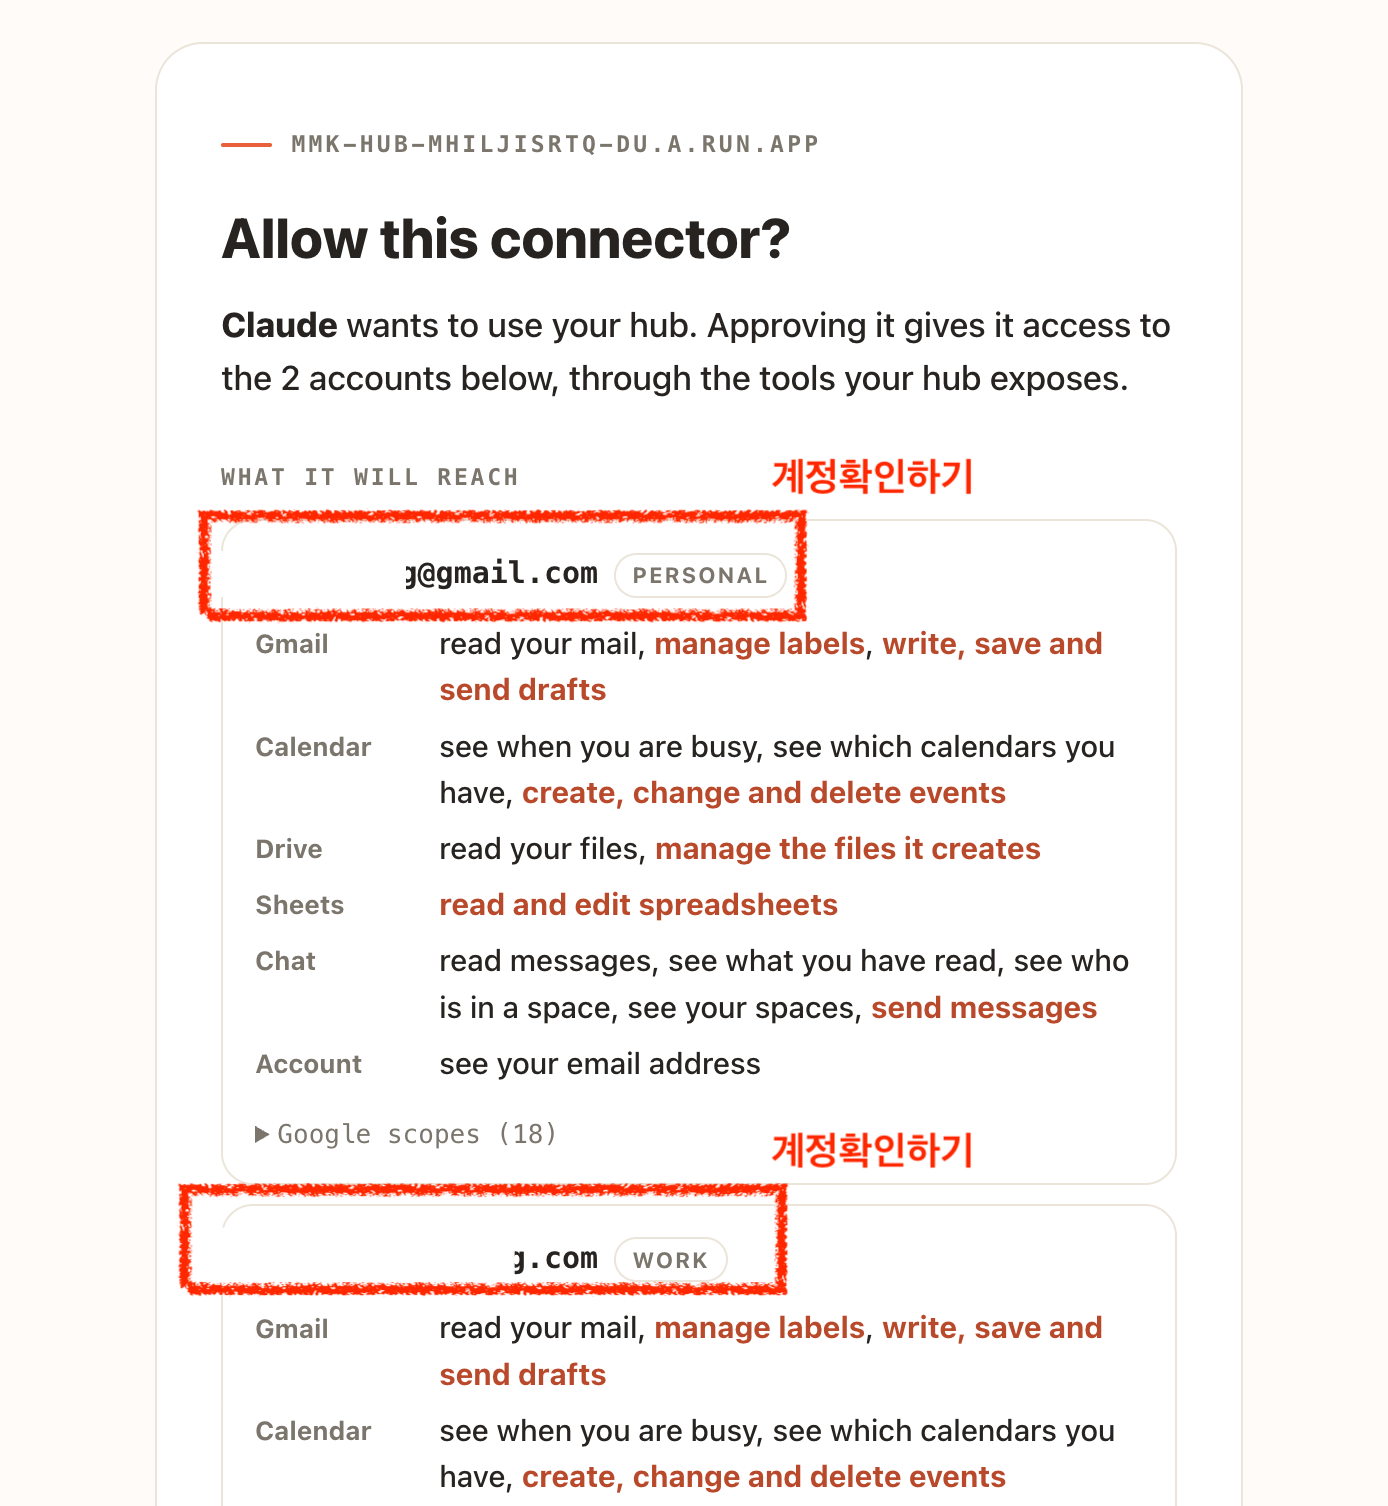
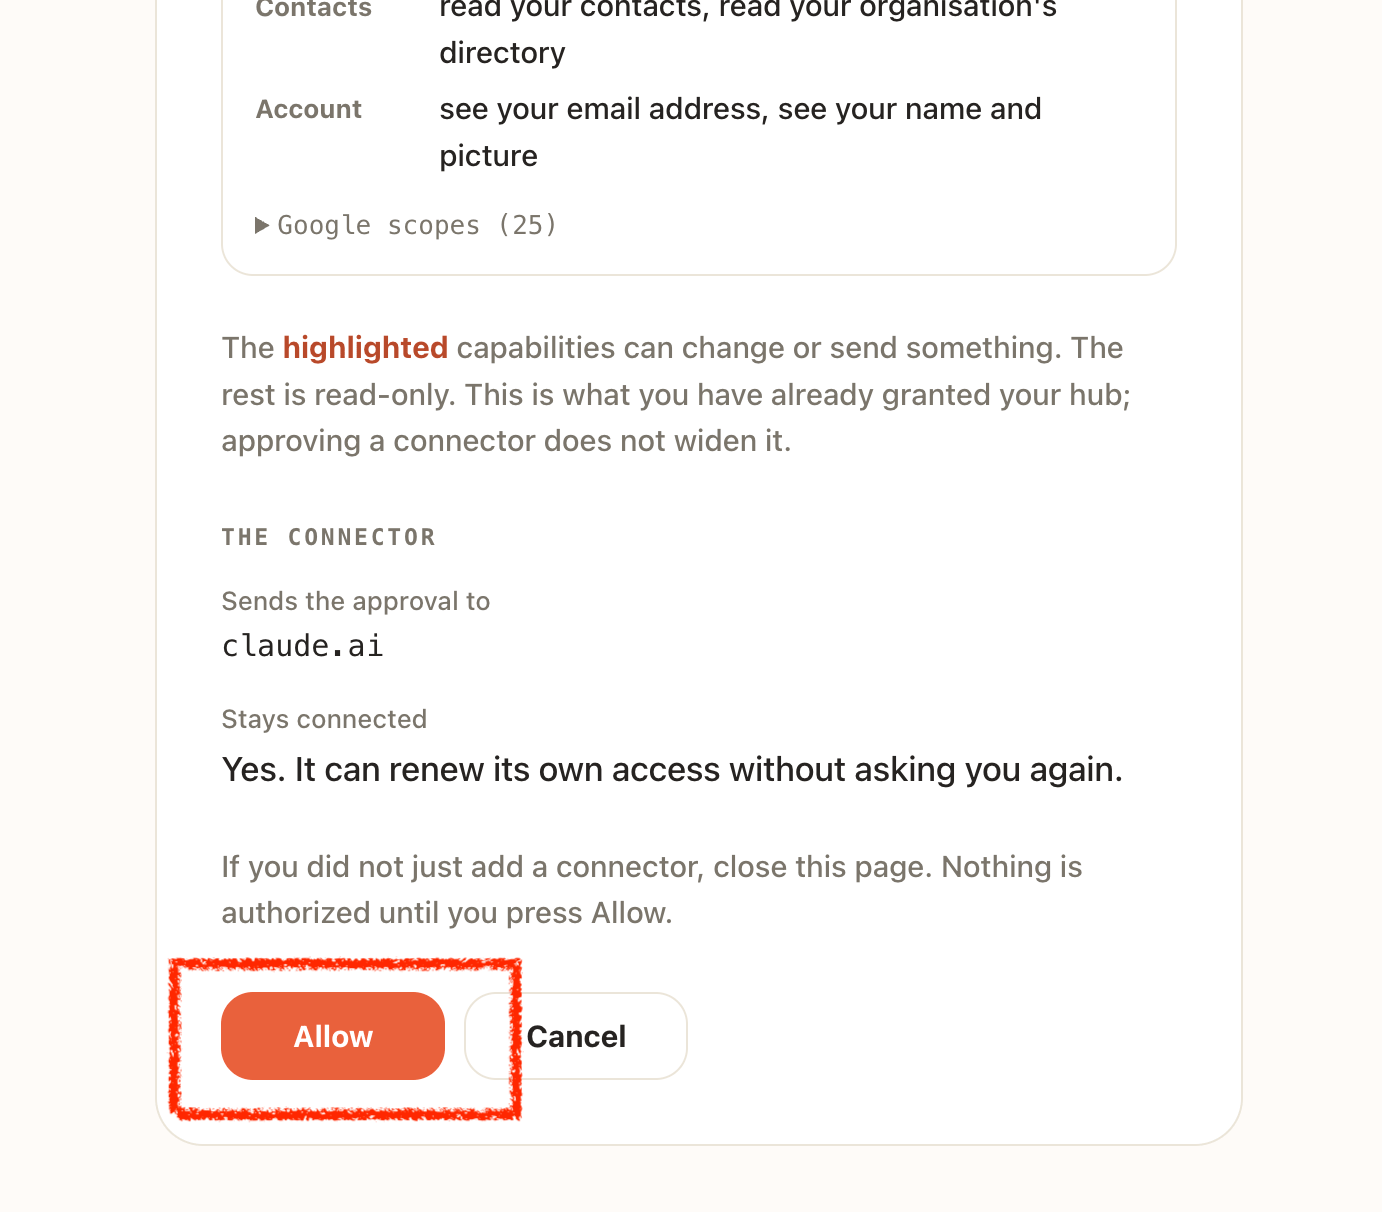
Choose how much Claude can do on its own
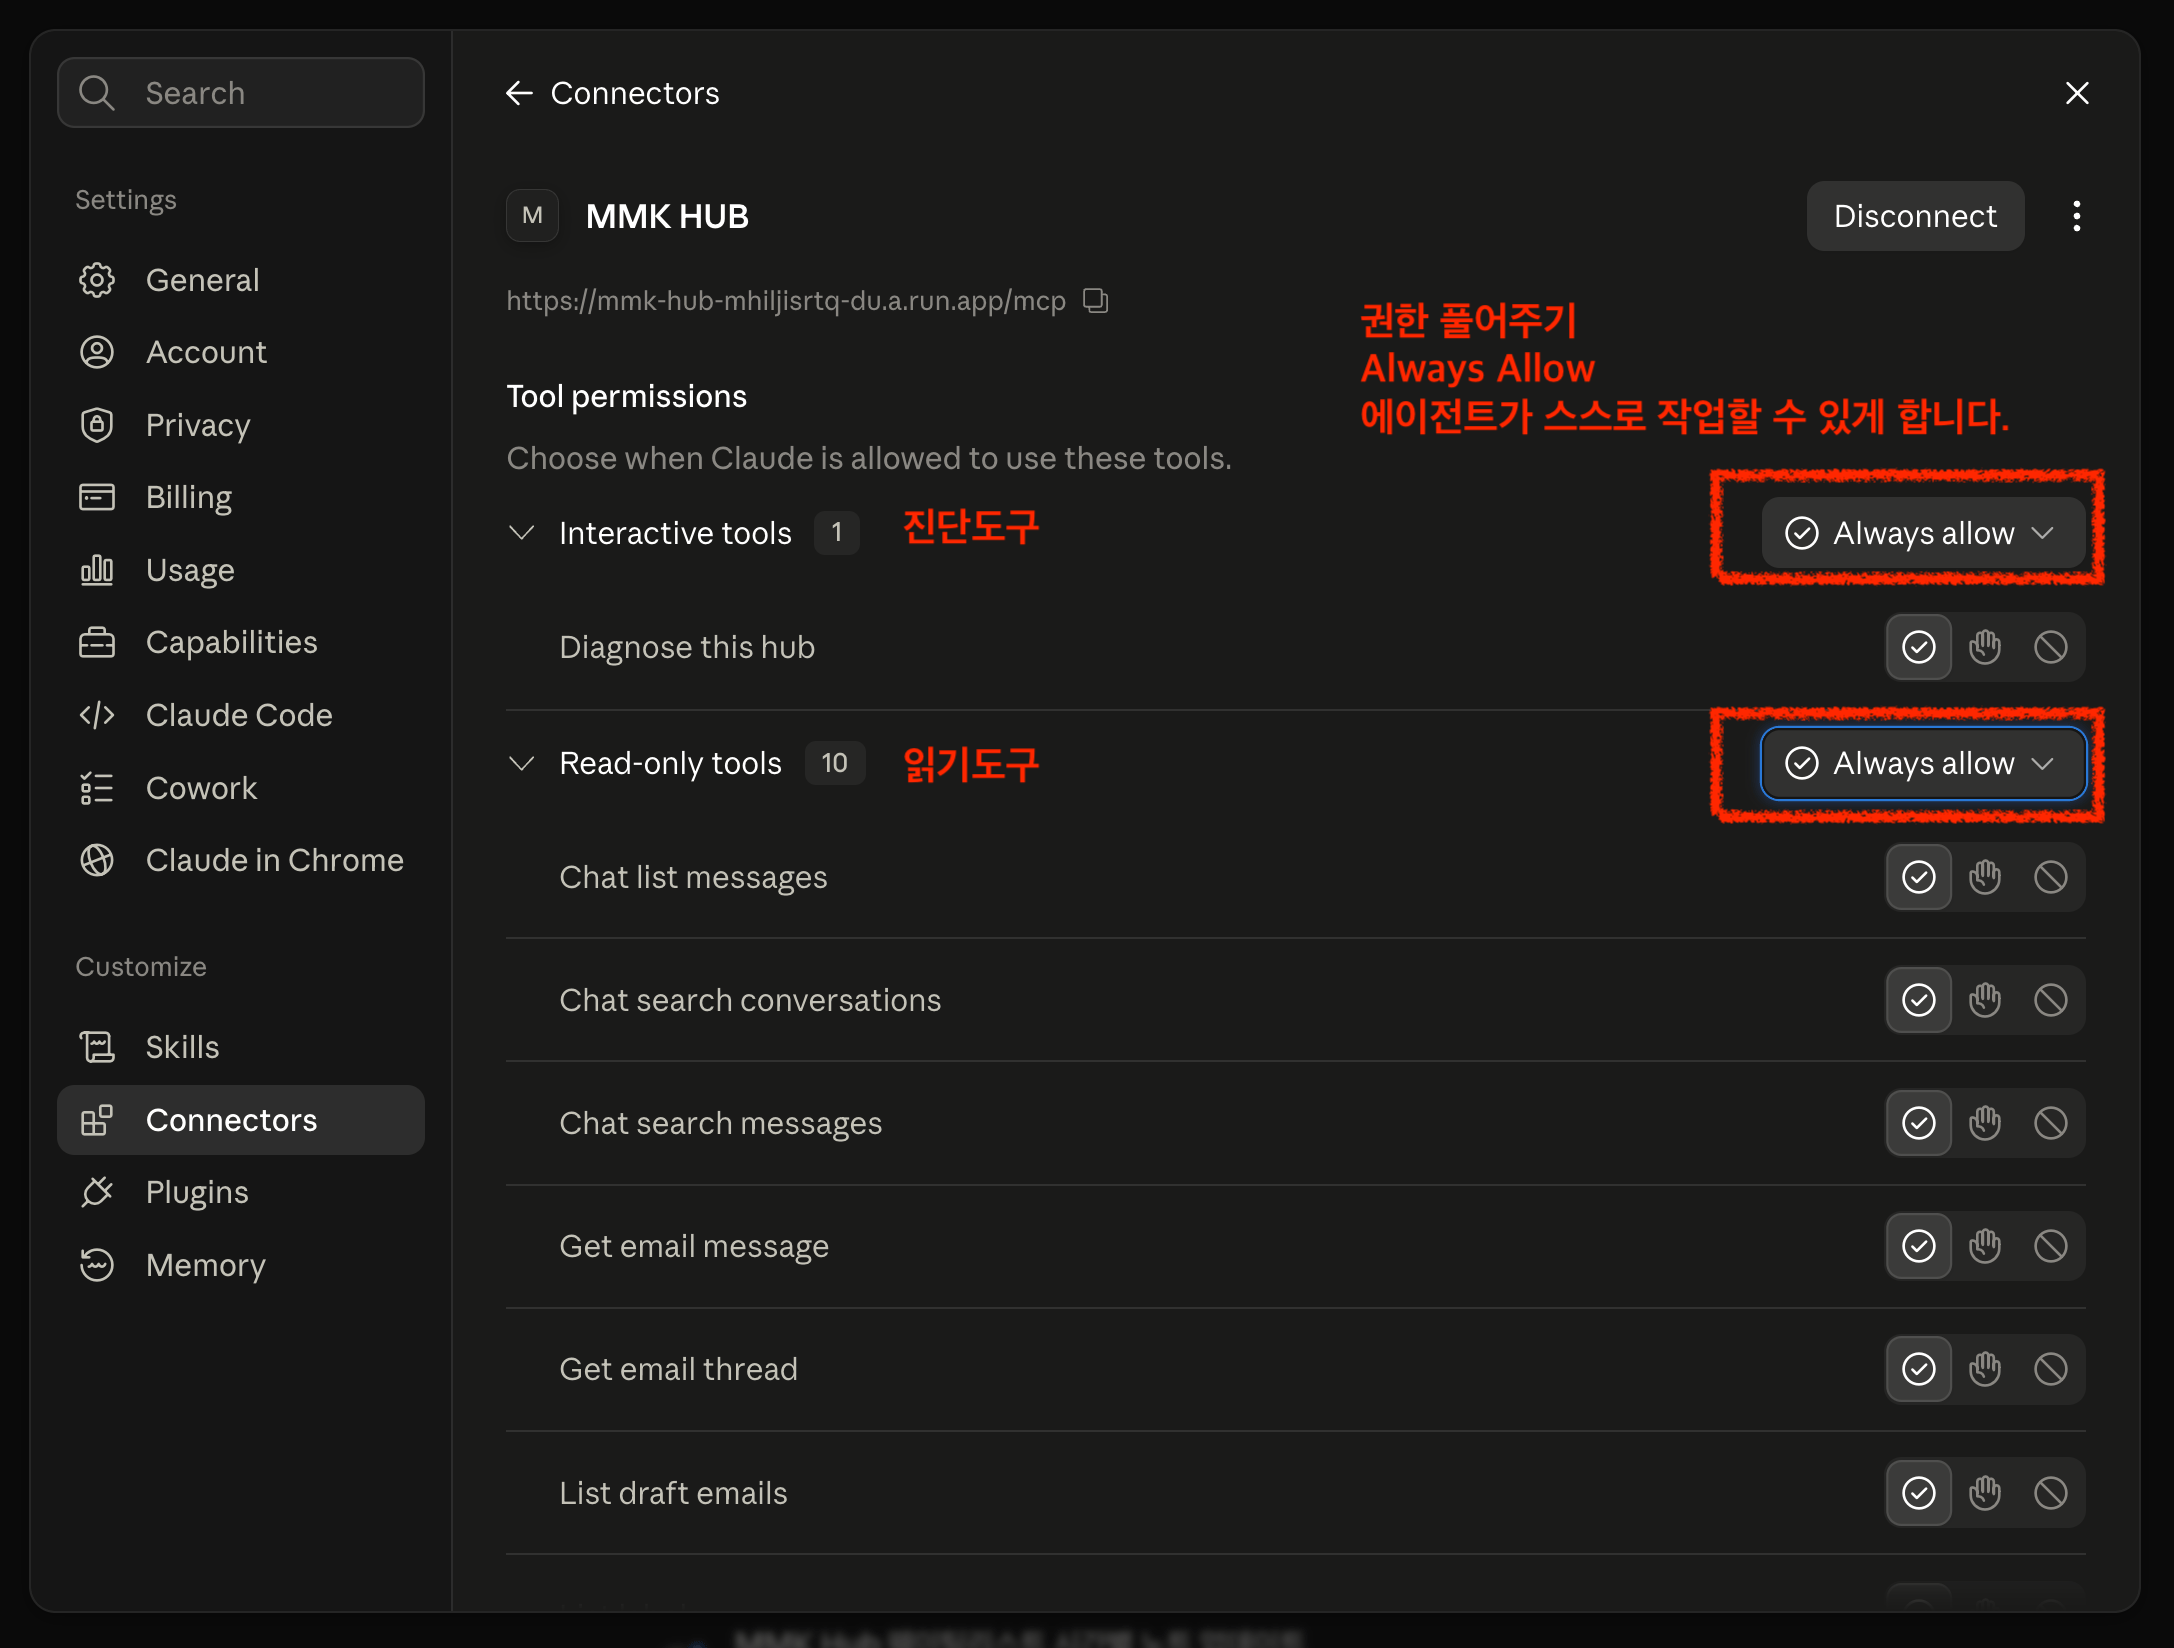
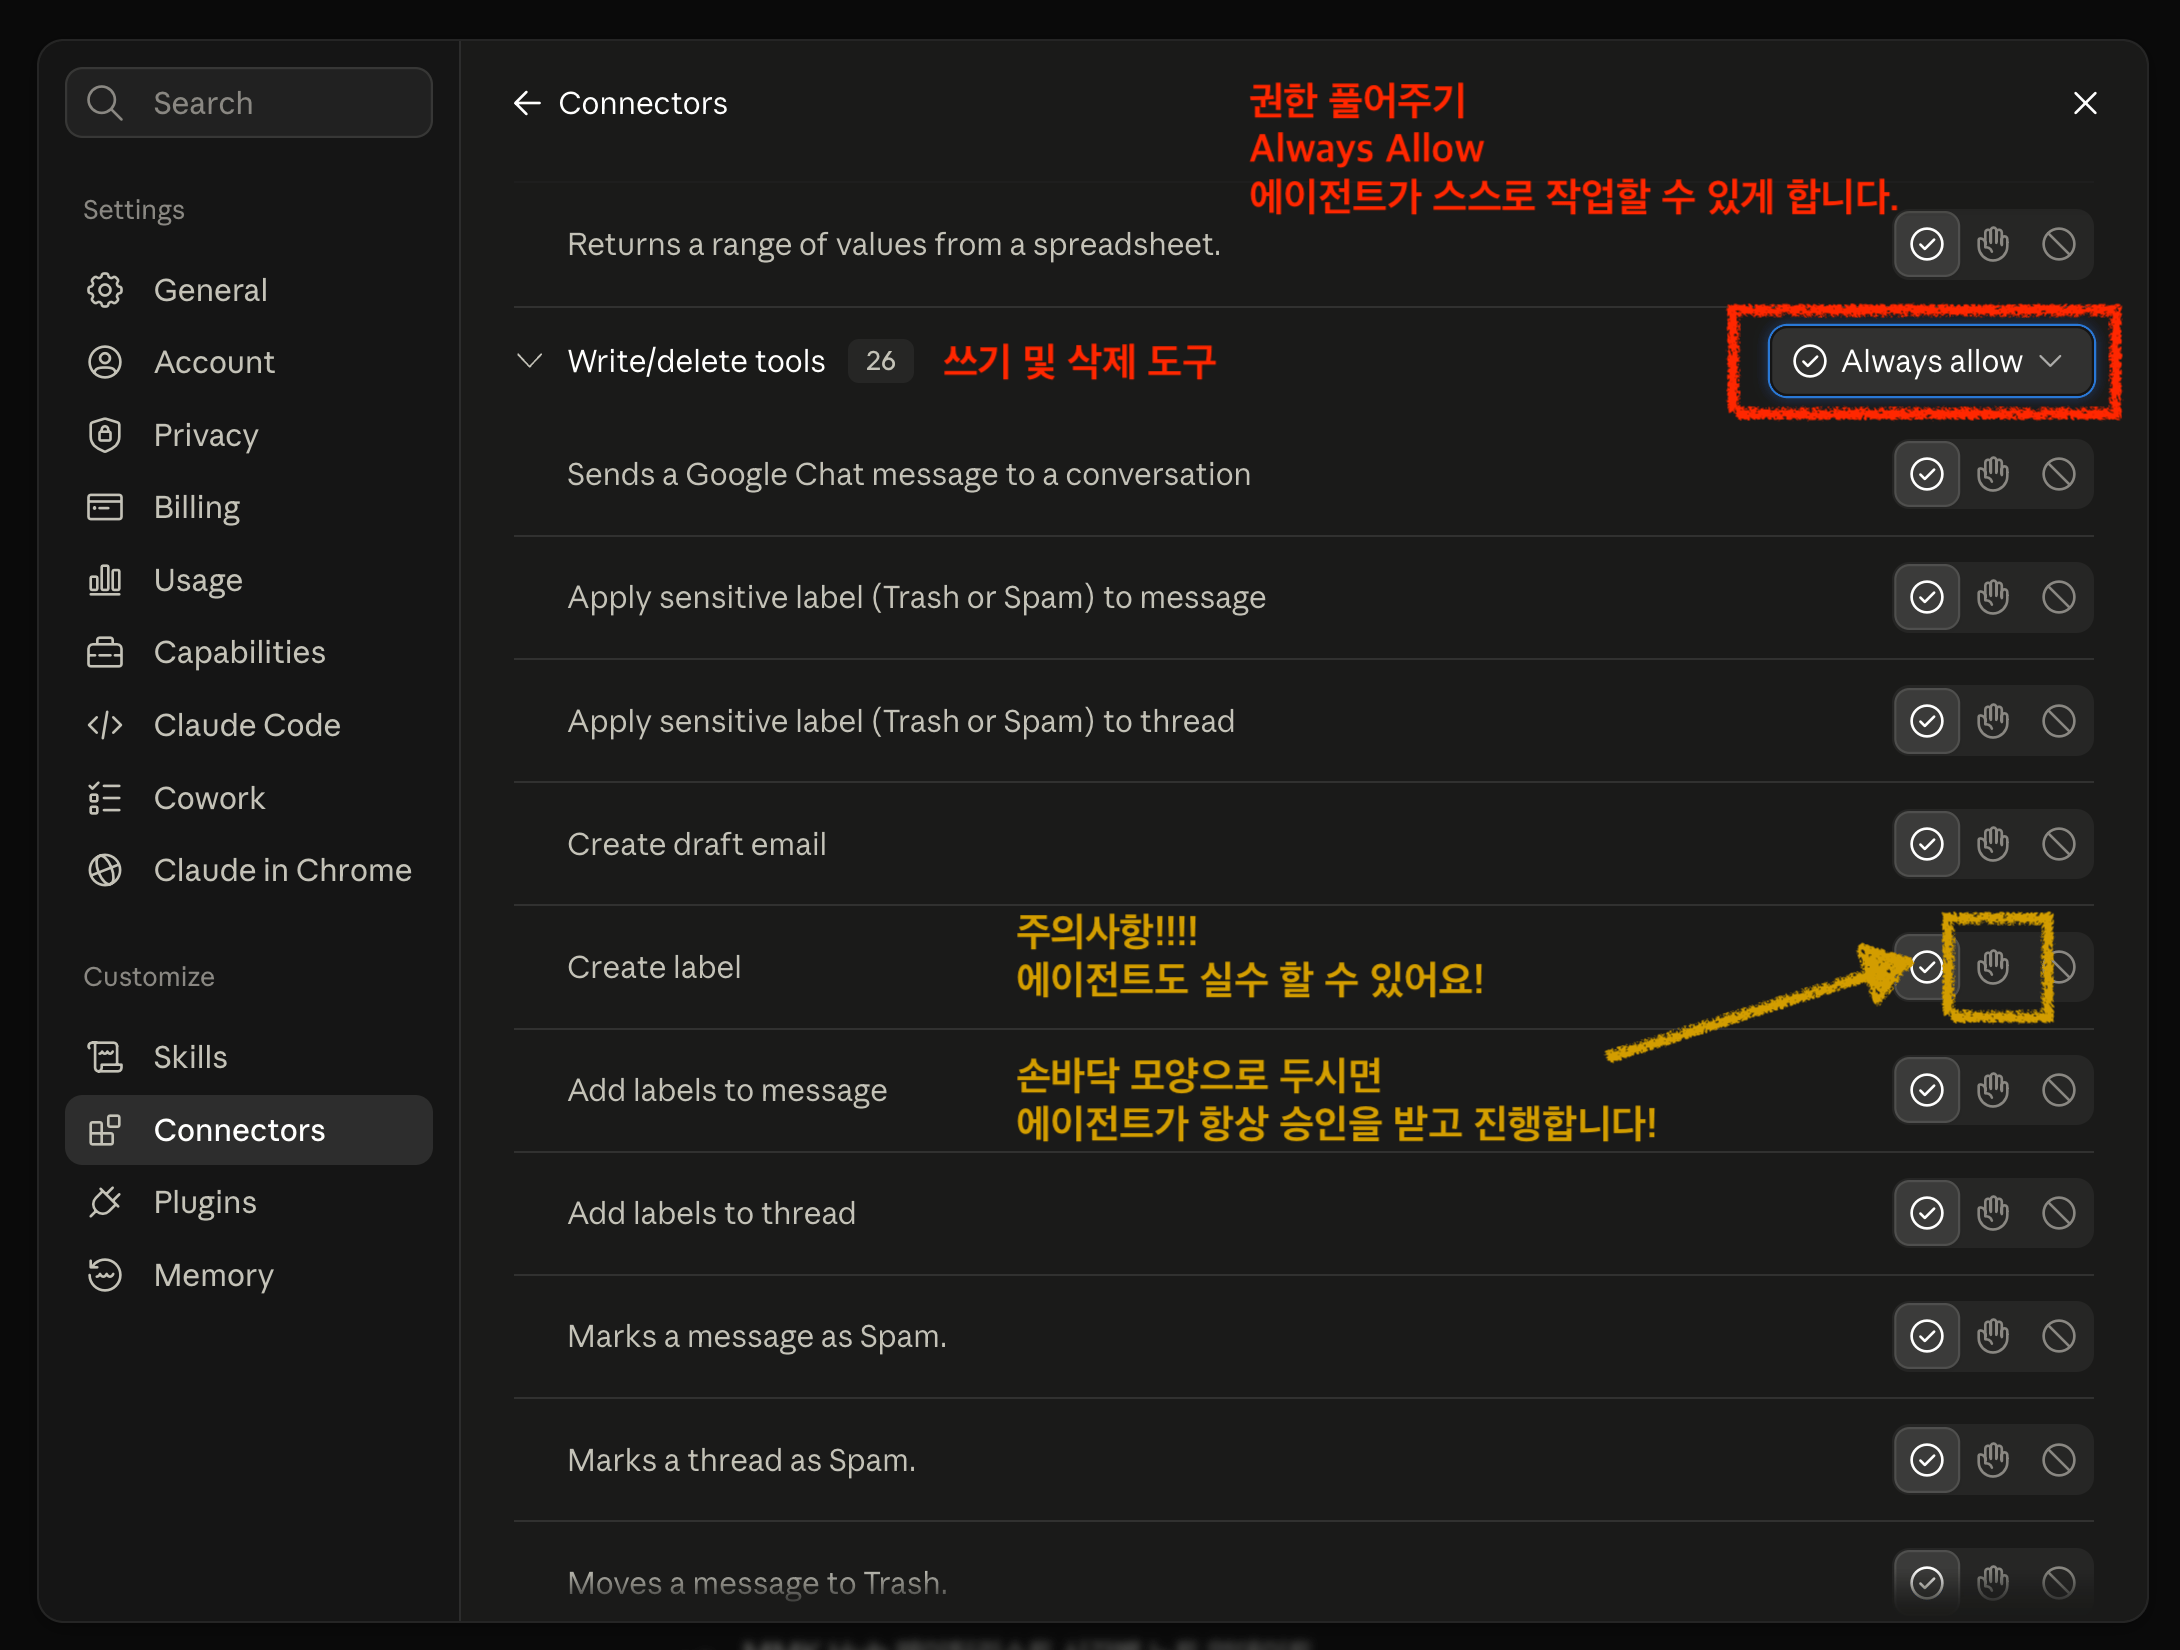
Once connected, Claude’s Connector settings for the hub carry a Tool permissions panel. Every tool the hub exposes falls into one of three groups, and each group can be set independently to Needs approval, Always allow, or Never allow.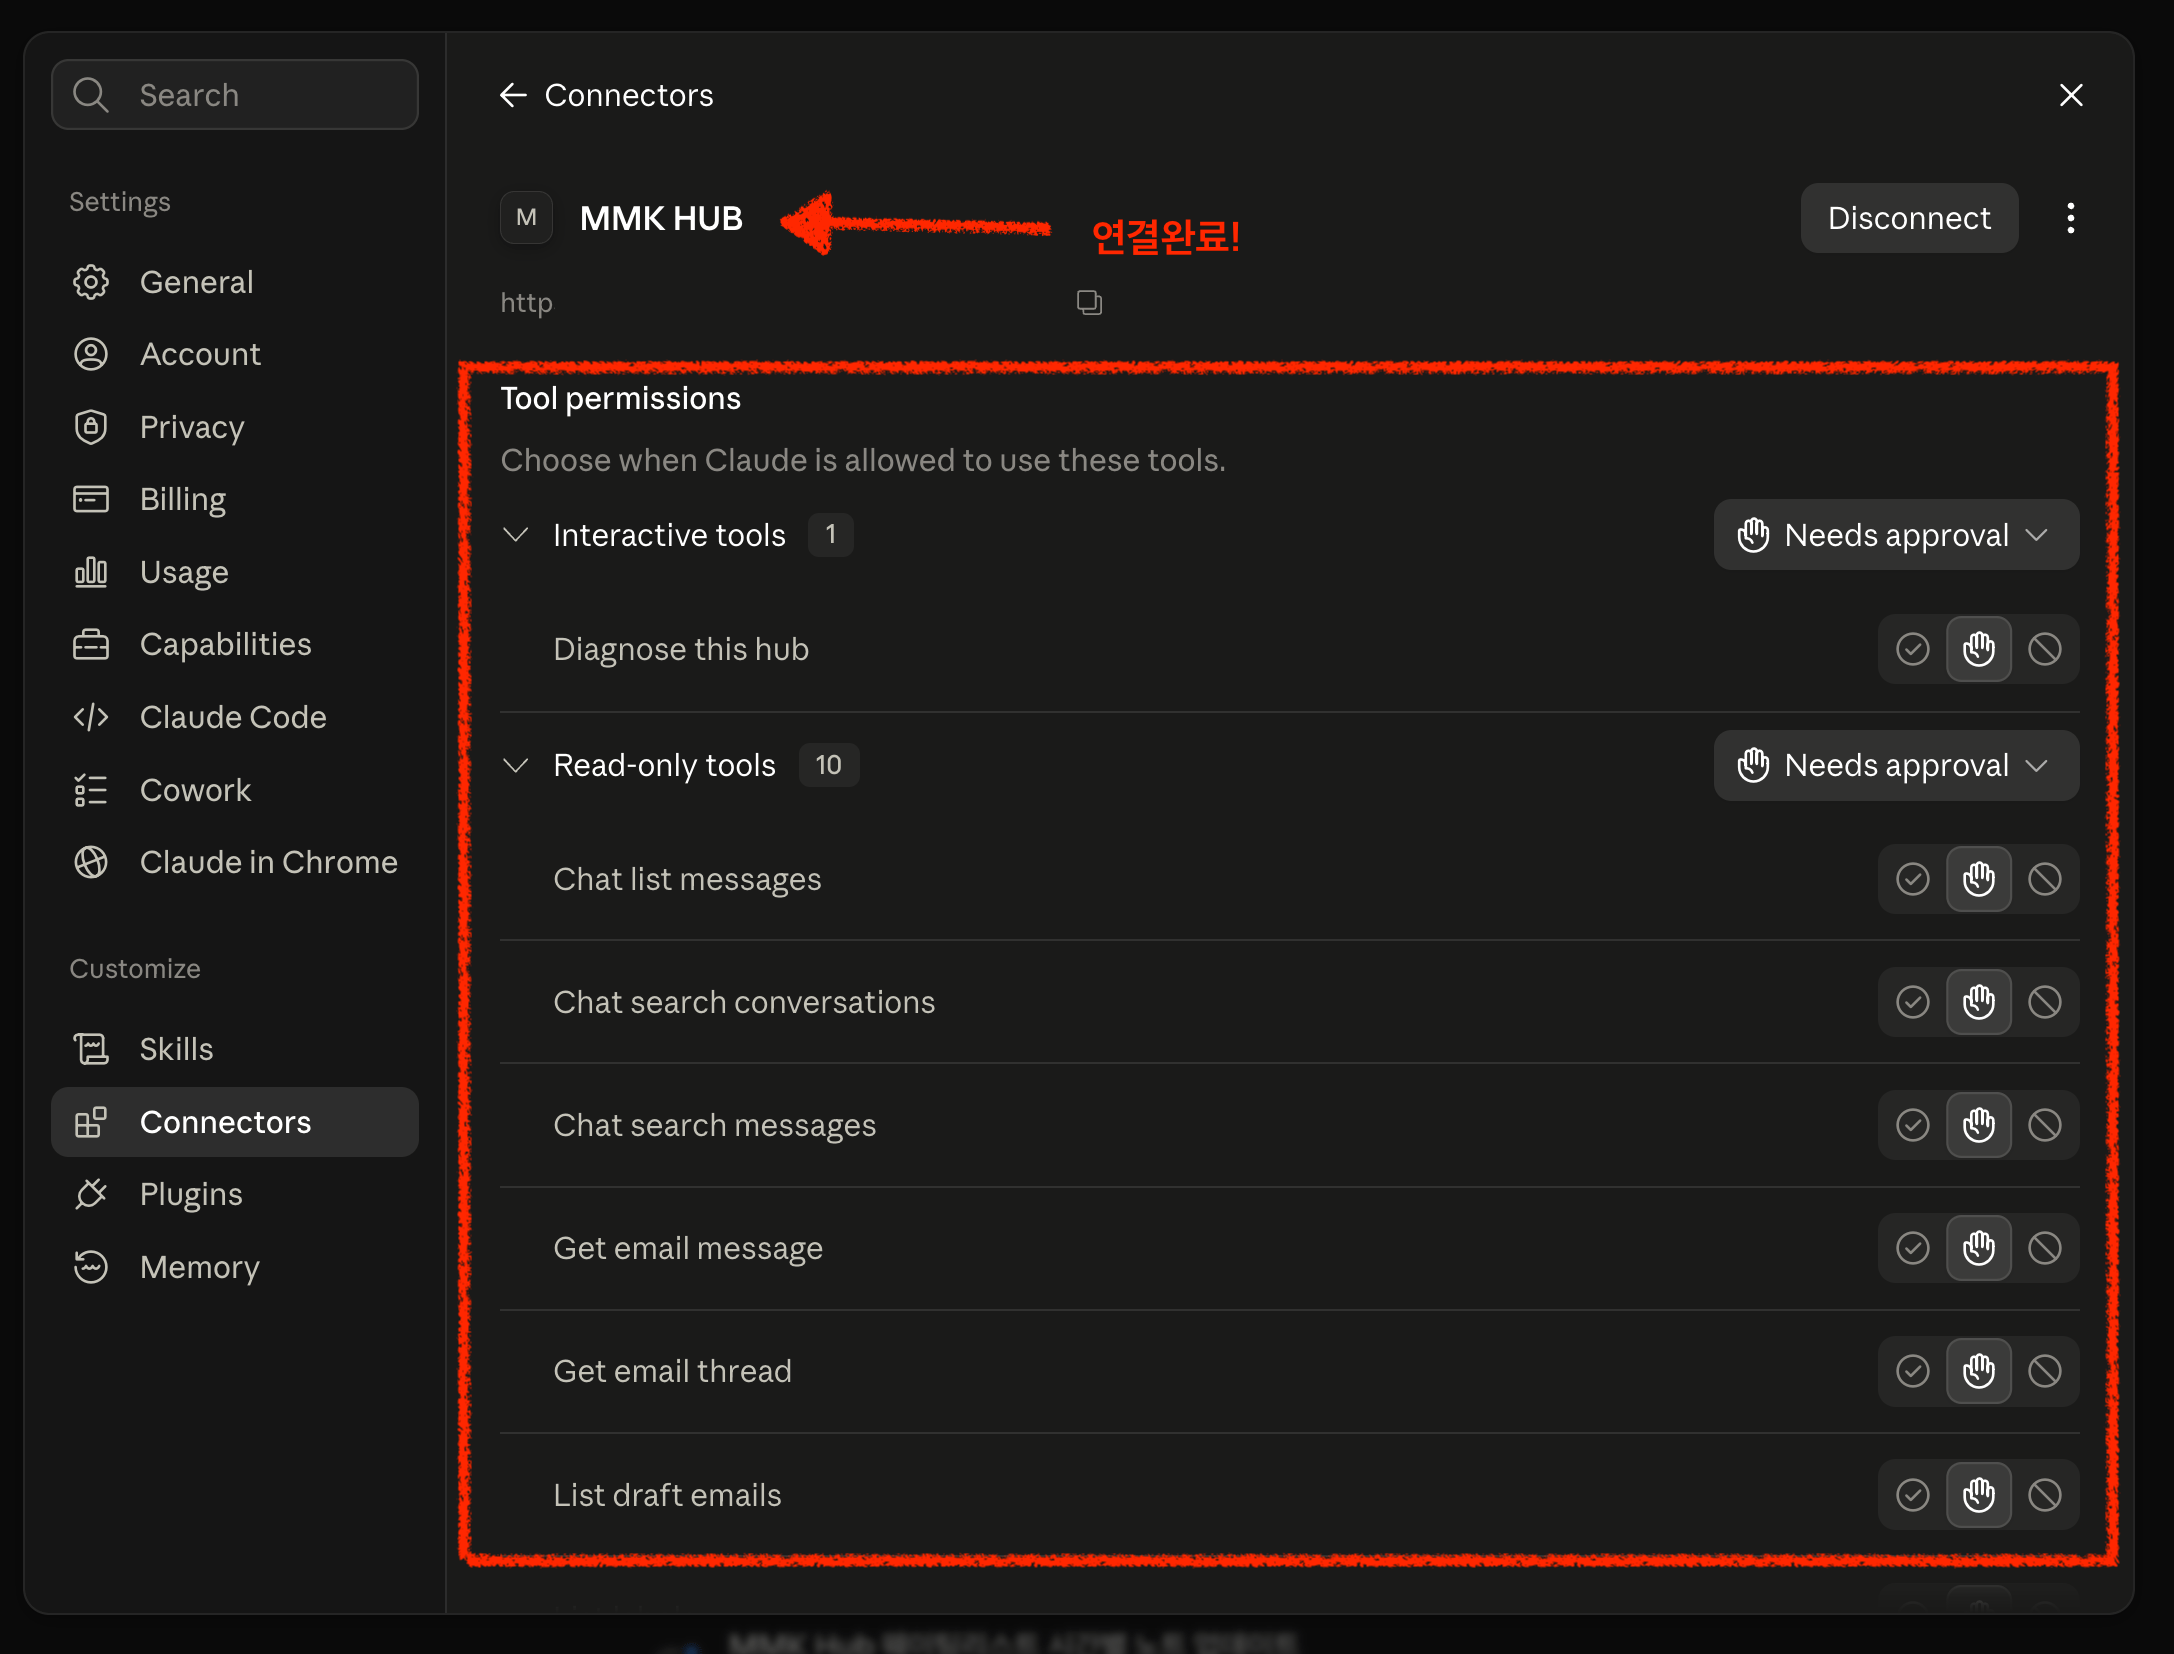
That is the setup done
Until Developer Preview approval lands, requests will still come back refused. When the approval email arrives, open the admin screen and press Refresh next to the schema status once, and the tools appear.Next
- Upgrading, when a new version appears
- Stopping the hub, and what it takes with it
- Developer Preview, which every request depends on
- Troubleshooting, if something is not behaving
- What it costs to run