Overview
mmkhub uses the tools your hub has connected, such as Gmail, Calendar, Drive and YouTube, from a terminal. People and AI agents (Claude Code, Codex and others) use the same program.- Your hub’s tools become commands. Connect a service to your hub and commands
such as
mmkhub gmail ...andmmkhub youtube ...appear, with nothing more to install. - Large files go straight to Google. Videos and attachments never pass through the hub.
- Built for AI agents. Run by an agent, it answers in JSON and will not run a command that cannot be undone without the user’s confirmation.
- Signs in through your hub. There are no API keys to create.
This is not the Magic Meal Kits CLI (
mmk). The two can be installed side by
side without affecting each other.Installation
Let your AI install it
The easiest way. Replacehttps://your-hub-address with your hub’s address and
paste this into an AI agent such as Claude Code or Codex. It installs mmkhub and
shows you a sign-in link; you approve it in your hub.
Install it yourself
No administrator rights are needed. The install script checks the download’s SHA256 checksum and installs nothing if it does not match.- macOS, Linux
- Windows
1
Open a terminal
On macOS, search for Terminal in Spotlight (⌘ + Space).
2
Paste the install command
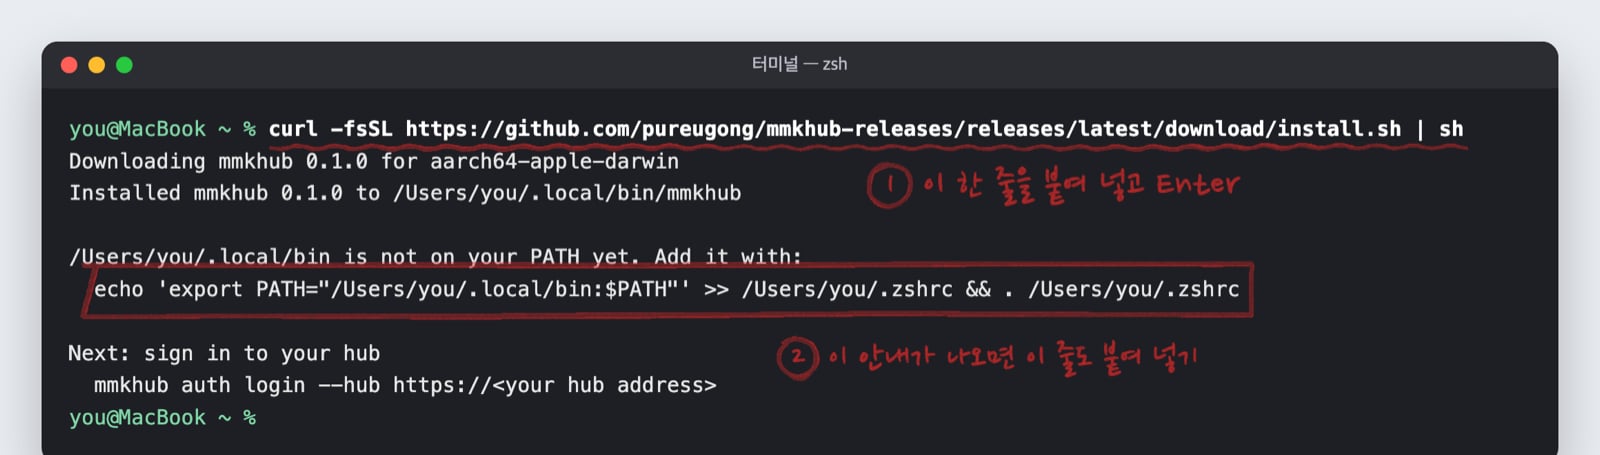
echo
as well. You only do this once. mmkhub goes in ~/.local/bin.3
Sign in to your hub
Replace 
https://your-hub-address with your hub’s address.4
Approve it in your hub
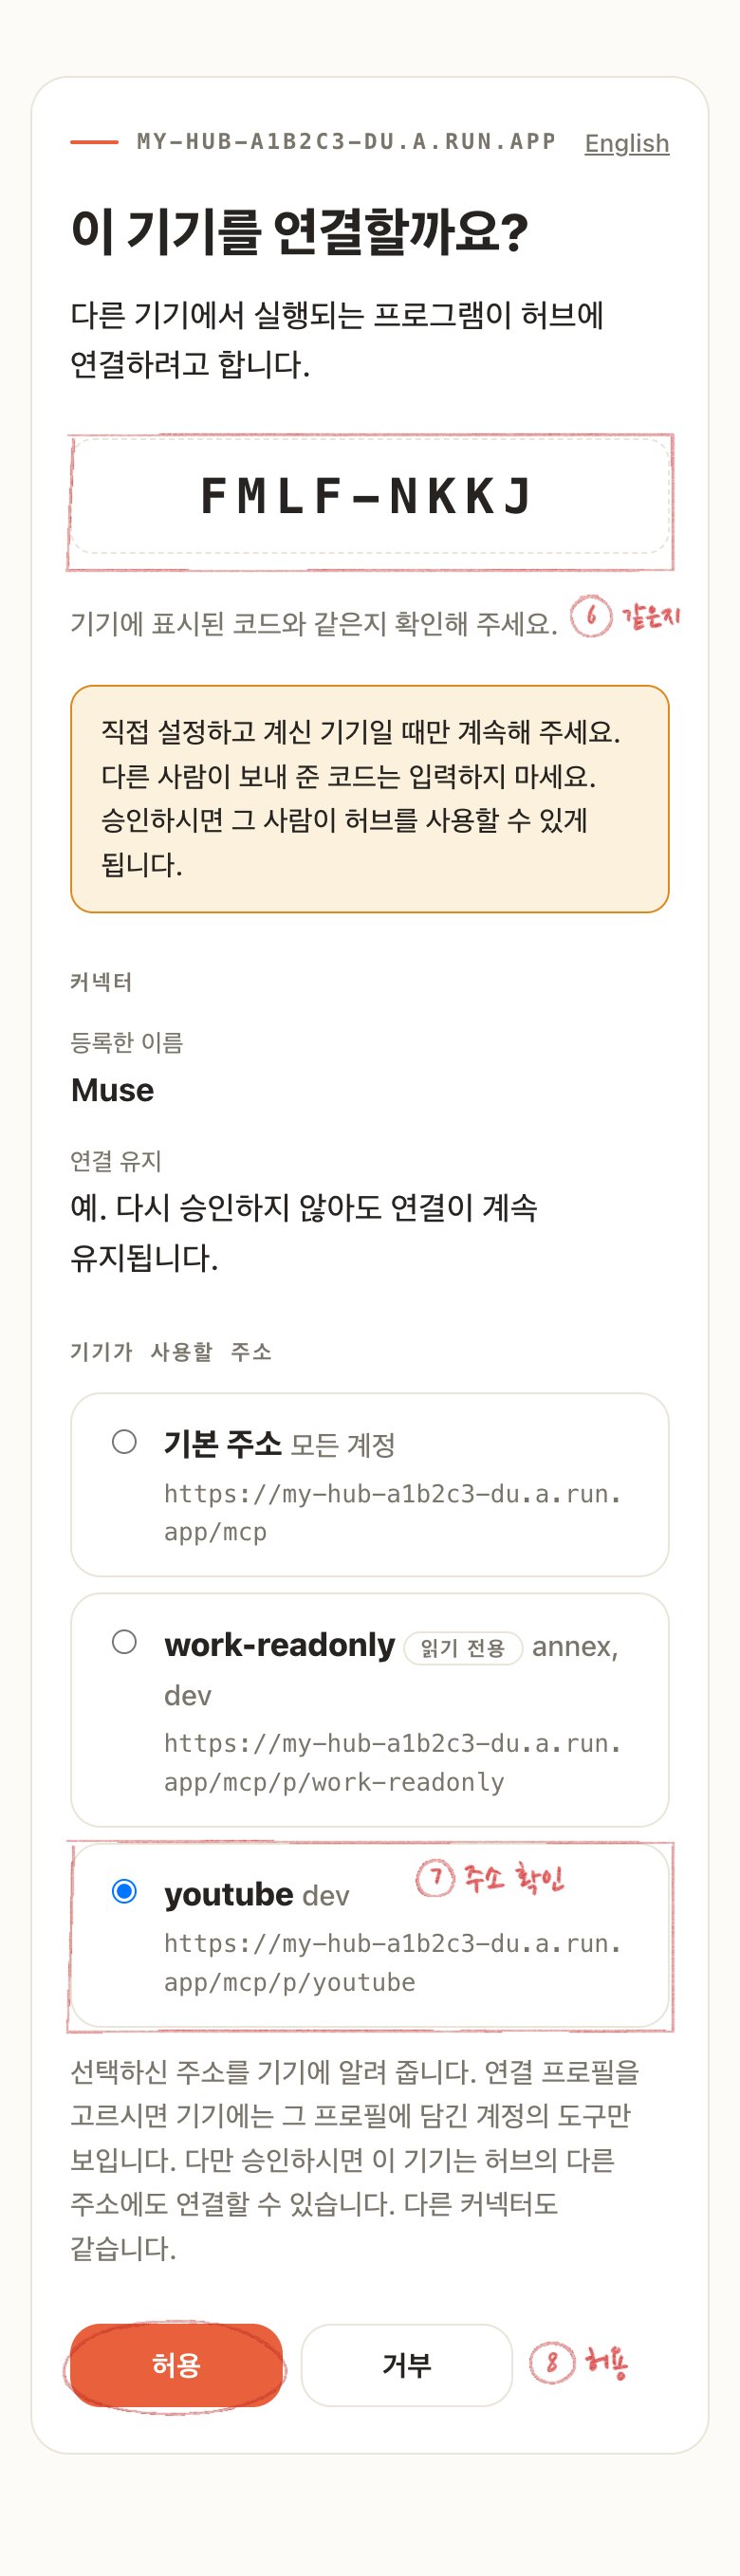
5
Check, and install the agent guide
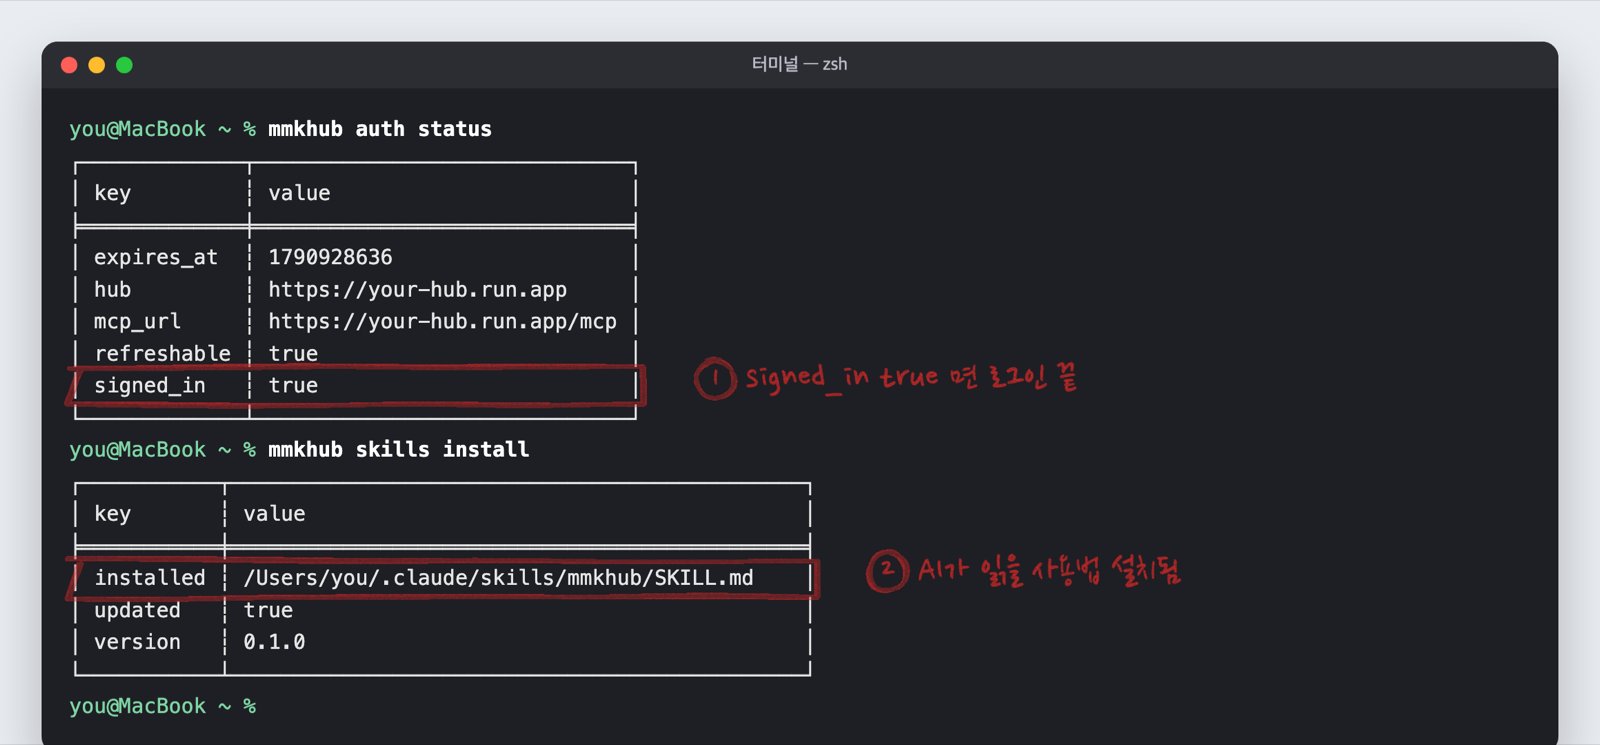
signed_in: true means you are connected. skills install puts the guide
AI agents read in place.With a package manager
With Homebrew or Scoop, the same tool also keeps mmkhub up to date.- Homebrew (macOS, Linux)
- Scoop (Windows)
Manual download
Download the archive for your system from the releases page and putmmkhub (mmkhub.exe on Windows) in a folder on your PATH. The SHA256SUMS file
lets you check what you downloaded.
Usage examples
Agent mode
Run inside an agent such as Claude Code or Codex, mmkhub switches to agent mode on its own.- Results and errors both come back as JSON. An error carries a
hintsaying what to do next. - A command that cannot be undone, such as sending or deleting, does not run without
--yes. The agent asks the user first and adds--yesonce they agree. - After
mmkhub skills install, the agent finds the commands it needs by itself.
--agent turns agent mode on and --no-agent turns it off.
Global flags
Environment variables
Nothing needs setting. Change these only when you need to.Uninstall
- macOS, Linux:
rm ~/.local/bin/mmkhub, andrm -rf ~/.config/mmkhubto remove the sign-in too (with Homebrew,brew uninstall mmkhub) - Windows: delete the
%LOCALAPPDATA%\Programs\mmkhuband%USERPROFILE%\.config\mmkhubfolders (with Scoop,scoop uninstall mmkhub)
Troubleshooting
The install command ends in 404 or Not Found
The install command ends in 404 or Not Found
mmkhub is in beta and the installers are not published yet. The same command
works once they are.
command not found: mmkhub
command not found: mmkhub
The install folder is not on your PATH. On macOS paste the
echo line the
installer printed; on Windows open a new PowerShell window.It says the code has expired
It says the code has expired
A code lasts ten minutes. Run the sign-in command again.
Windows blocks the script
Windows blocks the script
Run it as shown above, in the form
powershell -ExecutionPolicy Bypass -c "...".
That applies to this one command only and changes nothing on your PC.