> ## Documentation Index
> Fetch the complete documentation index at: https://docs-hub.magicmealkits.com/llms.txt
> Use this file to discover all available pages before exploring further.
# Creating your OAuth client
> Where the client ID and secret that adding an account asks for come from, one Google screen at a time.
When you go to add a Google account to the hub, you get this.
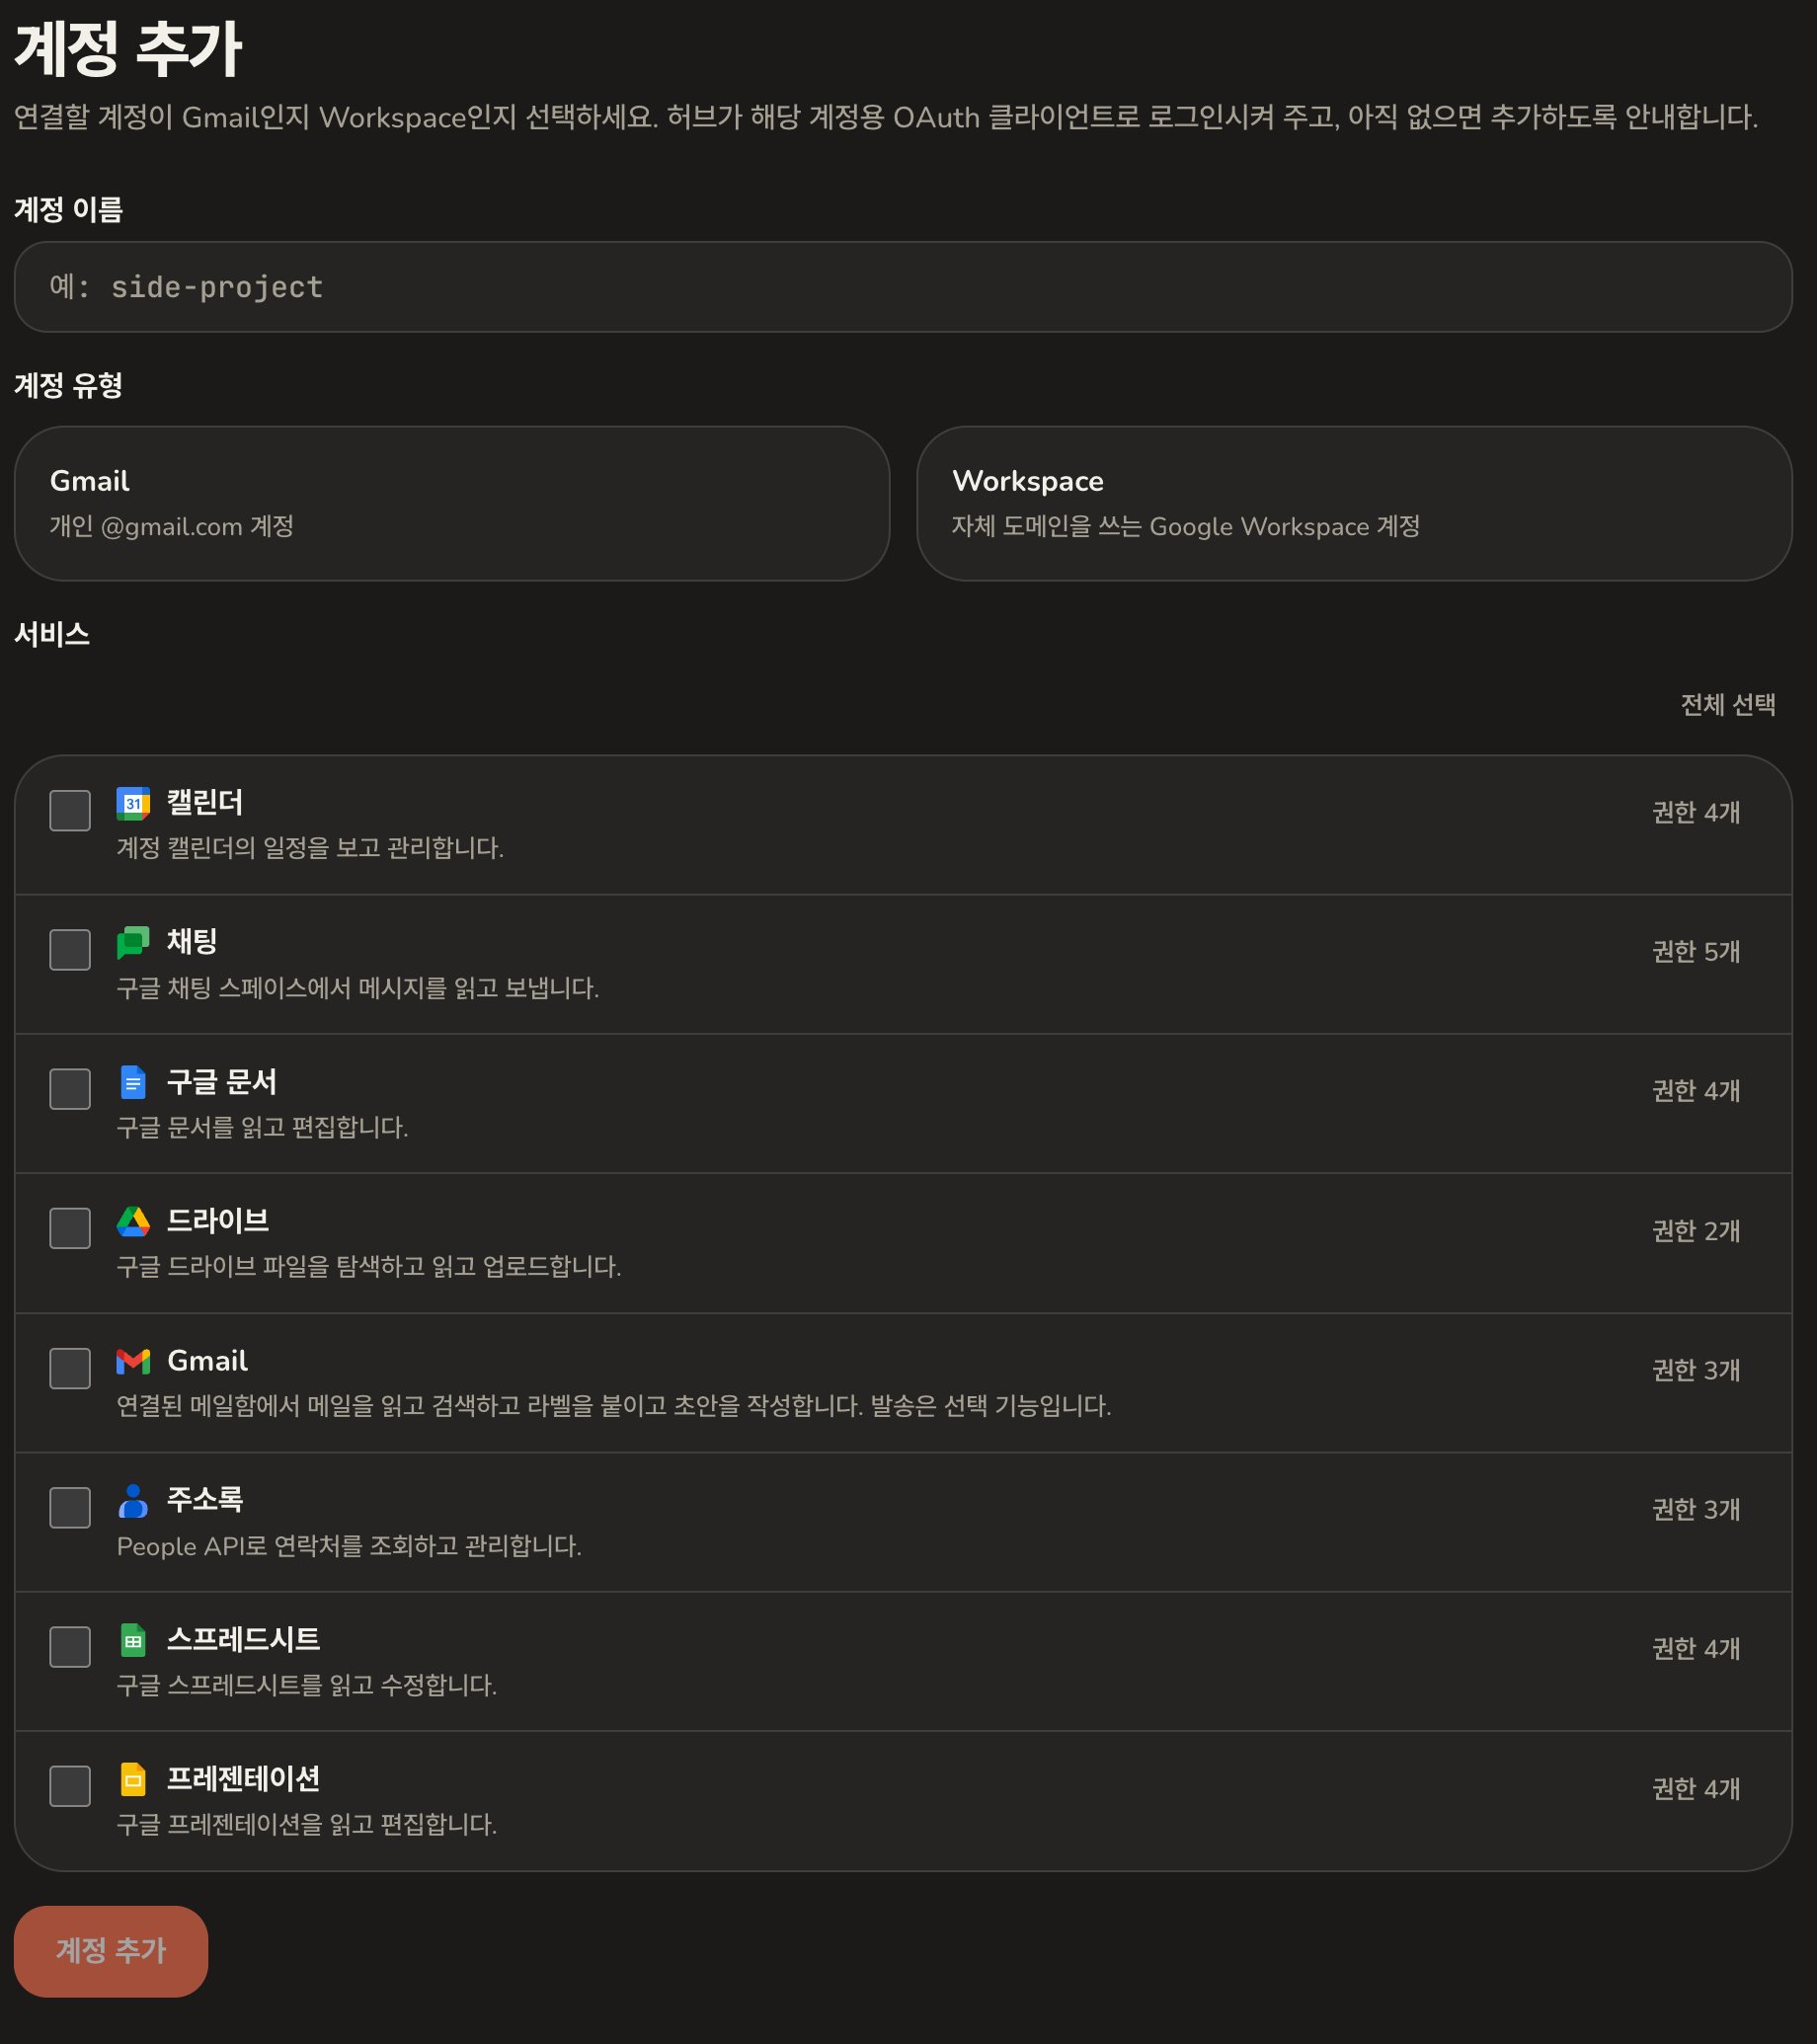 An **OAuth client ID** and an **OAuth client secret**. Both come from Google,
and this page is how you get them.
## What it is, and why you have to make it
For the hub to read your Gmail, it has to prove to Google that you allowed it
to. The OAuth client is that proof.
We cannot make it for you. Google offers no way to create one automatically, so
it has to be done in your own account, in the console. In return the client
lives **inside your own project**. We never see it and never hold it.
You make it once. Several accounts can share one client.
Allow about ten minutes. The installer's **Create your OAuth client** card has
a button for each step that opens the right console page, so you never have to
go looking for one.
## 1. Set up the consent screen
The consent screen is what Google shows when you connect an account, listing
what is being asked for. It has to exist before a client can.
The installer's **Open consent screen** button lands you here. Press
**Get started**.
An **OAuth client ID** and an **OAuth client secret**. Both come from Google,
and this page is how you get them.
## What it is, and why you have to make it
For the hub to read your Gmail, it has to prove to Google that you allowed it
to. The OAuth client is that proof.
We cannot make it for you. Google offers no way to create one automatically, so
it has to be done in your own account, in the console. In return the client
lives **inside your own project**. We never see it and never hold it.
You make it once. Several accounts can share one client.
Allow about ten minutes. The installer's **Create your OAuth client** card has
a button for each step that opens the right console page, so you never have to
go looking for one.
## 1. Set up the consent screen
The consent screen is what Google shows when you connect an account, listing
what is being asked for. It has to exist before a client can.
The installer's **Open consent screen** button lands you here. Press
**Get started**.
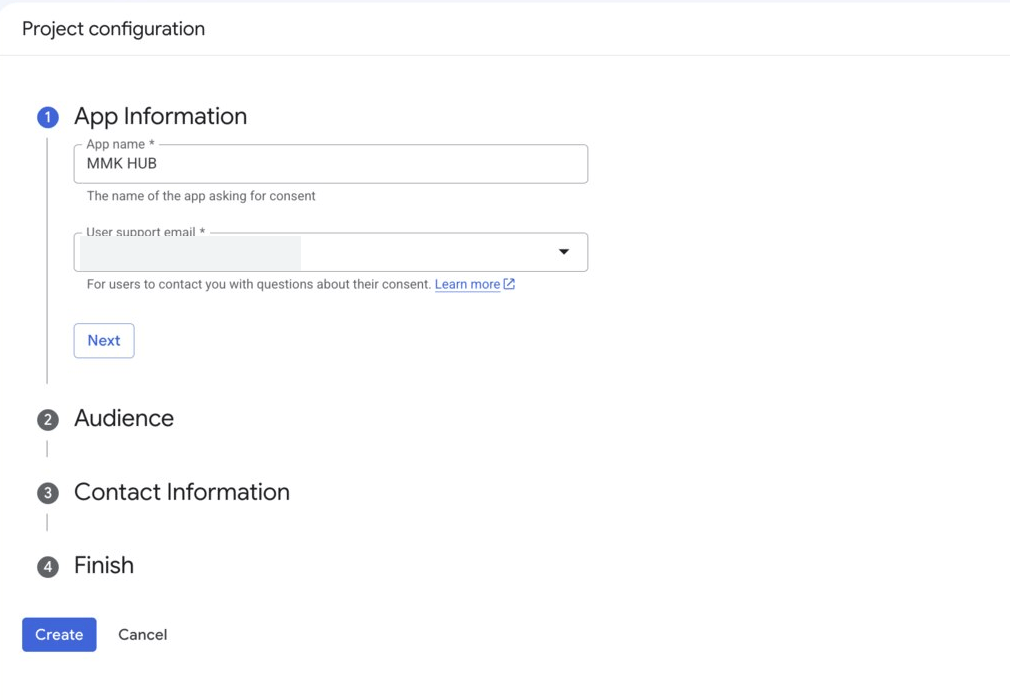
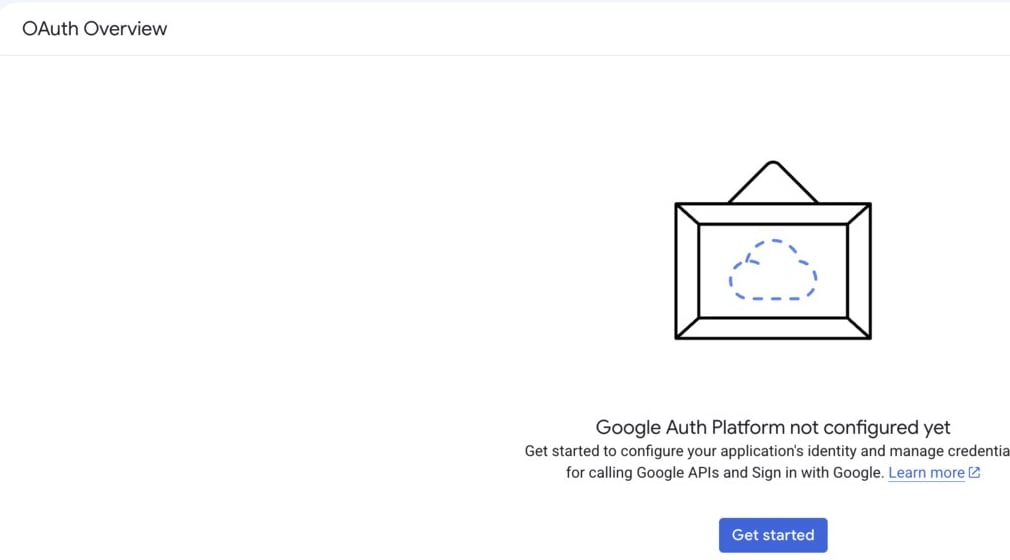 **App name** is for your own benefit. It is the name you will see when you
connect an account. **User support email** is a dropdown; pick your own.
**App name** is for your own benefit. It is the name you will see when you
connect an account. **User support email** is a dropdown; pick your own.
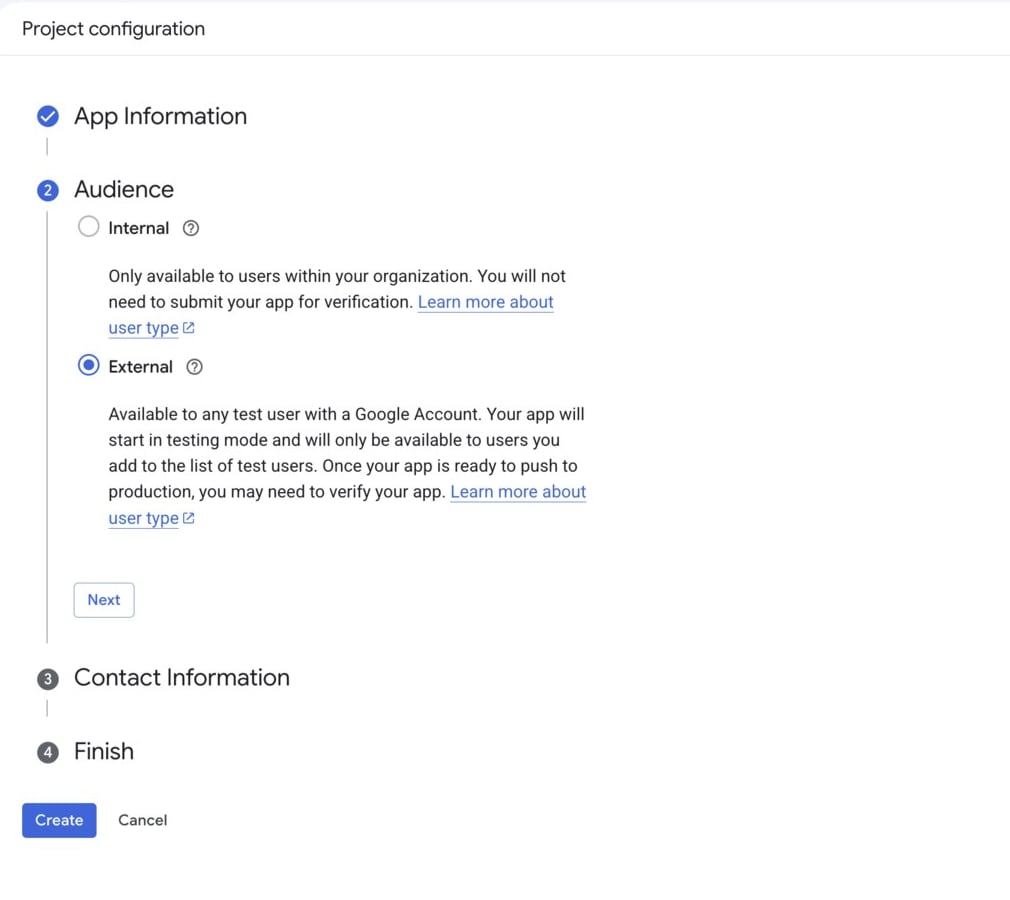
 Choose **External**. Internal restricts it to your organization, which
would stop you connecting a personal Gmail account at all.
Choose **External**. Internal restricts it to your organization, which
would stop you connecting a personal Gmail account at all.
 It says the app starts in testing mode. The next section deals with that.
Your address again. This is where Google writes if something about the
project changes.
It says the app starts in testing mode. The next section deals with that.
Your address again. This is where Google writes if something about the
project changes.
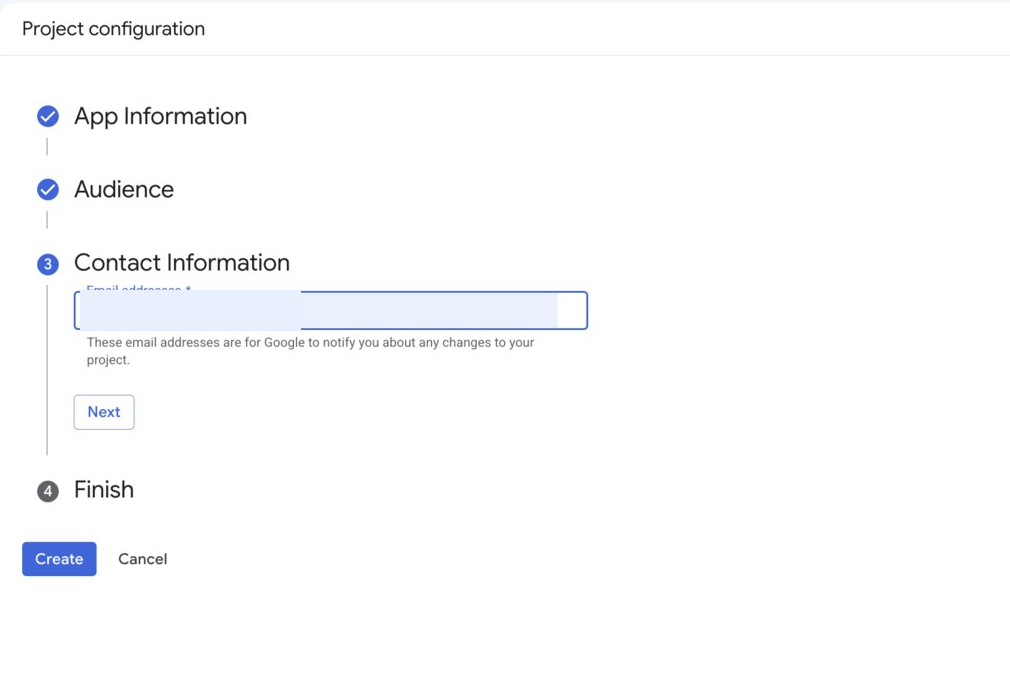 Tick the policy box and press **Create**.
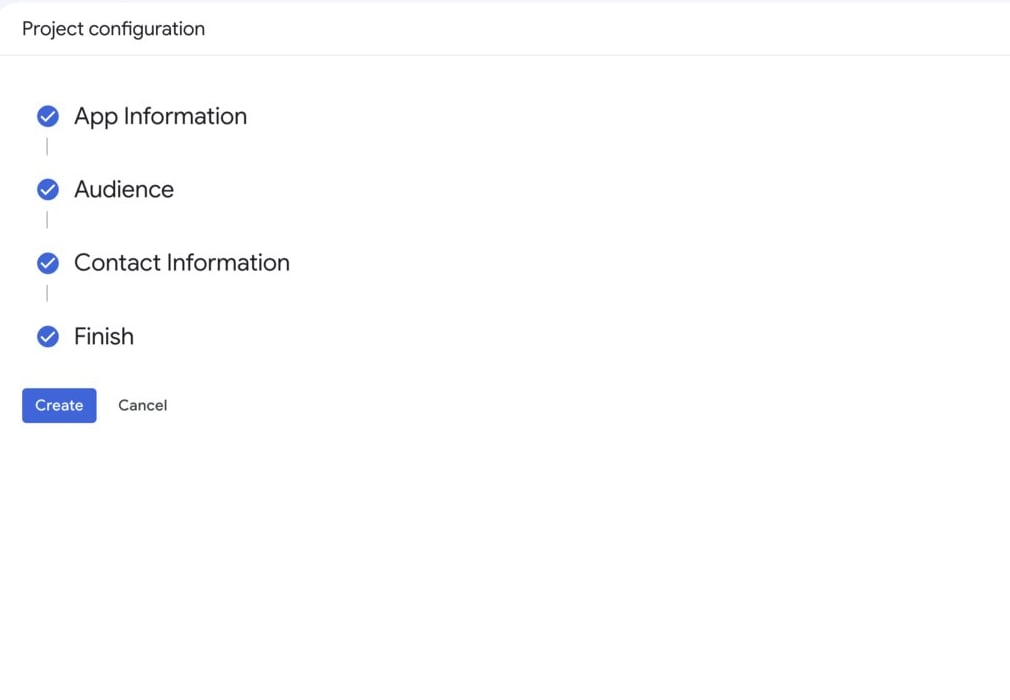 ## 2. Publish it
**Skip this and your accounts will sign themselves out about once a week**,
every week, each time needing a Reconnect. Thirty seconds now avoids that.
This is the screen you land on. Go to **Audience** in the left menu.
## 2. Publish it
**Skip this and your accounts will sign themselves out about once a week**,
every week, each time needing a Reconnect. Thirty seconds now avoids that.
This is the screen you land on. Go to **Audience** in the left menu.
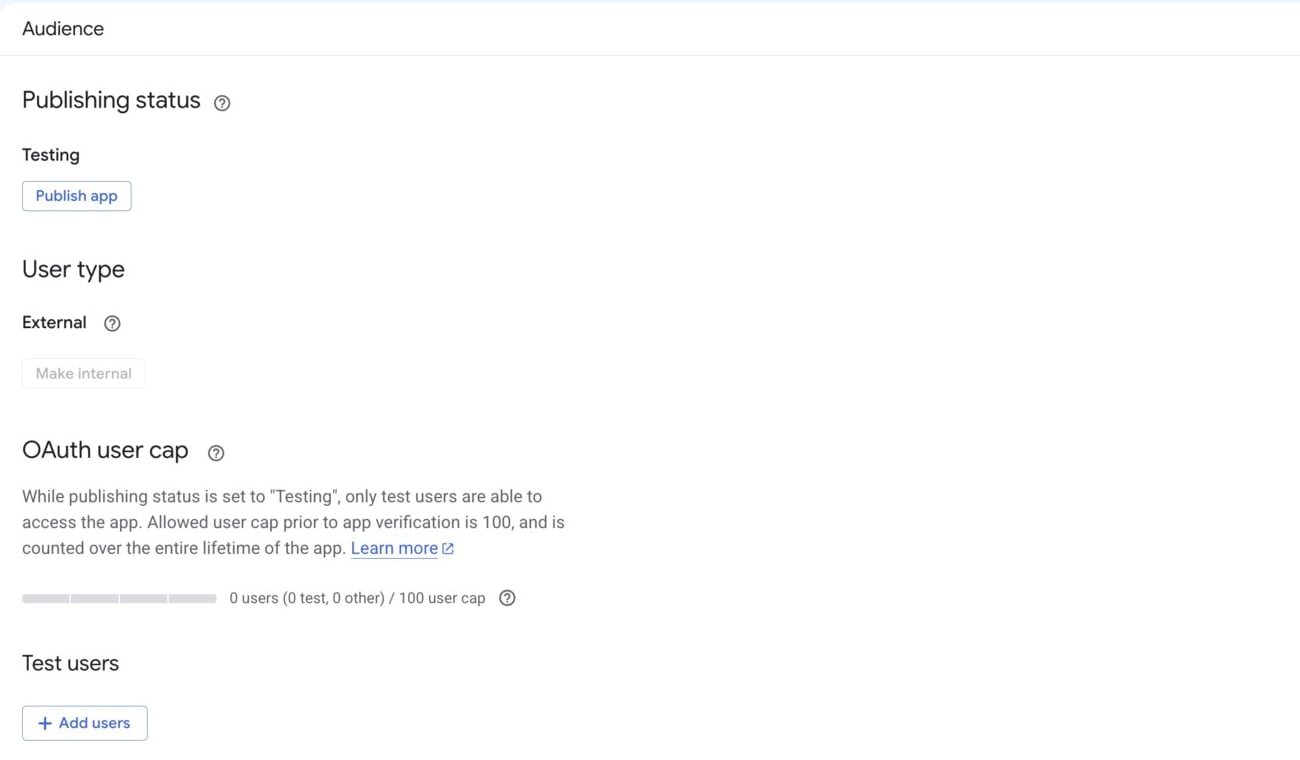
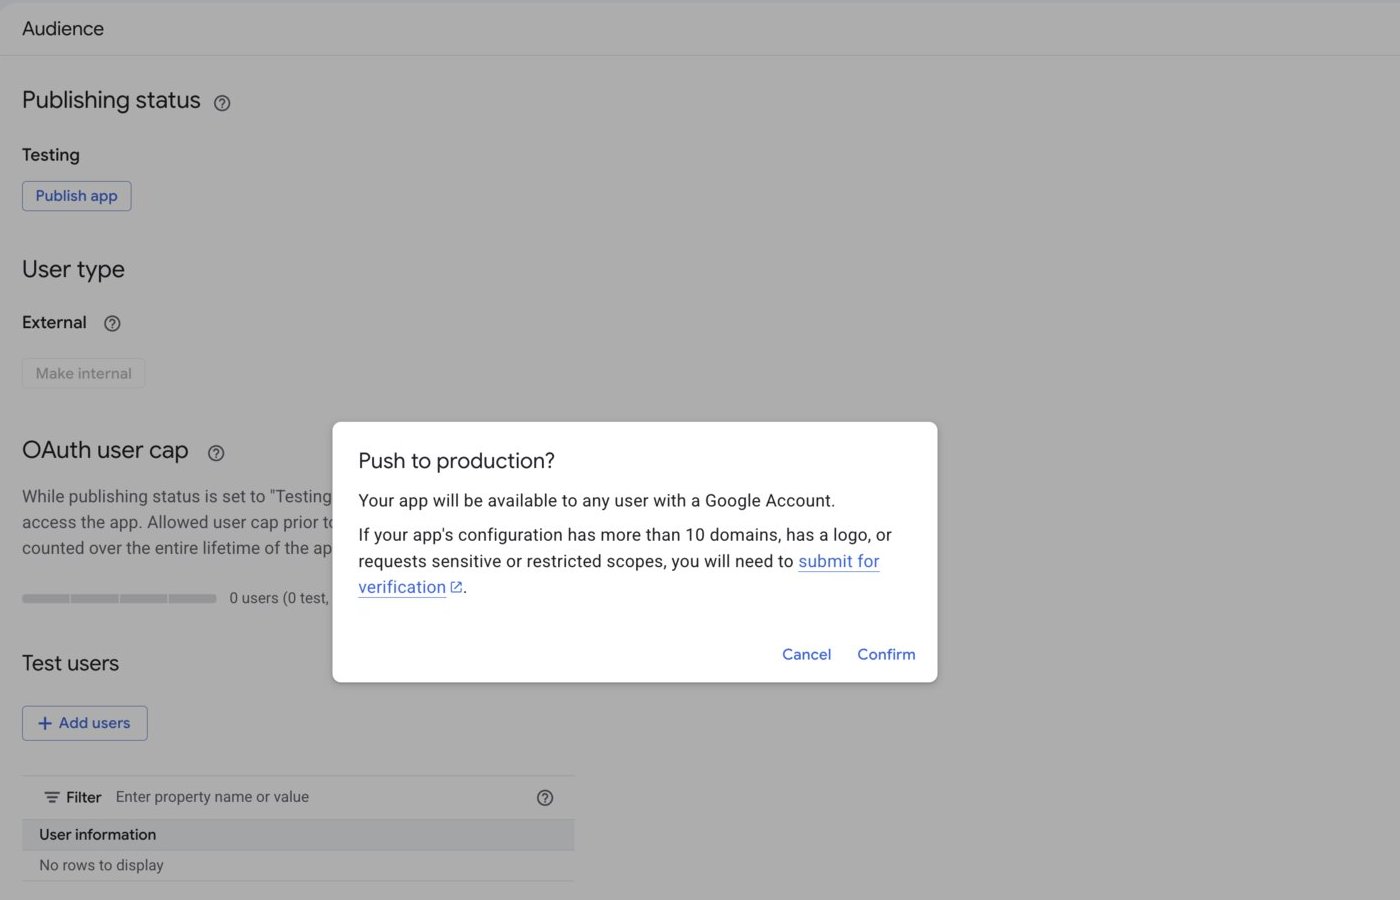
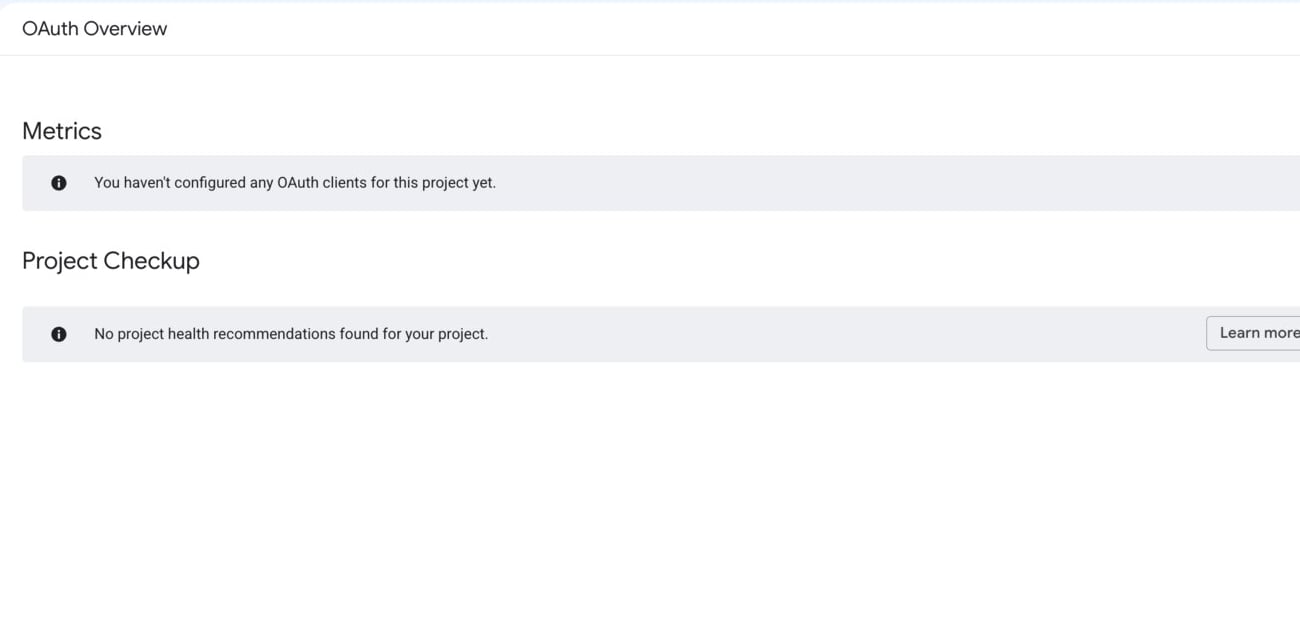 The publishing status says **Testing**. That is the setting that expires
sign-ins every seven days. Press **Publish app**.
The publishing status says **Testing**. That is the setting that expires
sign-ins every seven days. Press **Publish app**.
 You are warned that verification may be required. Press **Confirm** anyway.
An unverified app works perfectly well for your own accounts.
You are warned that verification may be required. Press **Confirm** anyway.
An unverified app works perfectly well for your own accounts.
 It should now read **In production**.
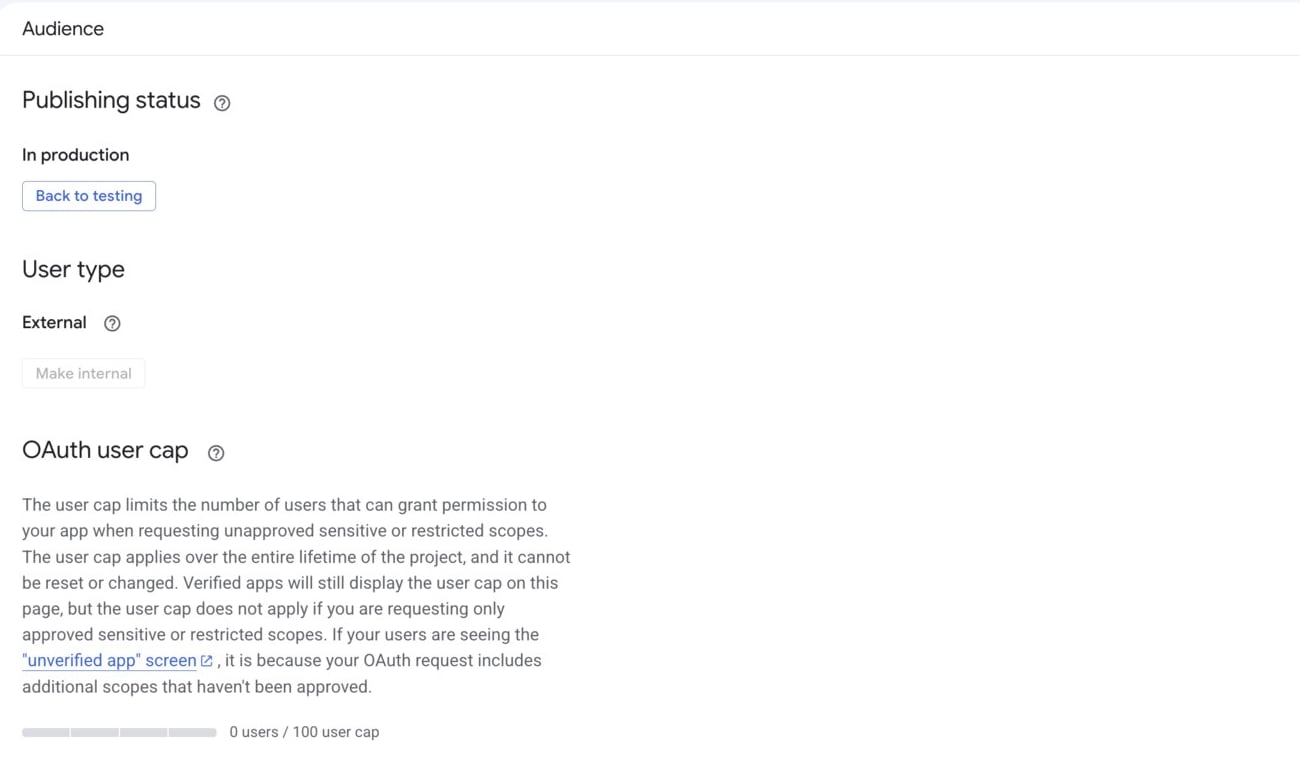 Publishing does not make this available to anyone else. The only person who
can connect an account is still whoever gets through your Google sign-in.
## 3. Create the client
Now for the two values themselves.
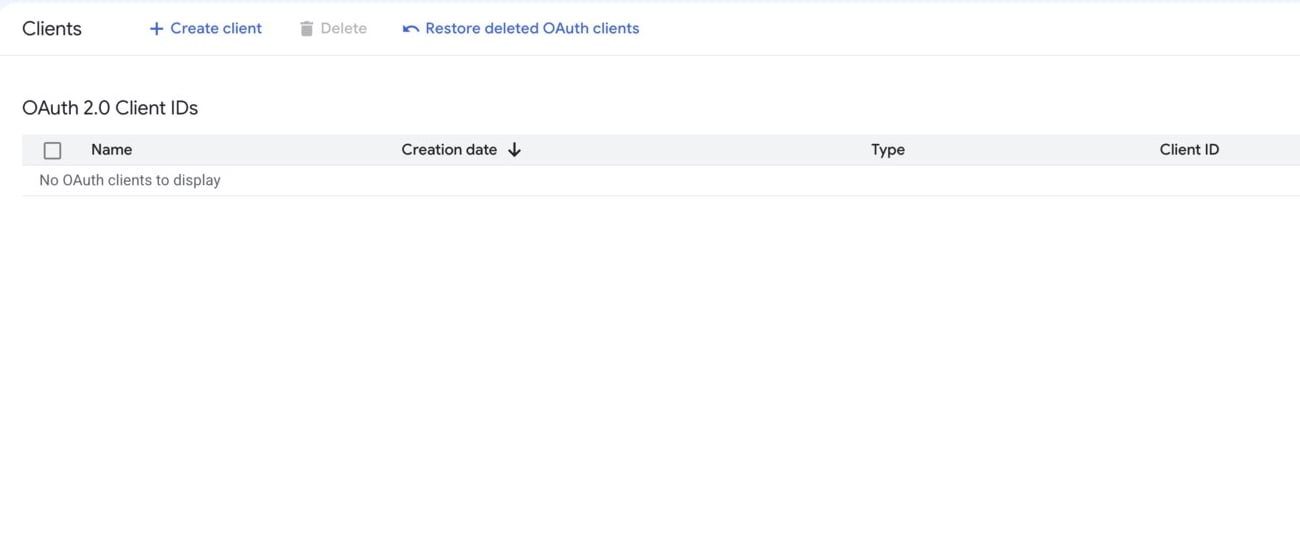
Go to **Clients** in the left menu and press **Create client**.
Publishing does not make this available to anyone else. The only person who
can connect an account is still whoever gets through your Google sign-in.
## 3. Create the client
Now for the two values themselves.
Go to **Clients** in the left menu and press **Create client**.
 Leave **Application type** as **Web application** and name it whatever you
will recognise.
Further down, under **Authorized redirect URIs**, press **Add URI** and
paste the address the installer gave you. It is on the OAuth card, step 3,
with a copy button beside it.
Leave **Application type** as **Web application** and name it whatever you
will recognise.
Further down, under **Authorized redirect URIs**, press **Add URI** and
paste the address the installer gave you. It is on the OAuth card, step 3,
with a copy button beside it.
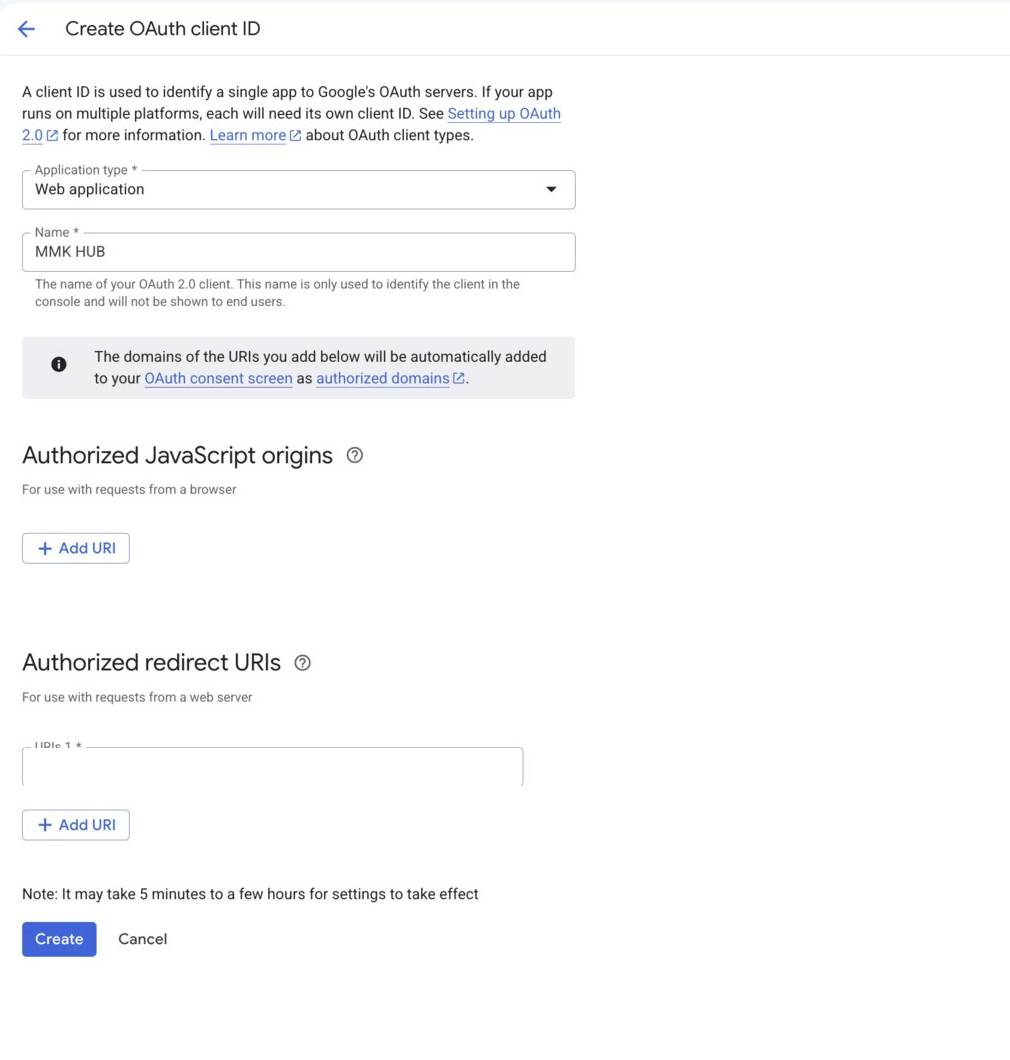 This address has to match exactly. Use the copy button rather than typing
it. If it is wrong, Google refuses the connection later and says the
redirect address does not match.
Then press **Create**.
The **Client ID** and **Client secret** appear together.
This address has to match exactly. Use the copy button rather than typing
it. If it is wrong, Google refuses the connection later and says the
redirect address does not match.
Then press **Create**.
The **Client ID** and **Client secret** appear together.
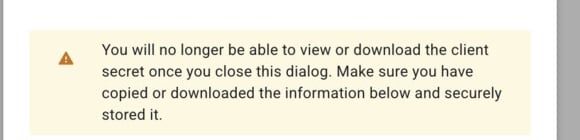 **Copy both before closing that dialog.** The secret is shown once. If you
lose it, the only way forward is to delete the client and make another.
Paste them into the hub's add account screen and you are done here.
## How many projects you need
Almost always **one**. A personal Gmail account and a work Workspace account
can share it.
```mermaid theme={null}
flowchart LR
A["Personal Gmail"] --> P["One project
**Copy both before closing that dialog.** The secret is shown once. If you
lose it, the only way forward is to delete the client and make another.
Paste them into the hub's add account screen and you are done here.
## How many projects you need
Almost always **one**. A personal Gmail account and a work Workspace account
can share it.
```mermaid theme={null}
flowchart LR
A["Personal Gmail"] --> P["One project
External, published"]
B["Workspace account"] --> P
P --> OK["Works"]
```
A second project comes up only when a Workspace account is involved, for one of
two reasons. Either the **organization blocks unverified apps**, in which case
that account cannot reach the consent screen at all, or you simply **do not
want people in the organization seeing the unverified warning**. Either way the
Workspace side gets its own project, owned by that organization, with its own
client.
[Developer Preview](/developer-preview#when-you-need-a-second-project) has the
fuller version, including why the setting is per project rather than per
client.
```mermaid theme={null}
flowchart LR
A["Personal Gmail"] --> P1["Project A"]
B["Workspace account
(org blocks it)"] -.->|cannot consent| P1
B --> P2["Project B
owned by that org, Internal"]
P1 --> OK1["Works"]
P2 --> OK2["Works"]
```
Both projects then need Developer Preview approval. The installer's **Does your
Workspace org block unverified apps?** card sets the second one up and gives
you both project numbers in one line to paste into the application.
## Next
* Back to [Setting up](/quickstart) to add the account
* [Troubleshooting](/troubleshooting)