> ## Documentation Index
> Fetch the complete documentation index at: https://docs-hub.magicmealkits.com/llms.txt
> Use this file to discover all available pages before exploring further.
# Connecting other AI apps
> How to use your hub from ChatGPT, Cursor and Muse, and how to choose between the default address and a connection profile address.
Your hub works in any AI app that supports MCP, not only Claude. All it needs
is one address. For Claude, see Connect Claude in the
[quickstart](/quickstart).
## Choose the address
Pick the address at the top of the **Connect your assistant** card in your
admin screen. The **Connect MCP** card on your hub page at
hub.magicmealkits.com works the same way. If your admin screen does not show
this card, [upgrade](/upgrading) first.
* **Default address**: every account connected to your hub, except the ones
taken off the default address.
* **Connection profile address**: only the accounts in that profile, and
read-only if the profile is read-only. Make profiles under
[Connection profiles](/connection-profiles).
Each address is added as its own connector. Once you pick an address, every button and
message for the apps below uses it.
## ChatGPT
In the card, choose **ChatGPT** and click **Open ChatGPT connector
settings**. ChatGPT only lets you make your own connector with developer
mode on. If it is off, turn it on first; the card's **Official guide**
shows where.
Paste the address you copied from the card into the new connector's URL
field, and choose OAuth for authentication.
When your hub's sign-in page opens, sign in and click **Allow**.
## Cursor
In the card, choose **Cursor** and click **Add to Cursor**. Cursor opens
with the address filled in. Click **Install**.
When it asks you to sign in, sign in to your hub and click **Allow**.
## Muse
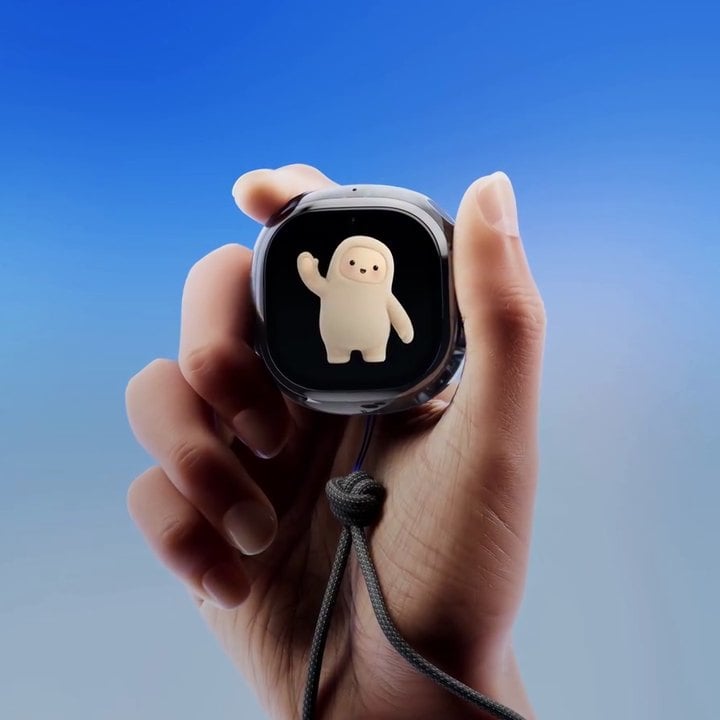 **Muse is supported too.** You can use the accounts connected to your hub from
Muse, Meta's AI agent.
Muse has no settings screen for connectors; it builds them in chat. Because
Muse runs somewhere without a browser, your hub approves it with a short code
instead.
The Muse chat pictures below are illustrations, not screenshots, and the real
Muse screen may look different. The hub's admin and approval screens are
real, shown in Korean; the buttons are in the same places in English.
**Muse is supported too.** You can use the accounts connected to your hub from
Muse, Meta's AI agent.
Muse has no settings screen for connectors; it builds them in chat. Because
Muse runs somewhere without a browser, your hub approves it with a short code
instead.
The Muse chat pictures below are illustrations, not screenshots, and the real
Muse screen may look different. The hub's admin and approval screens are
real, shown in Korean; the buttons are in the same places in English.
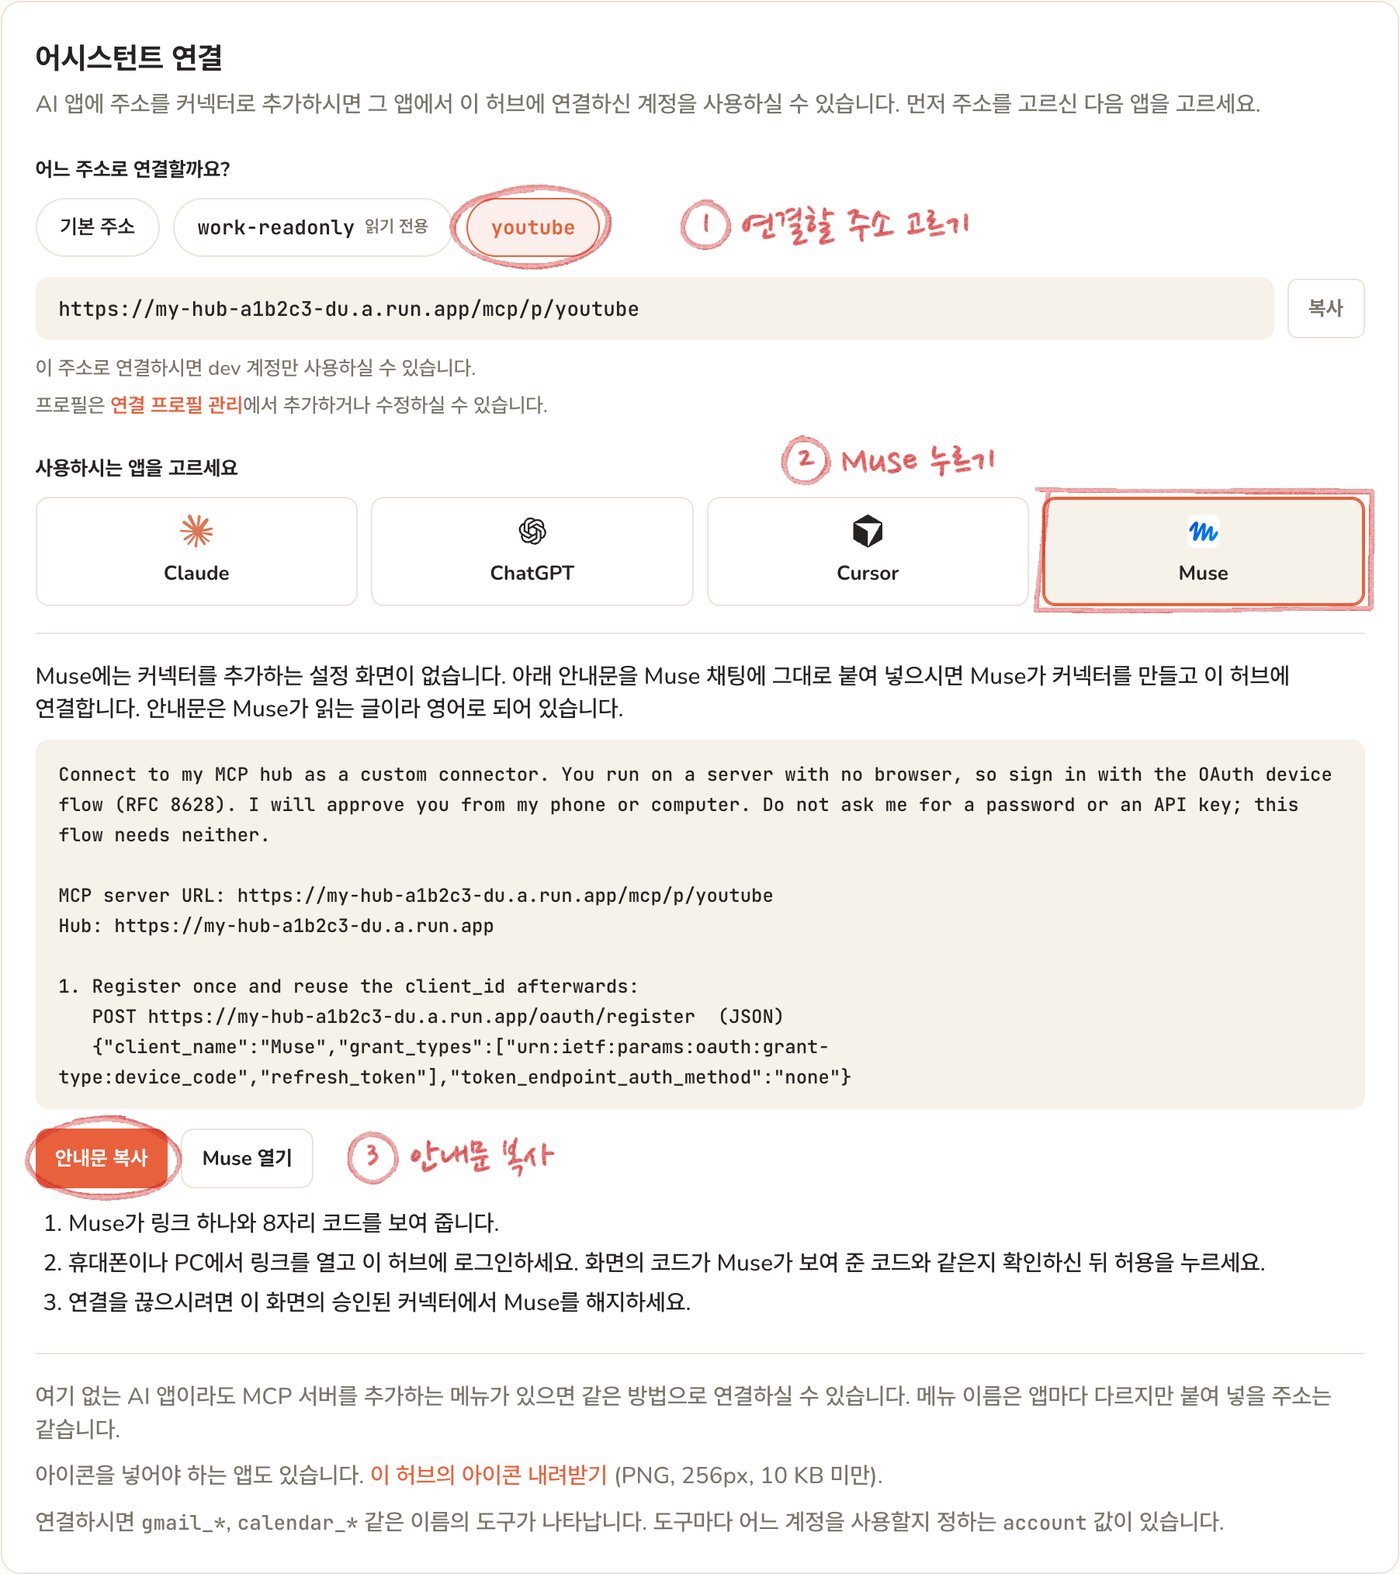 In the **Connect your assistant** card, pick the address, choose **Muse**
and click **Copy message**.
In the **Connect your assistant** card, pick the address, choose **Muse**
and click **Copy message**.
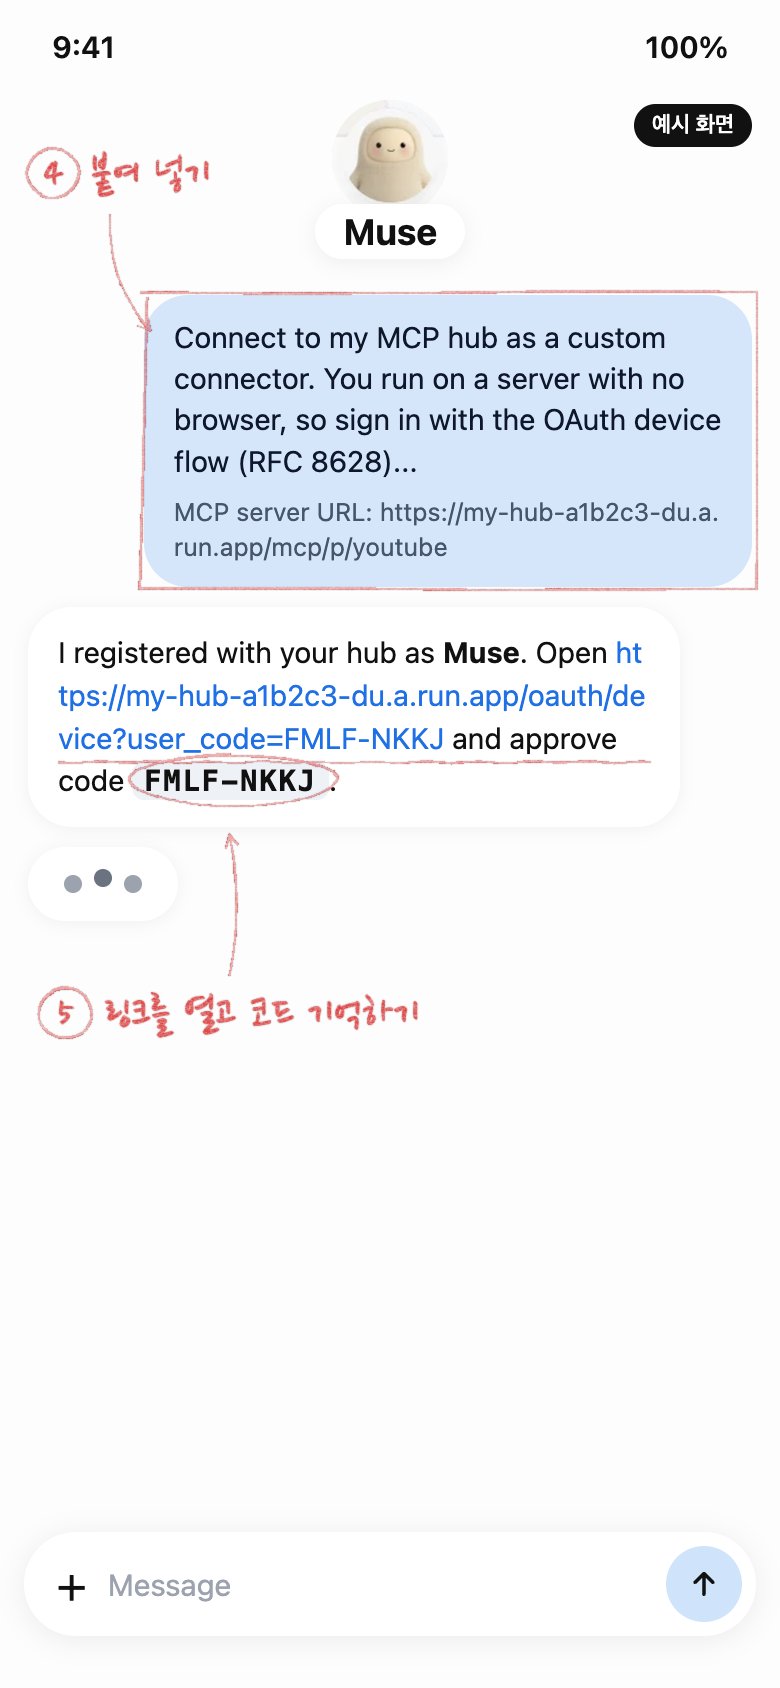 Paste the message into a Muse chat as it is. Muse shows you a link and an
eight-character code.
Paste the message into a Muse chat as it is. Muse shows you a link and an
eight-character code.
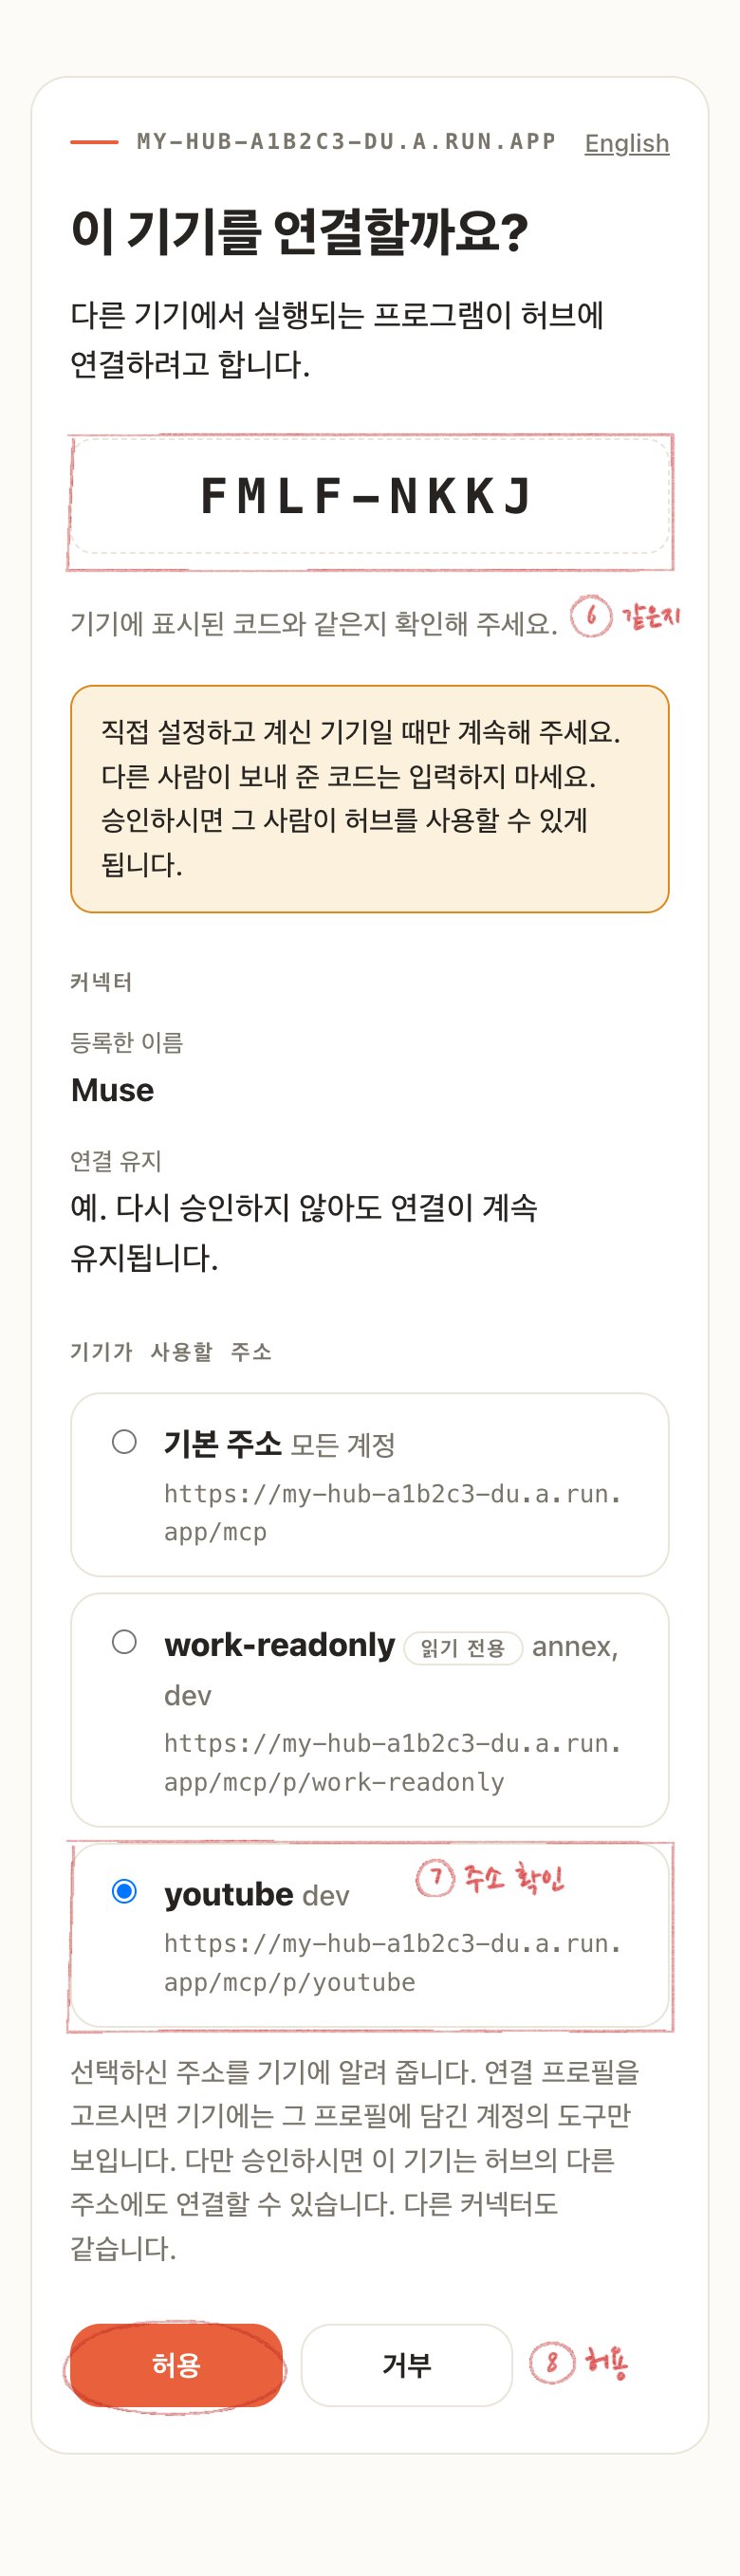 Open the link on your phone or computer and sign in to your hub. Check the
code matches the one Muse showed you, check **Address the device will use**
is the address you want, then click **Allow**.
Open the link on your phone or computer and sign in to your hub. Check the
code matches the one Muse showed you, check **Address the device will use**
is the address you want, then click **Allow**.
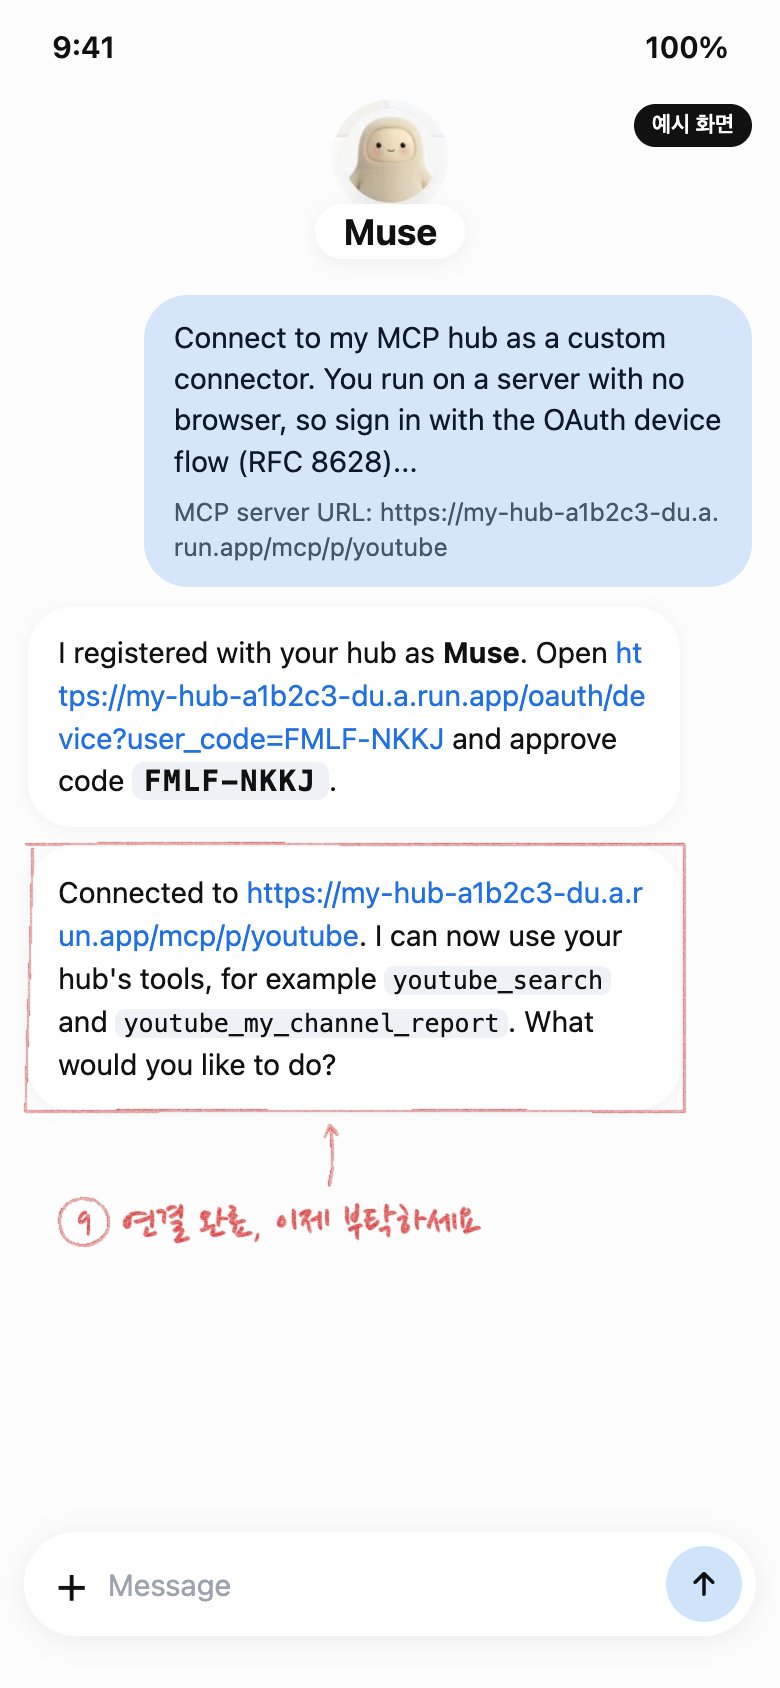 Muse tells you it is connected. Ask it for anything your hub's accounts can
do, such as a report on your YouTube channel.
Never approve a link or code someone else sent you. Approving it lets them
use your hub.
Muse tells you it is connected. Ask it for anything your hub's accounts can
do, such as a report on your YouTube channel.
Never approve a link or code someone else sent you. Approving it lets them
use your hub.
 Once approved, Muse stays connected without asking again. To disconnect it,
revoke Muse under **Approved connectors** in your admin screen; it loses
access to your hub at once.
Once approved, Muse stays connected without asking again. To disconnect it,
revoke Muse under **Approved connectors** in your admin screen; it loses
access to your hub at once.